How to know if a checkbox is checked in javascript
Learn how to reliably detect checkbox state in JavaScript with clear examples, robust event handling, and accessibility considerations for real-world forms.

To know if a checkbox is checked in javascript, read the input element’s checked property. For example, document.querySelector('#agree').checked yields true when checked and false when not. Use a change event listener to respond to user toggles, and remember to sanity-check the element exists before reading its state. If you’re validating on submit, combine the check with the form’s submit handler to prevent submission when required.
Understanding how the DOM represents a checkbox state
A checkbox input is an interactive form control that communicates its state through a boolean property on the element called checked. When the user clicks the checkbox, the browser toggles this property from false to true or back again. In JavaScript, reading or reacting to this property is the standard, reliable approach for determining whether the box is selected. This is preferable to inspecting the value attribute alone, since value is just a string and may not reflect the actual checked state.
- The DOM representation is the input element with type="checkbox".
- The checked property tells you whether the checkbox is selected.
- The disabled attribute does not automatically change the checked state; it merely prevents user interaction.
Think of the checked property as the source of truth for UI state in most forms, and pair it with accessible labels to ensure screen readers announce the current state clearly. According to JavaScripting, building a mental model around this property reduces subtle bugs when users interact with your UI.
Accessing the checked property safely
Accessing the checked state should always be safe and predictable. Start by selecting the element and verifying it exists before reading the property. A common pattern is:
const el = document.querySelector('#agree');
if (el) {
  const isChecked = el.checked;
  // use isChecked for logic, validation, or UI updates
}- Prefer querySelector for flexibility, but ensure the selector uniquely identifies the element.
- If you use getElementById, you’ll typically get a faster lookup, but the result is the same: a DOM element or null.
Remember: null checks are essential to avoid runtime errors in dynamic pages where elements may not render yet.
Reading single versus multiple checkboxes
When dealing with a single checkbox, reading the checked property is straightforward. For groups of checkboxes, use querySelectorAll or a name attribute to collect them, then map their states:
const boxes = document.querySelectorAll('input[type="checkbox"][name="preferences"]');
const states = Array.from(boxes).map(b => ({ id: b.id, checked: b.checked }));- For a radio-like effect, you can also implement mutually exclusive logic if needed, but remember checkboxes typically allow multiple selections.
- If you only care about checked items, filter the states array to those with checked === true.
JavaScripting analysis shows that explicit checks of the checkbox state reduce common form submission bugs.
Responding to user interaction with events
Reactive UI requires listening for changes on the checkbox, not just reading its state at submission time. The change event fires whenever the user toggles the box, making it ideal for live validation and UI updates:
const c = document.querySelector('#subscribe');
c?.addEventListener('change', (e) => {
  const on = e.target.checked;
  document.getElementById('status').textContent = on ? 'Subscribed' : 'Unsubscribed';
});- Debounce if the handler triggers heavy processing.
- Update any dependent UI (e.g., enabling/disabling other inputs) based on the new state.
- Ensure the event handler reads the current checked value from the event target to stay robust if the element is replaced dynamically.
Form submission and validation strategies
When validating on submit, rely on the checkbox state rather than its value string. Typical flow:
- Prevent the default submission to run client-side checks. 2) Read the checked state. 3) If required and not checked, show an error message and halt submission. 4) If all checks pass, allow the form to submit or use fetch to send data.
const form = document.querySelector('#signup');
form.addEventListener('submit', function(e) {
  const consent = document.querySelector('#agree')?.checked;
  if (!consent) {
    e.preventDefault();
    document.getElementById('error').textContent = 'Please agree to continue.';
  }
});- Always perform a final check on the server, since client-side validation can be bypassed.
- Use a concise error message and clearly indicate how to resolve the issue. In practice, this improves accessibility and UX.
Common pitfalls and how to avoid them
Many developers fall into the trap of reading the checkbox state before the element exists or assuming value reflects state. Common mistakes include relying on the value attribute, failing to null-check DOM queries, or forgetting to handle dynamic UI changes where elements are replaced. JavaScripting emphasizes always validating element presence and using the checked property as the canonical state indicator. When in doubt, re-check the element immediately before using its state to avoid stale references.
Accessibility considerations for checkboxes
Accessible checkboxes should be associated with visible labels and have a clear focus state. Use the label element with for="id" or wrap the input inside the label so clicking the label toggles the checkbox. Announce state changes to assistive tech by updating live regions or using aria-checked for custom controls. Screen readers rely on semantic HTML and predictable event patterns to convey current state reliably.
Debugging techniques and practical tips
Debug by printing the element and its state at key events:
- Console logs on load and on every change
- Verify the selector returns the expected element
- Check for multiple elements sharing the same id (which should be unique) that could cause incorrect reads
Pro tip: frequently test with disabled and enabled states to ensure your logic remains correct regardless of user interactions.
Real-world example: a small signup form
Imagine a signup form with a terms checkbox (#terms) that must be checked before submission. Attach an event listener to provide real-time feedback and validate at submit time. This concrete pattern covers initialization, live UI updates, and a robust submit path. The approach scales to more complex forms where several checkboxes contribute to the final data object and error messaging is consolidated in a single place for maintainability.
Recap of best practices and robust patterns
- Always read the checked property to determine a checkbox’s state.
- Validate presence before reading the property to avoid runtime errors.
- Use change events for responsive UI and submit handlers for final validation.
- Maintain accessibility with proper labeling and ARIA practices when building custom widgets.
- Test with single and multiple checkboxes to cover common real-world scenarios.
Tools & Materials
- Modern web browser (Chrome/Edge/Firefox)(to run and debug sample code)
- Text editor or IDE(for editing HTML/JS and saving files)
- Sample HTML form with a checkbox (id='agree')(include a form with a checkbox and a submit button)
- Console access / DevTools(for debugging the JS state)
- Optional: unit test harness or testing notes(to automate checks)
Steps
Estimated time: 25-40 minutes
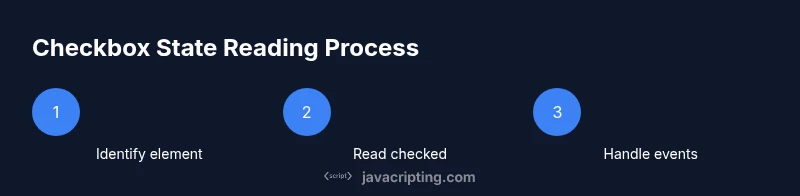
- 1
Identify the checkbox element in HTML
Locate the checkbox in the DOM and confirm it has a unique selector (for example, id='agree'). This ensures subsequent reads reference the correct element. If the element is generated dynamically, plan a safe initialization after it exists.
Tip: Prefer an id for a stable, fast selector. - 2
Read the checked state with JavaScript
Access the element’s checked property to determine if it’s selected. This is the authoritative source of truth for UI logic and data submission.
Tip: Always guard reads with a null check on the element. - 3
Guard against missing elements
If the element might not exist yet, verify the selector returns a valid node before reading .checked to avoid runtime errors.
Tip: Use optional chaining or a conditional check. - 4
Add an event listener for changes
Attach a change event listener to react when the user toggles the checkbox, enabling live feedback and UI updates.
Tip: Prefer addEventListener for flexibility and future changes. - 5
Read state on form submission
In your submit handler, read the current checked state to decide whether to proceed or show an error.
Tip: Do server-side validation as a safety net. - 6
Handle multiple checkboxes gracefully
If you have a group, collect all checkboxes with the same name and map their states for submission.
Tip: Use Array.from to convert NodeList to an array. - 7
Explain to users why the checkbox matters
Provide clear labels and error messages so users understand why toggling the checkbox is required.
Tip: Accessible labels improve usability for keyboard and screen readers. - 8
Cross-browser considerations
Test in major browsers to ensure consistent behavior of the checked property and event firing.
Tip: Keep code simple and avoid browser-specific hacks. - 9
Edge cases: indeterminate state
The indeterminate state is visual only; rely on checked for actual submission state, but know how to set it if you implement custom UI.
Tip: Indeterminate is not reliable for form submission. - 10
Provide a complete example
Wrap up with a single, copy-paste snippet showing element selection, event handling, and submission logic.
Tip: Comment the snippet to explain each line. - 11
Test with disabled state
Ensure disabled checkboxes still render state correctly when enabled later, and that your logic doesn’t override user intent.
Tip: Disabled checkboxes should not silently bypass validation.
Questions & Answers
What does the checked property mean for a checkbox?
The checked property is a boolean that reflects whether the checkbox is selected. True means checked, false means unchecked. It is the standard way to read a checkbox’s state in JavaScript.
The checked property tells you if the box is currently checked or not.
How do I read the state of multiple checkboxes?
Query all relevant checkboxes using document.querySelectorAll and map their checked states to an array, which you can send with the form data. This approach scales to forms with many options.
For groups of checkboxes, read each one's checked state and collect them into a list.
Should I rely on the value attribute for state?
No. The value attribute holds the submitted value string, not whether the checkbox is checked. Always rely on the checked boolean for UI logic and validation.
State comes from checked, not value.
Can a checkbox be read before the DOM is ready?
Reading before the element exists will return null. Wait until the DOM is loaded or place your script at the end of body, or wrap in a DOMContentLoaded listener.
Make sure the element is in the DOM before reading it.
What about the indeterminate state?
The indeterminate state is visual only and does not affect form submission. Use checked to control actual submission state and set indeterminate only if you implement a custom UI.
Indeterminate is only a visual cue, not a submitted state.
How can I test cross-browser behavior?
Test in multiple browsers and use feature detection to ensure your code works across environments. Rely on standard DOM APIs rather than browser-specific hacks.
Test across browsers and rely on standard APIs.
Watch Video
What to Remember
- Read the checked property to determine state
- Guard DOM queries to avoid null errors
- Use change events for real-time feedback
- Validate on submit and also on the server
- Ensure accessibility with proper labeling