How to Add a Class to an Element in JavaScript
Learn how to attach, toggle, and manage CSS classes on DOM elements using JavaScript. Step-by-step instructions, examples, and best practices for reliable DOM manipulation and accessible UI behaviors.

You will learn how to attach CSS classes to a DOM element using JavaScript. This guide covers classList.add, className, and conditional class toggles, with practical examples, edge cases, and tips to avoid common pitfalls. You'll also see how to handle multiple classes efficiently and how to update classes in response to user interactions.
Why Adding a Class to Elements Matters
According to JavaScripting, mastering how to add a class to element javascript is a foundational skill for building interactive UIs. Classes are the lightweight mechanism browsers use to apply CSS rules and modify visual state without touching inline styles. When you attach a class, you trigger styles, transitions, and accessibility cues that reflect user actions, app state, or validation results. The ability to manage classes cleanly also makes your code easier to read, test, and reuse across components. Beyond aesthetics, well-timed class changes can improve perceived performance—changing a class often causes less layout work than recalculating numerous inline styles. As you work on real projects, you’ll repeatedly need to decide which approach best expresses intent and minimizes side effects. This section lays the groundwork for reliable DOM manipulation and predictable UI behavior, especially for aspiring developers who want practical, battle-tested techniques.
From a practical standpoint, the act of adding a class is not merely about vanity styles. It often serves as a state signal—indicating that an element is ready, highlighted, or disabled. Keeping your class names semantic and consistent across your codebase helps teams understand what each class does at a glance. In this guide, you’ll see how to apply these concepts to common tasks like button activation, list item highlighting, and modal visibility. Remember: the goal is to write code that is readable, maintainable, and accessible to users with assistive technologies.
The JavaScripting team found that developers who align class management with a clear naming convention tend to ship features faster and with fewer regressions. By focusing on robust patterns rather than ad-hoc tweaks, you’ll reduce debugging time and flatten the learning curve for teammates joining your project.
Core Methods: classList, className, and Toggles
Historically, manipulating an element’s classes involved reading and writing the className string. That approach is error-prone because it requires manual string operations and careful handling of spaces. Modern JavaScript provides the classList API, a safer, more expressive way to manage CSS classes. The two primary methods you’ll use are classList.add and classList.remove, which add or remove one or more classes without clobbering others. You can also use classList.toggle to switch a class on or off based on a boolean or an event state. For most practical purposes, classList is your first choice because it reduces the risk of accidentally overwriting existing classes. When you need to check whether a class exists, classList.contains is the most direct method. Finally, className remains available for simple or legacy scenarios, but it’s easy to introduce bugs due to string concatenation if not managed carefully.
In this section, you’ll learn how each method works, common patterns, and when to prefer one approach over another. A consistent strategy—prefer classList methods for state changes and reserve className for legacy code—will keep your projects modern and maintainable. You’ll also see how to handle multiple classes at once by passing several arguments to classList.add or by chaining operations in a clear, readable way. The goal is to enable predictable, debuggable changes to your DOM with minimal boilerplate.
Practical Examples: Attaching a Class
Attach a class to a target element in a straightforward, readable way. The canonical approach is to select the element and then call classList.add with the class name(s) you want to apply. For example, to highlight a button when it’s clicked, you might add an event listener that toggles the 'active' class. The following snippet shows a minimal setup:
<button id="myButton">Click me</button>const btn = document.getElementById('myButton');
btn.addEventListener('click', () => {
btn.classList.add('active');
});If you need to apply multiple classes at once, pass them as separate arguments: btn.classList.add('active', 'highlight'); You can also prepare class names in variables for better readability:
const classes = ['active', 'focus'];
btn.classList.add(...classes);
This approach keeps your intent clear and minimizes the chance of accidentally removing other classes.
Another common pattern is to add a class in response to a form’s validation result. For example, after validating an input, you might add 'valid' or 'invalid' to the input element. This practice helps CSS rules express state changes without inline styles, keeping style concerns separate from logic.
Handling Multiple Classes and Conditional Logic
In real-world apps, you often need to manage several classes based on user actions or state changes. The classList API supports adding and removing multiple classes in a single call, which reduces boilerplate and makes the code easier to follow. When conditions determine whether a class should be present, you can use a simple if/else block or a ternary expression to decide which class to apply.
const panel = document.querySelector('.panel');
const isOpen = true; // example condition
panel.classList.toggle('open', isOpen); // adds 'open' if isOpen is true, otherwise removes it
To replace a whole set of classes atomically, you can clear the existing class list and then re-apply the new set. However, be mindful of performance implications if you’re toggling classes inside a tight loop or during rapid events.
For accessibility, ensure that class changes correspond to ARIA states where appropriate. A common pattern is to reflect focus or expansion states with corresponding ARIA attributes in addition to CSS classes. This keeps your UI navigable by assistive technologies while preserving keyboard and screen reader experiences.
Performance and Accessibility Considerations
Performance matters when you’re toggling classes in response to frequent events like scrolling, resizing, or rapid user input. ClassList-based changes typically cause less reflow than manipulating inline styles, because you’re altering CSS rules rather than recalculating multiple style properties. The JavaScripting analysis shows that keeping class changes centralized in event handlers and avoiding repeated DOM queries can reduce costly layout recalculations. To further optimize, debounce or throttle high-frequency handlers and batch DOM updates where possible.
Accessibility should never be an afterthought. When you add or remove visual state classes, pair them with ARIA attributes that reflect the same state, such as aria-expanded or aria-hidden. If you rely on CSS for visibility, ensure that screen readers receive equivalent state information through ARIA or semantic HTML. Using semantic elements and clear roles improves the experience for all users while keeping your code maintainable.
Additionally, prefer semantic, descriptive class names that reflect purpose rather than appearance. Names like 'is-active', 'has-error', or 'hidden' communicate intent and help future developers understand the code quickly. This discipline reduces bugs and makes refactoring safer as the project grows.
Common Pitfalls and Troubleshooting
Several pitfalls can bite you when you’re learning to add a class to an element javascript. The most common is querying a non-existent element and trying to operate on null. Always verify that the result of a querySelector or getElementById is not null before touching classList. Another frequent issue is overwriting the entire className string when trying to append a class—this risks removing existing classes. Prefer classList over string concatenation to avoid this problem.
If a class doesn’t appear as expected, inspect the computed class list in the browser’s dev tools. Look for typos, extra spaces, or conflicting CSS selectors that may override your rules. Remember that some styles depend on specificity and cascade; adding a class is just part of the equation. If your code runs before the element exists (for example, in a script tag in the head), wrap your logic in DOMContentLoaded or place scripts at the end of the body to ensure elements are present.
Edge cases include toggling classes on dynamically created elements. If you generate elements after the initial page load, you must attach event listeners to those elements after they exist or use event delegation. Finally, ensure cross-browser compatibility if you’re supporting very old environments; classList is widely supported in modern browsers, but polyfills exist for legacy support.
Putting It All Together: A Mini Project
Create a small, self-contained interactive widget that demonstrates adding, removing, and toggling classes. Build a toggle button that controls the visibility of a panel and changes its own appearance when active. This mini project helps you practice selecting elements, applying classList methods, and wiring events; you’ll finish with a reusable pattern you can adapt for other UI components.
<div class="widget">
  <button id="toggleBtn" aria-expanded="false">Toggle Panel</button>
  <section id="panel" class="panel hidden" aria-hidden="true">
    <p>This panel is shown or hidden by class changes.</p>
  </section>
</div>const btn = document.getElementById('toggleBtn');
const panel = document.getElementById('panel');
btn.addEventListener('click', () => {
const open = panel.classList.toggle('hidden');
btn.setAttribute('aria-expanded', !open);
panel.setAttribute('aria-hidden', open);
btn.classList.toggle('active', !open);
});This project demonstrates a clean pattern: separate concerns between interaction logic and styling rules through class management. You’ll notice how the button’s state, the panel’s visibility, and ARIA attributes stay synchronized, yielding a robust, accessible experience.
Debugging Live Scenarios
When you work on a live page, you’ll encounter scenarios that test your class manipulation logic. A common case is attaching or removing classes based on user input within a form. If changes don’t appear, start by verifying the exact element you’re targeting with console.log or by inspecting the DOM path. Ensure the script runs after the DOM is ready and that there are no conflicting selectors. If you’re expanding functionality, separate your logic into small, testable functions that take the element and the class name(s) as arguments. This modular approach makes it easier to reason about outcomes and to reuse code across components. Finally, consider writing a minimal unit test for the core behavior—adding, removing, and toggling classes—to catch regressions early in the development cycle.
Tools & Materials
- Code editor(Choose an editor with syntax highlighting and live preview (optional).)
- Modern browser(Chrome, Firefox, Edge, or Safari for debugging.)
- Developer Tools(Console, Elements panel, and Network tab for debugging.)
- Optional polyfill(If supporting very old browsers, consider a classList polyfill.)
Steps
Estimated time: 15-25 minutes
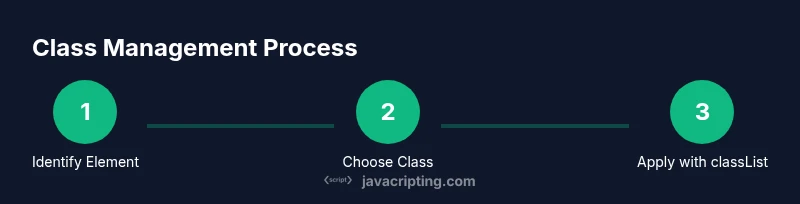
- 1
Identify the target element
Select the DOM element you will modify using querySelector or getElementById. Ensure the selector uniquely identifies the element to avoid unintended changes.
Tip: Prefer id selectors for unique targets; use data attributes for reusable selectors. - 2
Choose the class to add or remove
Decide on a semantic class name that reflects the state or styling purpose. Keep naming consistent across your project to improve readability.
Tip: Use a prefix like 'is-' or 'has-' to indicate boolean state. - 3
Add a class with classList.add
Call element.classList.add('my-class') to attach the class without overwriting existing ones.
Tip: If adding multiple classes, pass them as separate arguments. - 4
Toggle a class based on state
Use classList.toggle('active') or classList.toggle('active', condition) to reflect state changes.
Tip: For accessibility, pair with ARIA attributes when state changes. - 5
Handle multiple classes together
Apply several classes at once for readability and to minimize DOM writes.
Tip: Spread an array of class names if building dynamically. - 6
Test and iterate
Verify behavior across devices and browsers; adjust selectors and class names as needed.
Tip: Use dev tools to inspect the final class list in real time.
Questions & Answers
What is the difference between classList.add and setting className directly?
classList.add appends new classes without altering existing ones, while setting className replaces the whole class list. classList is safer for incremental updates and reduces errors.
Using classList.add keeps existing classes, unlike setting className which replaces them.
How do I toggle a class on a click event?
Bind an event listener and use classList.toggle('className') or classList.toggle('className', condition) to switch state based on a condition.
Attach a click handler and toggle the class to reflect the new state.
Can I add multiple classes at once?
Yes. Pass multiple arguments to classList.add, like element.classList.add('active', 'visible').
You can add several classes in one call.
Is classList supported in all major browsers?
classList is supported by all modern browsers. For very old environments, consider a polyfill, but plan for progressive enhancement.
Most users will have classList available; older browsers may need a polyfill.
What should I do if a class doesn’t apply as expected?
Check the element, ensure the class name matches exactly, inspect CSS specificity, and verify there aren’t conflicting rules. Use the DOM inspector to confirm the active classes.
Double-check the element and class name, then inspect CSS rules that might be overriding it.
Should I always pair class changes with ARIA attributes?
If your class changes reflect UI state that affects accessibility (like expanded/collapsed), pair them with corresponding ARIA attributes for better assistive technology support.
Yes, when state changes affect accessibility, add ARIA attributes too.
Watch Video
What to Remember
- Use classList.add for reliable class attachment
- Toggle classes with classList.toggle for clear state handling
- Guard element existence before manipulating classes
- Keep class names semantic and accessible