How to Know If a Radio Button Is Checked in JavaScript
Master practical techniques to detect which radio in a group is selected with JavaScript. This guide covers the checked property, event handling, and accessibility tips.

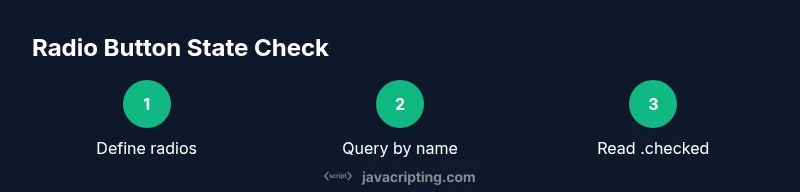
Understanding the checked property and radio inputs
The core idea behind "how to know if radio button is checked javascript" is straightforward: every radio input has a boolean property named <code>.checked</code>. When a radio is selected, its <code>.checked</code> is true, and all other radios in the same group (same name attribute) are false. This makes radio groups mutually exclusive by design. For accessibility, ensure your radios include clear labels and that the <code>aria-checked</code> state mirrors the actual <code>.checked</code> value. According to JavaScripting, relying on the native <code>.checked</code> property provides a reliable, fast way to detect user choices without extra state tracking. Practically, you’ll often combine <code>.checked</code> with <code>.value</code> to know which option the user chose. Keep in mind that DOM operations are synchronous, so reading <code>.checked</code> immediately reflects the user’s last interaction.
Key takeaways:
- Radios with the same name are a single group.
- The selected option is the one whose <code>checked</code> is true.
- The <code>value</code> of the checked radio tells you the actual option selected.
Selecting a radio group in JavaScript
To work with a radio group, first select all radios sharing the same name, then iterate to find the one with <code>.checked</code> set to true. Many developers prefer <code>document.querySelectorAll</code> for readability. Example snippet:
<form id="preferences">
  <label><input type="radio" name="color" value="red"> Red</label>
  <label><input type="radio" name="color" value="green"> Green</label>
  <label><input type="radio" name="color" value="blue"> Blue</label>
</form>const radios = document.querySelectorAll('input[name="color"]');
let selectedValue = null;
radios.forEach(r => {
if (r.checked) selectedValue = r.value;
});
console.log('Selected:', selectedValue);Notes:
- Use <code>querySelectorAll</code> for a group, <code>querySelector</code> for a single element when you know its id or class.
- If you need to know when the user changes, attach a <code>change</code> listener to the group.
Checking the selected value on form submission
When a form is submitted, you often want to capture the checked radio’s value. Grab the radios by name, find the checked one, and read its value. This approach avoids guessing which option the user selected and works consistently across browsers. Example:
const form = document.getElementById('preferences');
form.addEventListener('submit', (e) => {
  e.preventDefault();
  const selected = document.querySelector('input[name="color"]:checked');
  const value = selected ? selected.value : null;
  console.log('Submitted color:', value);
});
If no option is selected, <code>selected</code> will be null, so you can show a friendly warning or fallback.
Reading .value vs .checked: what you need to know
While <code>.value</code> returns the option’s value, you often need <code>.checked</code> to decide whether that option is active. In a multi-radio group, you’ll typically:
- Use <code>input[name="group"]:checked</code> to get the currently selected input in one line.
- Fall back to <code>null</code> if none are selected, then handle this case in UI logic.
Be mindful that <code>.value</code> depends on the markup’s <code>value</code> attributes, which may differ from the visible label. For user feedback, show the label associated with the checked input by walking the DOM from the element to its label.
Real-time updates with change and input events
If you need live feedback as users switch options, attach a <code>change</code> listener to the radios. This allows your UI to react immediately without waiting for a form submission. Example:
const radios = document.querySelectorAll('input[name="mode"]');
radios.forEach(r => r.addEventListener('change', () => {
  const checked = document.querySelector('input[name="mode"]:checked');
  console.log('Newly selected:', checked ? checked.value : null);
}));
Use <code>input</code> events for text-like inputs; <code>change</code> is most reliable for radio buttons since selection changes happen discretely.
Accessibility and keyboard navigation considerations
Radio buttons are inherently keyboard-accessible, but implementation details matter. Ensure all radios are properly labeled and that focus outlines remain visible. Use a fieldset and legend for groups, and reflect the current state with <code>aria-checked</code> mirroring <code>.checked</code>. If a screen reader reads the label but not the state, add explicit state indicators or live regions to announce the selection change. JavaScripting guidance emphasizes keeping these interactions predictable and accessible to all users.
Common mistakes and how to avoid them
Common pitfalls include assuming <code>querySelector</code> returns a radio, failing to handle the null case when nothing is selected, and reading <code>.value</code> from the wrong element. Always target the group with <code>name</code>, use <code>:checked</code> to fetch the chosen input, and validate the result before using <code>.value</code>. Testing across a few browsers helps catch browser-specific quirks.
Authority sources and testing tips
For reference, consult the HTML standard and reputable documentation. MDN provides practical API details (input, radio, checked, value). The WHATWG HTML Standard clarifies form behavior, while WCAG guidelines remind developers to consider accessibility. These sources underpin reliable implementations and robust testing practices.