How to Make a Button in JavaScript: A Practical Guide
Learn to create a dynamic button with JavaScript using a practical, step-by-step approach. Covering DOM creation, events, accessibility, and clean coding patterns.

Goal: learn how to create a clickable button with JavaScript, attach an event listener, and reflect user interactions in the DOM. You’ll build the button element from scratch, append it to a container, wire up a click handler, and manage simple state changes (enabled/disabled, text updates). We’ll cover vanilla JavaScript, best practices, and accessibility considerations.
Prerequisites and overview
To understand how to make a button in javascript, you should be comfortable with basic HTML and JavaScript. If you’re new, start by creating a minimal HTML file that hosts a container where the button will live. This section outlines the goal, the concepts involved, and the minimal environment you’ll need: an HTML document, a script block or external JS file, and a browser to run and test the code. According to JavaScripting, a solid foundation in the DOM is essential for interactive UI components. You’ll see the button created programmatically, then appended to the page, and finally wired to respond to user actions. By the end, you’ll be able to reproduce this pattern in real projects, adapting it to forms, toolbars, or custom controls. The approach here emphasizes accessibility, semantics, and maintainability from day one.
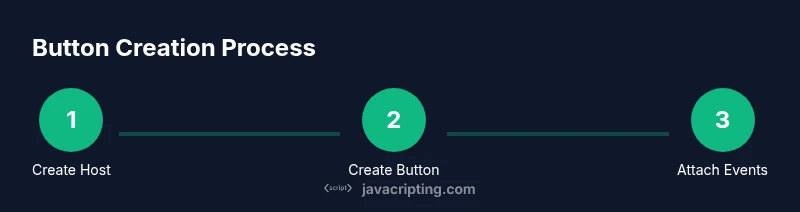
Creating the Button with JavaScript
Creating a button entirely with JavaScript gives you dynamic control over when and how the element appears. Start by selecting a host container (for example, a div with an id of 'button-area') or create one if it doesn’t exist. Use document.createElement('button') to instantiate the element, then set its textContent or innerText to describe the action (e.g., 'Click me'). Finally, append the button to the container with appendChild or append. This approach ensures the element is created at runtime and can be manipulated later without editing the HTML structure directly.
Attaching Event Listeners for Clicks and Keyboard
Once the button exists in the DOM, bind user interactions with addEventListener. A click event is the most common, but you should also ensure the button responds to keyboard activation (Space/Enter) by default, which native <button> elements handle. In your handler, you can update the UI, toggle a state, or trigger other UI changes. Access the event object to customize behavior (e.g., prevent default form submission when the button is inside a form). Prefer event listeners over inline handlers for better maintainability and testability.
Managing Button State and Dynamic Updates
Buttons are often part of broader UI state. You can enable/disable a button with the disabled property, or update its label to reflect current state (e.g., 'Loading...' during an operation). When updating text, prefer textContent to avoid injecting HTML. If the button represents a toggle, you can use aria-pressed to communicate state to assistive technologies while keeping the native button semantics.
Styling and Accessibility Best Practices
Start with a semantic <button> element for accessibility. Ensure good color contrast, visible focus outlines, and consistent sizing across devices. If you create or modify the button with JavaScript, apply CSS classes to keep styling centralized. Always provide an accessible label (textContent suffices for most cases; add aria-label if the visible text is decorative). Test with keyboard navigation and screen readers to confirm predictable behavior.
Tools & Materials
- Code editor(VS Code, WebStorm, or any editor)
- Web browser(Latest Chrome, Edge, or Firefox for testing)
- HTML file(index.html hosting a container for the button)
- JavaScript file(script.js or an inline script tag)
- CSS stylesheet (optional)(For styling and focus ring customization)
- ARIA accessibility guide (optional)(Helpful when you’re learning accessible patterns)
Steps
Estimated time: 25-45 minutes
- 1
Create the HTML host
In your HTML, add a container element where the button will appear, such as <div id='button-area'></div>. This step establishes a predictable host for dynamic content created with JavaScript. The reason is to separate structure from behavior, making the page easier to maintain.
Tip: Keep the container semantic and accessible; avoid relying on orphaned tags for dynamic content. - 2
Create and insert the button
In your JavaScript, instantiate the button with document.createElement('button'), set its textContent (e.g., 'Click me'), and append it to the host container. This creates a button element at runtime and ensures the UI can be built or rebuilt as needed.
Tip: Always set type='button' to avoid triggering form submission when the button is used outside a form. - 3
Attach a click handler
Add an event listener using button.addEventListener('click', handler). Define the handler to perform a simple action (e.g., increment a counter or toggle text). This decouples behavior from markup and makes testing easier.
Tip: Use a named function for the handler to facilitate reuse and testing. - 4
Ensure keyboard accessibility
Native <button> elements are keyboard accessible by default, but verify the focus outline is visible and that pressing Space/Enter activates the button. For non-semantic replacements, consider ARIA roles carefully.
Tip: Prefer native button over div with role='button' to avoid reinventing accessibility. - 5
Style and test the button
Apply CSS to improve visibility, legibility, and responsiveness. Test across screen sizes and with keyboard navigation. Refine the behavior to handle rapid clicks or state changes gracefully.
Tip: Use CSS variables for colors to simplify theming and ensure contrast links with your brand palette.
Questions & Answers
What is the best way to add a button to the DOM?
Use document.createElement('button') and append it with appendChild or append. This ensures a clean, dynamic insertion that you can control with JavaScript.
Create the button with document.createElement and attach it to the page using append, then bind events.
Why use addEventListener instead of inline onclick attributes?
addEventListener keeps behavior separate from markup, supports multiple handlers, and enables easier testing and refactoring.
Using addEventListener keeps logic separate from HTML and helps you add more handlers later.
How can I ensure accessibility for the button?
Use a real <button> element, provide visible text, ensure keyboard access, and consider aria-label only if the visible text is insufficient.
Make sure the button is focusable and operable with a keyboard, with clear labeling.
Can I create or remove the button dynamically?
Yes. You can create with document.createElement and remove with element.remove(). Also manage any related event listeners as needed.
Yes, you can create and remove the button at runtime and clean up listeners if you remove it.
Is it safe to set the button label with innerHTML?
Prefer textContent for label text to avoid injecting HTML and reduce XSS risk. Use innerHTML only if you deliberately need HTML tokens.
Stick to textContent for the label unless you really need HTML in the label.
What if I want multiple buttons handled by one function?
Use data attributes to differentiate buttons and add a single delegated listener to a common parent.
Use a shared handler with data attributes to distinguish which button was clicked.
Watch Video
What to Remember
- Create a button element with DOM APIs and attach a click handler.
- Maintain accessibility by using a real button and visible focus states.
- Manage simple state changes (text, disabled) to reflect actions.
- Keep code modular: separate HTML, CSS, and JavaScript for maintainability.