Can You Code a Game in JavaScript? A Practical Guide
Discover how to build a browser game with JavaScript—from idea to playable product. This educational guide covers the game loop, rendering, input, and deployment using Canvas and modern tooling.

Yes. JavaScript can power complete browser games using Canvas, WebGL, or libraries. This article walks you through planning, coding loops, rendering graphics, handling input, and polishing before publishing online now. Expect practical steps, common pitfalls, and a clear path from idea to playable product.
Can you code a game in javascript? Getting oriented
The question can you code a game in javascript often triggers two immediate concerns: can you realistically build a playable game in the browser using vanilla JavaScript, and what path should you follow to learn efficiently? The short answer is yes—JavaScript is capable of powering 2D and even certain 3D experiences in the browser. You don't need a big engine to start; a few core concepts, a canvas element, and a simple game loop can yield a surprisingly engaging result. As you begin, keep scope in mind: start with a tiny prototype that demonstrates movement, collision, and scoring before adding levels or sound. According to JavaScripting, beginners who focus on small, repeatable iterations progress fastest toward a finished project. This approach aligns with practical, project-based learning and helps you move from curiosity to competence without getting overwhelmed.
Choosing a canvas-first approach: Canvas vs WebGL
For most 2D browser games, the HTML5 Canvas API is the most approachable entry point. It gives you immediate control over drawing operations and a straightforward loop. WebGL offers more power for complex visuals but has a steeper learning curve. If you’re new, start with Canvas to validate your game logic, then explore WebGL or higher-level libraries (like Three.js) if you want 3D or advanced shaders. The important thing is to establish a reliable render path and a timing mechanism that keeps the game frame-rate smooth across devices. Throughout your journey, remember that you can reuse core logic as you scale up, so keep code modular from day one.
Core terminology you’ll encounter
- Game loop: the heartbeat of your game, repeatedly updating and rendering.
- Delta time: the amount of real time between frames, used for consistent motion.
- State management: keeping track of player position, scores, enemies, and levels.
- Input handling: translating keyboard, mouse, or touch events into game actions.
- Asset management: loading images, sounds, and data efficiently to avoid stalls.
Grasping these terms early will help you read tutorials and adapt code more quickly. If you can explain the loop and state transitions to a peer in plain terms, you’re on the right track.
Planning your first playable prototype
Before coding, sketch a tiny game concept with a clear win condition. A simple example: move a character to collect coins within a bounded area while avoiding obstacles. Define the core rules, basic art style, and how you’ll determine victory or failure. This blueprint keeps you focused and prevents feature creep. As you implement, verify that the game feels responsive on keyboard and/or touch input and that the score updates reliably. A well-scoped prototype is the fastest path to learning through hands-on practice, not just reading about it.
Layering the learning path with milestones
Milestones keep motivation high. Start with milestone one: a moving square on a blank canvas. Milestone two adds collisions with walls. Milestone three introduces collectibles and a scoring system. Milestone four implements a simple enemy or obstacle. Milestone five adds levels or progression. Each milestone should be a small, testable chunk of functionality. By organizing your work this way, you gain confidence and visibility into progress, which is essential when you’re learning by doing.
A quick note on tooling and environment
A lightweight setup often beats a heavy toolchain for beginners. You’ll typically need a modern browser, a text editor, and a simple local server to avoid cross-origin issues when loading modules or assets. Keep files organized: index.html, main.js, styles.css, and an assets folder. Use version control to track changes and to revert when you experiment with new ideas. JavaScripting’s guidance emphasizes practical scaffolding over perfection at the start—build, test, refactor, and repeat.
Why a browser-based approach scales well
Browser games benefit from universal accessibility: players don’t install software, just open a URL. As you add features—sound effects, levels, responsive controls—you’ll rely on the same core principles: a reliable loop, deterministic timing, clean input handling, and small, testable modules. This makes JavaScript a strong foundation for learning, prototyping ideas quickly, and eventually building more ambitious projects such as multiplayer games or hybrid experiences using Web APIs.
Tools & Materials
- Laptop/PC with a modern web browser(Chrome/Edge/Firefox are good defaults; ensure Canvas is supported.)
- Code editor(Examples: Visual Studio Code, Sublime Text; enable syntax highlighting and live preview if possible.)
- Local web server(Use a simple server like Live Server (VS Code) or http-server to avoid file:// limitations.)
- Canvas-ready assets (optional at first)(A few simple sprites or shapes help visualize motion and collisions.)
- Version control(Initialize a Git repo to track changes and practice good release discipline.)
- Sound assets (optional)(Short audio clips can enhance feedback but aren’t required for a first prototype.)
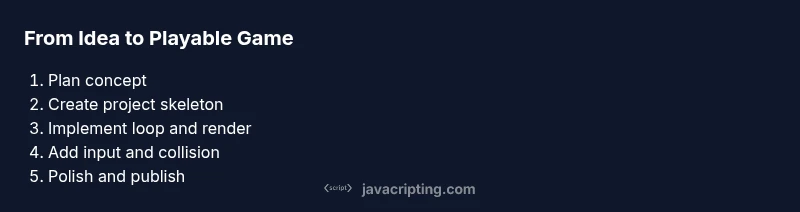
Steps
Estimated time: 2-5 hours
- 1
Define your game idea and scope
Write down the core mechanic, win condition, and minimal assets. Keep it tiny and testable within a few hours. A clear scope prevents scope creep and accelerates learning.
Tip: Document success criteria before coding and reassess after each milestone. - 2
Create project structure
Set up index.html, a main.js for logic, and a style.css for visuals. Create an assets directory for images and sounds. Establish a basic canvas element in HTML and prepare the rendering context in JavaScript.
Tip: Use modular folders (src, assets, dist) to keep code maintainable from day one. - 3
Implement the game loop
Create a loop using requestAnimationFrame. Update game state with delta time and render the scene every frame. Ensure the loop stops when the game ends or the tab becomes hidden.
Tip: Separation of update and render logic makes debugging easier. - 4
Render and draw to canvas
Draw shapes or images to the canvas and implement simple camera logic if needed. Start with a player square and walls to verify collision detection.
Tip: Use clear and consistent coordinates; render order matters for visibility. - 5
Add input handling and basic physics
Map keyboard arrows or WASD to player movement. Introduce basic gravity or velocity, and implement simple collision with boundaries or blocks.
Tip: Normalize input across devices; consider a simple input state object. - 6
Test, polish, and prepare to publish
Playtest on multiple devices, fix performance issues, polish visuals, and add basic accessibility (keyboard focus, readable contrast). Package files for sharing and consider hosting options.
Tip: Keep a changelog and remember to keep assets lean for faster load times.
Questions & Answers
Do I need advanced math to build a simple JavaScript game?
No. A basic understanding of geometry and simple kinematics is enough for early projects. You can learn more math concepts as you expand your game.
Not initially—start with basic movement and collision, then explore math as your game grows.
Is Canvas the only option for rendering?
Canvas is ideal for beginners. You can also use WebGL for advanced graphics and libraries like Phaser for higher-level game development.
Canvas works well to start; WebGL and libraries offer more power later.
Can I reuse libraries or templates?
Yes. Libraries like Phaser or dashboard templates can accelerate development, but learn the fundamentals with vanilla JS first.
You can use libraries after you grasp core concepts.
How long does it take to complete a basic game?
Time varies with scope, but a tiny, functional prototype often takes a few hours. Expect additional time for polish and testing.
It depends on scope; a basic version can take several hours.
What about publishing online?
Hosting a static site on platforms like GitHub Pages or Netlify makes sharing easy. Ensure your assets load quickly and legally.
Yes—hosting is straightforward for simple browser games.
What if I want 3D in the browser?
For 3D, consider WebGL-based libraries. Start with 2D to learn timing and input, then gradually explore 3D concepts.
3D requires WebGL or libraries; begin with 2D to learn core ideas.
Watch Video
What to Remember
- Define a small, testable game scope.
- Choose Canvas for 2D rendering to start quickly.
- Implement a robust game loop with delta time.
- Modularize code to ease learning and reuse.
- Iterate with short milestones to stay motivated.