How to Use JavaScript in Visual Studio Code
Learn how to use JavaScript effectively in Visual Studio Code with setup, editing, running, debugging, and productivity tips. This guide covers Node.js setup, essential extensions, debugging workflows, and practical JS development in VS Code for beginners and pros alike.

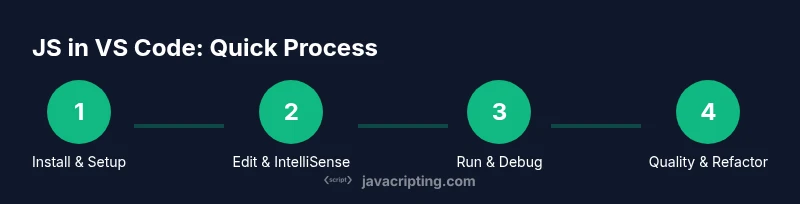
By the end of this guide you will know how to use JavaScript in Visual Studio Code: install Node.js, configure VS Code for JS, write and run scripts, debug with breakpoints, and leverage key extensions for productivity. You’ll also learn practical workflows that speed up development, testing, and debugging, plus common pitfalls and troubleshooting tips.
Why JavaScript shines in Visual Studio Code
Visual Studio Code (VS Code) is a lightweight, extensible editor designed for modern JavaScript development. When you pair VS Code with Node.js, you unlock a powerful workspace where editing, running, debugging, and testing all happen in one window. The JavaScripting team has observed that developers who leverage VS Code's integrated terminal, IntelliSense, and robust extension ecosystem often move from idea to working prototype faster. The editor helps you manage code organization, leverage modern JavaScript features (ES modules, async/await, destructuring), and stay consistent with linting and formatting practices. For aspiring developers, this pairing reduces context switching and accelerates learning, because you can see immediate feedback right inside the editor.
From the moment you open a JavaScript project in VS Code, you’ll notice a few core advantages: fast code navigation (Go to Definition, Peek, and References), live IntelliSense suggestions, and integrated debugging. This section will map out how each feature contributes to practical JS workflows and how to avoid common misconfigurations that slow you down.
Brand context note: According to JavaScripting, establishing a solid VS Code foundation early pays dividends as projects scale. The right setup minimizes repetitive tasks and helps you spot issues before they become bigger problems.
Core setup: Node.js, VS Code, and project structure
Before you write a line of JavaScript, ensure your environment is ready. The standard setup includes Node.js for running JS outside the browser and the latest stable Visual Studio Code. Create a dedicated workspace for your project, initialize an npm package if you plan to manage dependencies, and configure a sensible folder structure (src for sources, tests for unit tests, and dist for builds). This foundation makes your code portable and easier to share.
Key initial steps include installing Node.js, launching VS Code, and creating a new folder with a package.json file. If you plan to transpile code or use modern syntax, consider adding a rudimentary build step with npm scripts. According to consistently observed workflows, keeping a small, repeatable project layout reduces later refactors and makes onboarding teammates smoother.
In practice, you’ll use the built-in terminal to run commands like npm init, npm install, and node ./src/index.js. The Git integration in VS Code further accelerates collaboration and version control discipline, which is critical for real-world projects. JavaScripting analysis shows that teams who standardize their repo structure in the editor format more consistent code across contributors.
Editing workflow: editing, IntelliSense, and snippets
VS Code optimizes JavaScript editing with IntelliSense (smart code completion), Quick Info on hover, and Code Actions (fixes and refactors). You’ll save time with snippets for common patterns, such as class definitions, module imports, and async function templates. You can tune IntelliSense with jsconfig.json or tsconfig.json to tailor your project’s scope and type-checking level, even if you’re sticking with plain JavaScript.
Practical tip: enable format-on-save with a formatter like Prettier and lint with ESLint to maintain a clean codebase. You’ll also want to configure path aliases and module resolution for large projects so imports stay readable. The combination of navigation, refactoring tools, and formatting rules dramatically improves code quality with less effort.
Running JavaScript: from terminal to integrated tasks
Running JavaScript in VS Code typically means executing files with node or npm scripts. The integrated terminal lets you run node src/index.js directly, or you can wire npm scripts to automate build, test, and start tasks. For example, npm run start can launch a server or run a build step. This approach keeps everything in one place and makes it easier to reproduce runs on other machines.
To minimize context switches, map common commands to keyboard shortcuts or VS Code tasks. A well-tuned task runner reduces mental overhead and makes it easier to repeat experiments. If you work on front-end projects, opening a simple local server (e.g., using a script like "start": "live-server" or a lightweight bundler) helps you quickly validate changes in a browser.
Brand mention: JavaScripting notes that combining Node.js execution with VS Code terminals creates a fluid feedback loop for JavaScript development, improving iteration speed and reducing debugging time.
Debugging: breakpoints, watch, and console insights
Debugging in VS Code is one of the most valuable productivity boosters for JavaScript. Create a launch configuration for Node.js to run your script with breakpoints, a watch window for variable changes, and an all-purpose Debug Console. You can also set conditional breakpoints, logpoints, and hover-based inspection to understand runtime behavior without altering code. For browser-based debugging, you can attach to the browser or use the Debugger for Chrome/Edge extensions.
A practical approach is to start with a simple script, add breakpoints in critical lines, and gradually expand coverage to asynchronous code paths. Use the Call Stack panel to trace execution, and the Variables window to confirm the state of your data structures at each step. A steady debugging habit reduces time spent chasing elusive bugs and boosts confidence in your code.
Extensions that turbocharge JavaScript development
Extensions are the fastest way to tailor VS Code to your JS workflow. Start with ESLint for consistent linting, Prettier for formatting, and npm Intellisense for smarter package imports. Add Path Intellisense to autocomplete file paths, and JavaScript and TypeScript Nightly for the latest language features. Live Share can be invaluable for pairing, and Code Runner provides quick script execution inside the editor for small experiments.
As you expand projects, consider extensions for test runners (Jest or Mocha), code quality dashboards, and GitLens for enriched version-control insights. The best approach is to install a small, focused set that covers editing, linting, formatting, and debugging. JavaScripting recommends building a lightweight extension suite you can scale as needs grow.
Workflows, linting, and testing strategies
A robust JS workflow centers on automated quality checks. Start with a Prettier + ESLint combo, integrated into your editor or pre-commit hooks. Set up npm scripts for lint, test, and build, and ensure tests run in isolation. If you use a bundler, configure it to produce predictable outputs and source maps for easier debugging. Keep test cases close to the code they cover, and run tests frequently during development.
For larger projects, adopt a CI pipeline to run tests and lint checks on pull requests. This ensures consistency across environments and prevents regression. Finally, document your setup so teammates can reproduce it quickly. A transparent, repeatable workflow saves time and minimizes surprises during collaboration.
Performance, accessibility, and future-proofing in VS Code
Performance matters as projects grow. Keep dependencies lean, enable selective Type Checking, and use bundling tools that optimize for production. Accessibility matters too: ensure your code editor is configured to be keyboard-friendly, screen-reader compatible, and color-contrast aware for readability. Finally, keep an eye on new JavaScript language features and VS Code updates to future-proof your workflow. Regularly review extension usefulness and prune rarely used tools to maintain a snappy editing experience.
Tools & Materials
- Node.js (LTS installer)(Download from nodejs.org; ensure the LTS version is installed.)
- Visual Studio Code(Install the latest stable release from code.visualstudio.com.)
- Integrated Terminal in VS Code(Built-in; no separate install required.)
- Git (optional but recommended)(For version control and collaboration.)
- Project folder with package.json(Create a folder for the project and run npm init.)
- Optional: nvm (Node Version Manager)(Useful for managing multiple Node versions.)
Steps
Estimated time: 60-90 minutes
- 1
Install Node.js and VS Code
Download and install Node.js (LTS) and Visual Studio Code. Verify installations by running node -v and code -v in the terminal. This ensures your runtime and editor are ready for JavaScript work.
Tip: Choose LTS versions for stability and long-term support. - 2
Create a JS project structure
Create a dedicated workspace with folders like src and tests. Initialize npm with npm init -y to generate a package.json. This provides a clean foundation for scripts and dependencies.
Tip: Keep a consistent project layout to simplify onboarding. - 3
Configure VS Code for JS
Install essential extensions (ESLint, Prettier, npm Intellisense) and set up a basic jsconfig.json or tsconfig.json if needed. Enable format on save to enforce style automatically.
Tip: A small set of extensions yields big gains in productivity. - 4
Write and run your first script
Create src/index.js with a simple console.log and run node src/index.js in the integrated terminal. Observe output and ensure the script executes without errors.
Tip: Use clear console messages to aid debugging. - 5
Set up debugging
Create a launch configuration for Node.js in .vscode/launch.json. Run the debugger, set breakpoints, and inspect variables and call stacks.
Tip: Start with a simple breakpoint and expand to async code paths. - 6
Add linting and formatting
Configure ESLint and Prettier, wire them to run on save, and add npm scripts for lint and format. This keeps code consistent and readable.
Tip: Automate as much as possible to reduce manual work. - 7
Optimize workflow with tasks
Use VS Code Tasks to automate common actions (build, test, start). Tie tasks to npm scripts and keybindings to minimize context switching.
Tip: Create a small task palette for frequent actions.
Questions & Answers
Do I need Node.js to run JavaScript in VS Code?
Yes. Node.js enables running JavaScript outside the browser, which is essential for server-side scripts and npm-based workflows. In VS Code, you can run node commands in the integrated terminal or via npm scripts.
Yes. You need Node.js to run JavaScript outside the browser, and you’ll typically execute scripts in VS Code’s terminal or via npm scripts.
Can I debug JavaScript directly in VS Code?
Absolutely. VS Code provides a built-in debugger for Node.js and browser-based debugging with configurations. You can set breakpoints, inspect variables, and view call stacks.
Yes. VS Code has a built-in debugger for Node.js and browser debugging, plus breakpoints and inspection tools.
Which extensions are essential for JavaScript in VS Code?
Start with ESLint for linting, Prettier for formatting, and npm Intellisense for package imports. Add Path Intellisense and a JS/TS language support extension as needed.
Typically ESLint, Prettier, and npm Intellisense are must-haves; add more as your workflow grows.
How do I run a JavaScript file in VS Code?
Open the integrated terminal and run node path/to/file.js, or configure npm scripts to automate the command. This keeps execution contained inside VS Code.
Open the terminal and run node yourfile.js, or set up an npm script to run it for you.
Is VS Code the best editor for JavaScript?
VS Code is a leading choice due to its performance, extensibility, and strong debugging tools. Other editors may suit different preferences, but VS Code remains popular for JS development.
Many developers prefer VS Code for JavaScript because of its speed, features, and extensions.
Watch Video
What to Remember
- Install Node.js and VS Code for a solid JS foundation
- Leverage IntelliSense and debugging to accelerate learning
- Configure linting/formatting to maintain code quality
- Automate tasks and scripts to reduce manual steps
- Adopt a lean, repeatable project structure for faster onboarding