How to Install JavaScript in Visual Studio Code
Learn how to install JavaScript in Visual Studio Code, configure a productive workspace, install Node.js, and set up essential extensions for debugging, linting, and testing.

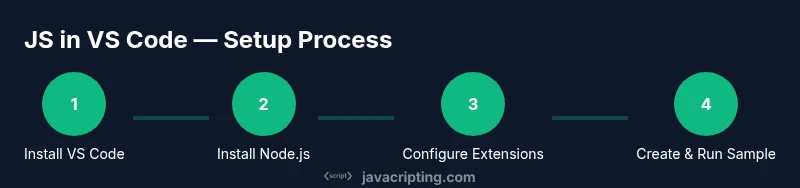
Goal: set up a complete JavaScript development environment in Visual Studio Code. You’ll install VS Code, install Node.js, configure a JS-friendly workspace, and add essential extensions. Then you’ll create and run a simple script to verify the setup. Requirements: internet access and a supported OS; basic terminal familiarity helps.
Why install JavaScript in VS Code
According to JavaScripting, Visual Studio Code is a popular choice for JavaScript developers because it combines lightweight performance with powerful tooling. Its IntelliSense autocompletion, built-in debugging, and a rich ecosystem of extensions help you write, test, and refactor JavaScript faster. If you're transitioning from a browser-only workflow or starting fresh, VS Code provides a cohesive environment that scales from small scripts to complex Node.js projects. In this guide, we’ll walk through installing the prerequisites, configuring the workspace, and validating your setup with a simple script.
Prerequisites and planning
Before you install anything, outline your target workflow. Decide whether you’ll primarily run JavaScript in the browser, on Node.js, or both. Ensure your computer meets the minimum system requirements for VS Code and Node.js. You’ll need an internet connection for downloads and a terminal or command prompt to execute commands. Optionally, sketch a plan for extensions you want to use for linting, formatting, and debugging, as these choices shape your daily work.
Step 1: Install Visual Studio Code
Visit the official Visual Studio Code site and download the installer for your operating system. Run the installer with default options unless you have a specific need to customize. After installation, launch VS Code and take a quick tour of the interface: the Explorer, the integrated terminal, and the debugging panel. This initial setup creates a clean canvas for JavaScript development.
Step 2: Install Node.js and npm
Node.js provides the JavaScript runtime and npm, which you’ll use to manage dependencies. Download the LTS release from the Node.js website and follow the installation prompts. Open a terminal in VS Code and run node -v and npm -v to verify the installation. If both commands print version numbers, you’re ready to proceed.
Step 3: Configure your workspace for JavaScript
With VS Code ready, configure a basic workspace that suits JavaScript workflows. Create a new project folder, open it in VS Code, and set up a minimal package.json by running npm init -y. Adjust settings for JavaScript: enable format on save, configure ESLint rules, and set the Node.js runtime path if needed. Consider creating a .editorconfig file to keep consistent formatting across collaborators.
Step 4: Install essential VS Code extensions for JavaScript
Extensions extend VS Code’s capabilities. Start with ESLint for static analysis, Prettier for consistent formatting, and npm Intellisense for smarter package name completion. You may also install the Path Intellisense extension, a JavaScript debugger, and a browser debugging tool if you test in-browser code. Keep in mind that fewer well-chosen extensions often beats a long tail of noisy add-ons.
Step 5: Create and run a sample JavaScript project
Create a new folder and open it in VS Code. Initialize a package.json with npm init -y, then create index.js. Add simple code, for example: console.log('Hello, JavaScript in VS Code!'); Run the script in the integrated terminal with node index.js. You should see the greeting printed in the terminal, confirming your environment works.
Step 6: Debugging and troubleshooting basics
VS Code’s debugger lets you run JavaScript with breakpoints, watches, and stepwise execution. Create a launch.json configuration for Node.js, set a breakpoint in index.js, then run the debugger. If you don’t see output, check that Node is correctly installed and that your terminal path is set. Common issues include path mismatches and ESLint configuration conflicts.
Tips for a smooth setup
- Start small: keep your first project tiny to validate the toolchain quickly.
- Use the built-in terminal to minimize context switching.
- Enable format-on-save to maintain consistent code style automatically.
- Document your setup in a README so teammates can reproduce it.
- Regularly update VS Code and extensions to benefit from security and performance improvements.
Next steps and continued learning
Once your basic setup works, explore debugging Node.js servers, using test runners, and setting up a project structure that scales. Learn more about TypeScript integration, linting strategies, and Git integration in VS Code to level up your JavaScript proficiency. The path from a working environment to a productive workflow is iterative, so revisit settings as your projects grow.
Verdict
The recommended approach is to install Visual Studio Code and Node.js, then tailor the workspace with essential extensions and minimal settings. This setup gives you a reliable, scalable JavaScript development environment that stays fast as your projects grow. The process is straightforward and repeatable, making it an ideal starting point for beginners and seasoned developers alike. The JavaScripting team endorses this method as the baseline for a healthy JavaScript workflow in VS Code.
Tools & Materials
- Visual Studio Code(Install from official site; available for Windows, macOS, Linux.)
- Node.js and npm(Download the LTS release from nodejs.org.)
- Internet access(Needed for downloads and extensions.)
- Sample project folder(Create a dedicated folder for your JS project.)
- Integrated terminal in VS Code(Used to run scripts without leaving the editor.)
- Optional extensions(ESLint, Prettier, npm Intellisense, Path Intellisense; add as needed.)
Steps
Estimated time: 45-60 minutes
- 1
Install Visual Studio Code
Download the VS Code installer for your OS and run it with default options. After installation, open VS Code and explore the Explorer, Terminal, and Run panels to familiarize yourself with the workspace. This creates a ready environment for JavaScript development.
Tip: If you’re migrating from another editor, import settings to speed up the transition. - 2
Install Node.js and npm
Download the LTS version and install it. Verify by running node -v and npm -v in the terminal. Node.js provides the runtime and npm handles dependencies for JS projects.
Tip: Stick with LTS to minimize breaking changes. - 3
Create a project folder and open it in VS Code
In VS Code, choose File > Open Folder and select or create a new project directory. This becomes your workspace for JavaScript files and configuration.
Tip: Use a dedicated folder per project to keep dependencies isolated. - 4
Initialize a package.json
In the terminal, run npm init -y to create a package.json with default values. This file tracks dependencies and project metadata for Node.js projects.
Tip: If you plan to publish or share, customize the package.json fields. - 5
Create a sample JavaScript file
Add index.js with a simple script like console.log('Hello, JavaScript in VS Code!'). This gives you a concrete file to run and debug.
Tip: Comment your first lines to remind yourself of the setup steps. - 6
Run the script in the integrated terminal
Open the terminal in VS Code (Terminal > New Terminal) and run node index.js. The console should display your message, confirming the runtime environment works.
Tip: If you get a command not found error, check Node.js installation and PATH. - 7
Install essential extensions
From the Extensions view, install ESLint and Prettier for quality and consistency, plus npm Intellisense for smarter autocompletion.
Tip: Only install extensions that you will actually use to keep VS Code snappy. - 8
Configure basic settings
Enable format on save, configure ESLint rules, and consider a small .editorconfig for cross-team consistency.
Tip: Keep configurations in a workspace or project-specific settings to avoid global changes. - 9
Set up basic debugging
Create a launch.json for Node.js in the Run and Debug panel, then place a breakpoint and start debugging to inspect values during execution.
Tip: Breakpoints help you understand runtime behavior quickly. - 10
Triage common issues
If things don’t work, verify Node and npm versions, extension compatibility, and path settings. Revisit your npm install steps and configuration files.
Tip: Check the VS Code Output panel for detailed error messages.
Questions & Answers
Do I need Node.js to run JavaScript in VS Code?
Node.js provides the runtime for running JavaScript outside the browser. For browser-only JavaScript, you don’t strictly need Node.js, but it’s essential for running scripts and building projects with npm dependencies.
Yes, Node.js is needed to run JavaScript outside the browser and manage dependencies.
Can I debug JavaScript in VS Code without a browser?
Yes. VS Code supports Node.js debugging directly. You can set breakpoints, inspect variables, and step through code without a browser.
You can debug JavaScript in VS Code using its Node.js debugging features.
What extensions are essential for JavaScript in VS Code?
ESLint and Prettier are highly recommended for code quality and formatting. npm Intellisense helps with package name autocomplete, and Path Intellisense speeds up path suggestions.
ESLint, Prettier, and npm Intellisense are solid starting extensions.
Is internet access required to set up VS Code for JavaScript?
Yes, you’ll need internet to download VS Code, Node.js, and initial extensions. After setup, you can work offline for many tasks, depending on your project.
You need internet to download the tools, but you can work offline once everything is installed.
What if I’m behind a proxy or corporate network?
Configure proxy settings for npm and VS Code to allow package installs and updates. This can require environment variables or VS Code settings changes.
If you’re behind a proxy, set the correct proxy configurations for npm and VS Code.
Watch Video
What to Remember
- Install VS Code and Node.js to create a JS-ready environment
- Configure a focused workspace with essential extensions
- Use the integrated terminal and debugging to validate workflow
- Keep extensions curated to avoid performance issues
- Document setup for team consistency