Paint JavaScript: Practical Canvas and DOM Techniques
A hands-on guide to painting graphics with JavaScript, covering Canvas drawing, CSS Paint API patterns, performance tips, accessibility considerations, and real-world projects you can build today.

By the end of this guide, you will be able to paint graphics with JavaScript using Canvas and DOM-driven techniques. You’ll learn setup, rendering basics, and practical patterns to write reusable drawing code. This practical approach emphasizes performance, accessibility, and real-world projects you can start today.
What 'paint javascript' Actually Means
In web development, painting with JavaScript refers to rendering 2D visuals on the screen using the Canvas API or DOM-driven techniques controlled by JavaScript. It covers drawing shapes, applying colors, gradients, and textures, and sometimes orchestrating complex scenes in real time. The phrase also invites emerging CSS capabilities like the Paint API. According to JavaScripting, painting JavaScript visuals blends practical DOM manipulation with the Canvas API, making interactive graphics accessible to beginners and pros alike. This fusion gives you pixel-level control alongside DOM-friendly patterns, so you can prototype quickly and scale later.
Prerequisites and Setup
To start painting with JavaScript, begin with a simple HTML page that includes a canvas element and a script tag. Ensure the canvas width and height match your design, and load your script after the DOM is ready to guarantee a valid drawing surface. A modern browser is essential, as is a capable editor. This setup forms the foundation for reliable rendering as you expand your visuals and experiment with different techniques.
Canvas API Essentials
The Canvas API offers a 2D drawing surface accessed via a rendering context obtained with canvas.getContext('2d'). Before drawing, configure colors, line widths, and composite settings to control how shapes blend. Start with basic shapes like a red square and a blue circle to verify coordinates and scale. Example patterns include: ctx.fillStyle = 'red'; ctx.fillRect(20, 20, 100, 100); ctx.beginPath(); ctx.arc(180, 100, 50, 0, Math.PI * 2); ctx.fill(); This foundational knowledge lets you layer more complex visuals over time.
Painting with the CSS Paint API
The CSS Paint API enables you to generate images on the fly using JavaScript and reference them in CSS (for example, background: paint(myPainter)). This is powerful for procedural textures and dynamic patterns, but support varies by browser. If you explore it, register a paint worklet and expose a painting function that returns an image CSS can render. Start with small textures and validate in multiple browsers before expanding to more complex scenes.
Practical Patterns: From Shapes to Scenes
Combine shapes, gradients, and textures to craft scenes. Reuse a single drawing function to render shapes and then layer gradients via ctx.createLinearGradient and ctx.createRadialGradient for depth. For more ambitious visuals, render to an offscreen buffer and composite it onto the main canvas. This approach improves responsiveness and keeps your code modular, enabling you to swap drawing logic without rewriting the entire scene.
Performance and Accessibility Considerations
Paint-heavy work should avoid long frames on the main thread. Use requestAnimationFrame for smooth animation and consider OffscreenCanvas when available to move work off the UI thread. Always provide textual or semantic fallbacks for essential visuals, and add controls to pause or reset when appropriate to support accessibility and usability.
Real-World Projects to Try
Begin with a simple particle system, then build a mini drawing app with a color picker and brush size controls. Finally, create a small data-visualization or game that redraws only the changed regions. These projects reinforce techniques and offer tangible results that you can showcase in a portfolio.
Common Pitfalls and Debugging Tips
Avoid redrawing everything every frame; track a dirty region or use layers to minimize work. Regularly profile with browser developer tools to catch layout thrashing or memory leaks. When something looks off, simplify the scene to isolate the problem, then gradually reintroduce features to verify each change.
Tools & Materials
- Modern web browser(Chrome, Firefox, or Edge with Canvas support)
- Code editor(VS Code or any preferred editor)
- Local development server(Optional for serving files over HTTP (e.g., http-server))
- HTML canvas element(Include <canvas id='paint' width='800' height='500'></canvas>)
- JavaScript runtime(Script tag or module to access Canvas API)
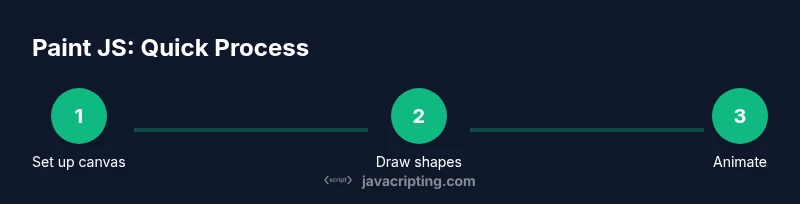
Steps
Estimated time: 1-2 hours
- 1
Set up the HTML canvas
Create an HTML page containing a canvas element and a script tag. Ensure the canvas width and height match your design and that the script runs after the DOM is ready.
Tip: Use window.addEventListener('load', ...) or place the script at the end of the body. - 2
Get the 2D rendering context
Select the canvas and obtain the 2D context via canvas.getContext('2d'). Check for null to handle browsers that don’t support Canvas 2D.
Tip: Always verify the context exists before drawing to avoid runtime errors. - 3
Draw basic shapes
Set colors and draw simple shapes with fillRect, strokeRect, and beginPath/arc to verify coordinate space.
Tip: Start with small shapes to validate coordinates and scaling. - 4
Apply color and gradients
Create gradients with ctx.createLinearGradient(...) and addColorStop. Use gradients as fillStyle or strokeStyle to add depth.
Tip: Experiment with multiple stops and directions to achieve mood. - 5
Add animation
Wrap your drawing in a requestAnimationFrame loop and update positions each frame. Use a time delta to keep motion smooth.
Tip: Throttle heavy draws or offload work to an offscreen canvas when possible. - 6
Enable interactivity
Attach pointer events (mousemove, mousedown) to paint in response. Debounce or throttle input to maintain performance.
Tip: Provide clear reset controls to avoid overwhelming the canvas. - 7
Optimize with offscreen canvas
If supported, render to OffscreenCanvas and transfer to the visible canvas. This keeps the UI responsive for complex scenes.
Tip: Check for browser support and gracefully fall back if unavailable. - 8
Wrap up a mini-project
Combine techniques into a cohesive project such as a particle system or a drawing app with features and persistence.
Tip: Incrementally add features and test each addition.
Questions & Answers
What is the difference between painting in Canvas vs CSS Paint API?
Canvas painting gives pixel-level control and is ideal for animations and games. The CSS Paint API generates images via JavaScript and is used for procedural textures; it’s more niche and has varying browser support.
Canvas gives precise drawing control, while the CSS Paint API generates images for CSS usage and is less widely supported.
Is the CSS Paint API ready for production?
The CSS Paint API is experimental in many browsers. Use it with progressive enhancement and fallbacks for browsers that don’t support it.
It's still experimental in many browsers, so use fallbacks.
Which browsers support Canvas painting?
All major modern browsers support the Canvas 2D API. Check for updates and provide fallbacks for older environments if necessary.
All major browsers support it today.
How can I optimize painting performance?
Limit redraw areas, reuse paths, minimize state changes, and consider OffscreenCanvas for heavy scenes. Profile and iterate.
Limit what you redraw and use offscreen rendering when possible.
Can painting JavaScript be accessible to screen readers?
Painted visuals may be inaccessible; provide non-visual fallbacks and ARIA labels where appropriate, and ensure essential information isn’t conveyed by visuals alone.
Make key information available to assistive tech via text or semantics.
Watch Video
What to Remember
- Start with a canvas and 2D context
- Master shapes, colors, and gradients
- Use animation frames for smooth motion
- Think about performance and accessibility