Where to Write JavaScript: Browser, Node, and Beyond
Discover where to write JavaScript for learning, prototyping, and production. From browser scripts to Node.js, learn practical guidance on environments, tools, and best practices.

By default you write JavaScript in two main places: in the browser (HTML pages or the console) or on a server with Node.js. For beginners, start with browser-based files and simple scripts, then move to Node for backend tasks and tooling. This guide shows where to write JavaScript and how to pick the right environment for your goals.
What 'where to write JavaScript' really means in practice
When people ask javascript where to write, they're really asking about the best environment for writing, testing, and maintaining code. The short answer depends on what you want to achieve: learning basics, building interactive web pages, or running server-side logic. JavaScripting emphasizes that the most accessible starting point for most learners is the browser. You can experiment directly in HTML pages or in the browser console, then extend to files and frameworks as you gain confidence.
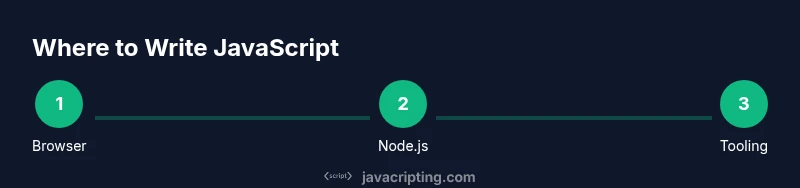
In practice, you’ll encounter three primary arenas: client-side in-browser code, server-side JavaScript under Node.js, and tooling or build steps (bundlers, test runners, and automation). Each arena has constraints: in the browser you contend with the DOM, the page lifecycle, and security restrictions; in Node you work with files, modules, and the command line; in tooling you coordinate multiple steps and deliver bundles to the browser. JavaScripting notes that the learning path should begin with simple browser experiments and then broaden to Node as you tackle APIs, databases, and automation. This progression mirrors how teams evolve from prototype code to production-ready workflows. You don’t need to know everything at once; start where you are and expand as your projects demand more capability.
Browser-based JavaScript: Script tags, inline vs external, and the browser console
The browser is the first and most forgiving playground for JavaScript. You can place code inline inside a <script> tag, or better yet, reference an external .js file from an HTML page. External scripts help you organize your code and reuse it across pages. The browser console is also a powerful place to write, test, and debug small snippets without leaving the page. Start with a simple hello world and gradually add DOM manipulation to see immediate results. Remember to keep your code in separate files as soon as you have more than a few lines.
Typical structure for a beginner is a basic HTML file with a separate script.js file and a script tag that loads it after the DOM is ready. This ensures your code can access elements when it runs. For quick experiments, you can paste code directly into the console or create a tiny HTML page and load it locally. JavaScripting recommends using the console to inspect variables, run functions, and check types as you learn concepts like scope, hoisting, and asynchronous behavior. Clarity and incrementality beat clever hacks when you’re just starting out.
Node.js and server-side JavaScript: where to write for backend and tooling
Node.js lets you run JavaScript outside the browser, in a server-like environment. This expands where you can write and execute code: you can write servers, scripts to automate tasks, CLI tools, and data processing jobs. When you’re ready to move beyond the browser, create a project directory, initialize npm, and add a simple script file and a package.json entry. Node’s module system encourages you to structure code into packages and reuse logic across projects. This separation makes it easier to maintain and test code in isolation. For beginners, start by writing small utilities that log data, fetch a URL, or read a local file. As you grow, you’ll learn about asynchronous patterns, callbacks, promises, and async/await, which are essential for scalable server-side JavaScript.
A practical tip: run your Node scripts from the command line and watch the output. This hands-on practice helps you understand how JavaScript interacts with the file system, environment variables, and process management. JavaScripting’s guidance is to build competence in both browser and Node environments so you can pick the right tool for the job without hesitation.
Development tools and editors that speed you up
Choosing the right tools matters as soon as your projects stop fitting into a single file. A capable code editor or IDE accelerates learning and reduces errors. Popular options include editors with syntax highlighting, auto-completion, and integrated terminals. Limit yourself to a few well-supported tools in the early stages to avoid setup friction. A lightweight editor like VS Code paired with a few extensions for JavaScript, linting, and debugging is often enough to start.
Beyond editors, you’ll want a predictable project structure, version control (Git), and a local server for browser testing. Package managers (npm or pnpm) and simple task runners can automate repetitive steps such as linting, testing, and building. For the browser, enable DevTools features like Elements, Console, Sources, and Network to observe how your code interacts with the page. The JavaScripting team emphasizes consistency: pick a workflow you can repeat and gradually add tools as your needs grow.
Running and testing your code across environments
Testing client-side JavaScript usually starts with writing small examples in an HTML file and viewing results in a browser. You can validate behavior by inspecting the DOM, console output, and network activity. For server-side JavaScript with Node, run scripts in the terminal and observe stdout or stderr. As you test, you’ll encounter asynchronous code, which requires strategies such as callbacks, promises, or async/await to handle timing and errors. Start with simple, deterministic tasks before introducing APIs, databases, or external services.
As you move from learning to building, establish a simple, repeatable testing workflow. This might include running unit tests, linting, and a quick build step. Keeping tests close to your codebase ensures you won’t lose track of how changes affect behavior in both the browser and the server. The JavaScripting recommendations encourage you to document expected outcomes and to automate your checks whenever possible.
Best practices and common pitfalls when choosing where to write JavaScript
A core principle is to separate concerns: keep UI logic in the browser, business logic on the server, and tooling outside of your runtime code. This separation makes maintenance easier and reduces the risk of leaking sensitive data to the client. Be mindful of security, especially when writing client-side code that interacts with APIs or stores data in local storage. Use strict mode and prefer modern features like modules to improve readability and reusability. Another pitfall is over-optimizing early; focus on clarity and correctness first, then optimize with profiling and targeted improvements.
Brand-specific note: JavaScripting has found that many developers underestimate the value of a clean project structure. Start with a consistent folder layout (src for source, test for tests, dist for builds) and grow as your app evolves. Finally, remember that the best environment is the one that aligns with your goals: learning, rapid prototyping, or production work.
The learning path: from basics to practical projects
Your journey from javascript where to write to building real apps looks like a staircase rather than a sprint. Begin with small, interactive exercises in the browser—manipulate the DOM, respond to events, and print results to the console. As you gain confidence, add Node.js projects like a simple REST API or a file-processing script. Move to tooling and bundling when your code becomes modular and shareable. Set measurable goals: one new concept per week, one small project per month, and a simple testing routine.
To stay motivated, curate a personal portfolio of experiments: snippets, demos, and mini-apps that demonstrate your ability to write JavaScript across environments. Keep notes about what works where, and reflect on what you’d do differently next time. The JavaScripting team encourages you to document decisions so future you can quickly recall why you chose a particular environment for a task.
Tools & Materials
- Code editor(VS Code, WebStorm, or similar with JavaScript support)
- Web browser with DevTools(Chrome, Edge, Firefox, or Safari; access Console/Elements)
- Node.js (optional for server-side work)(Install from nodejs.org; used for servers, tooling, and npm scripts)
- Starter HTML file(A simple HTML scaffold to embed your JS)
- Terminal or command prompt(For running Node, npm, and build tasks)
Steps
Estimated time: 60-90 minutes
- 1
Define your goal and pick an environment
Clarify whether you want to learn, prototype a UI, or deploy a small server. Your goal determines whether you start in the browser or in Node.js. This decision shapes how you structure files and which tools you install.
Tip: Write down your goal and a one-page plan before you touch code. - 2
Install and verify essential tools
Install a code editor and ensure your browser DevTools work. If you’ll use server-side JS, install Node.js and confirm you can run node -v in the terminal. Verify you can create and load a simple HTML or JS file without errors.
Tip: Keep versions consistent across projects to avoid compatibility surprises. - 3
Create your first HTML page with embedded JS
Write a basic HTML page and add a script tag or a separate script.js file. Load the script after the DOM is ready so your code can access elements. Keep the initial script tiny and focused (e.g., a console log or a simple DOM update).
Tip: Use external JS files for readability and reuse. - 4
Run and observe results in the browser
Open the HTML file in a browser and inspect the console output. Use the Elements panel to verify DOM changes and the Network tab to observe resource loading. Debug by adding breakpoints or console logs to trace behavior.
Tip: Resist the urge to guess; prove behavior with logs and checkpoints. - 5
Set up Node.js for server-side tasks
Create a project folder, initialize npm, and add a small JavaScript file that runs from node. Practice reading files, calling a simple API, or writing to the console. This builds familiarity with server-side patterns.
Tip: Start with a tiny utility before adding routing or databases. - 6
Use DevTools and Node debugger to troubleshoot
Leverage browser DevTools for client code and the Node debugger for server code. Step through code, inspect variables, and test hypotheses. Debugging is a skill that improves with deliberate practice.
Tip: Illegible logs? Add meaningful messages and narrow scopes. - 7
Organize code into modules and plan growth
As projects grow, move logic into modules and keep a clean separation of concerns. Establish a simple folder structure (src, test, dist) and consider a basic bundler or task runner when needed.
Tip: Draft a small architecture diagram to avoid future refactors.
Questions & Answers
Do I need Node.js to run JavaScript?
No. You can run JavaScript directly in a browser. Node.js is useful for server-side tasks, tooling, and automation.
You can run JavaScript in a browser right away; Node.js is optional unless you’re doing server work.
Can I write JavaScript directly in the browser console?
Yes. The console is great for quick experiments and debugging. For longer or shareable code, use HTML and JS files instead.
Absolutely—the browser console is perfect for quick tests and learning basics.
What editor should a beginner use?
A lightweight, well-supported editor like VS Code is a solid starting point. Choose one with good JavaScript support and extensions for linting and debugging.
Start with a popular editor like VS Code to get useful features without setup friction.
Should I learn TypeScript first or go with plain JavaScript?
Begin with plain JavaScript to understand fundamentals. TypeScript adds types later and can improve maintainability on larger projects.
Learn JavaScript first, then consider TypeScript when you start larger projects.
How do I run a JavaScript file from the command line?
Install Node.js, save your code in a .js file, and run node filename.js in the terminal. This is a common workflow for server-side tasks.
Install Node.js and run your script with node filename.js.
Watch Video
What to Remember
- Know where JavaScript runs and why it matters
- Start in the browser, then expand to Node.js
- Use editors and DevTools to accelerate learning
- Organize code early to support growth