How to Run JavaScript: A Practical Guide for 2026
Learn practical, step-by-step methods to run JavaScript in browsers and Node.js, with setup tips, tooling, and debugging strategies for 2026.

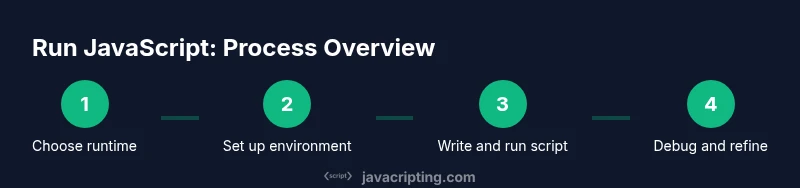
By the end of this guide, you will be able to run JavaScript in the browser and in Node.js, with clear steps, essential tooling, and practical tips. You’ll learn where to run code, how to install runtimes, how to write tiny scripts, and how to test and debug efficiently. This hands-on approach is designed for beginners and seasoned developers alike who want reliable, repeatable results.
Understanding the JavaScript runtimes
According to JavaScripting, the way you run JavaScript depends on the runtime you choose. The browser ecosystem includes engines such as V8, SpiderMonkey, and JavaScriptCore, which execute code inside a global window or worker context and expose Web APIs for the DOM, CSSOM, and network requests. Node.js uses a similar engine—the V8 family—but runs outside the browser, offering a rich set of server-side capabilities like the file system, networking, and shells. Other runtimes like Deno or Bun provide alternative security models or faster startup, but the core idea remains: a runtime is an environment that executes JavaScript and exposes APIs you can rely on. When you plan how to run code, consider the APIs you need, the environment your app targets, and the behavior you expect (synchronous vs asynchronous, modules vs script tags, global vs module scope). Understanding these differences early saves debugging time later and helps you choose predictable patterns for development and production.
Choosing your environment: Browser vs Node.js
Deciding where your JavaScript will run is often the first practical step in any project. If your goal is to enhance a web page or build a client-side feature, you’ll run code in the browser. In contrast, server-side tasks, command-line tools, and automation scripts belong in Node.js or another server runtime. Browsers expose DOM APIs, CSS Object Model interactions, and user input events, but restrict access to local files and network resources for security. Node.js, on the other hand, offers file I/O, process management, and package ecosystems, enabling you to build servers, CLIs, and tooling. Your choice affects module systems (ES modules in the browser vs CommonJS/ESM in Node), available globals, and performance considerations. The practical approach is to map your requirements to the runtime’s strengths: if you need user interface interactivity, start in the browser; if you need server capabilities, start with Node. You can combine them via modern tooling, but you’ll still have to manage cross-environment compatibility.
Running JavaScript in the browser: quick methods
Running JavaScript in a browser is approachable and immediate. You can embed code directly in a page using a script tag, include an external .js file, or load modules with type="module" to use import/export syntax. For quick experiments, the browser console is a powerful REPL—open DevTools, type code, and see results instantly. If you plan to distribute code as part of a website, prefer external files with script tags that use the defer attribute to avoid blocking parsing, or switch to modules for better organization. Browsers expose plenty of Web APIs for DOM manipulation, fetch requests, and timers, but you’ll still have to handle asynchronous patterns with promises, async/await, or callbacks. Remember to test in multiple browsers and enable source maps for easier debugging. When you want to run UI-focused code, anchor it to window.onload or an event handler instead of executing immediately at load time.
Running JavaScript with Node.js: getting started
Node.js lets you run JavaScript on the server or in the terminal. Start by downloading the LTS release from the official site and installing it; then verify installation with node -v and npm -v. Create a new file named hello.js and write a simple statement like console.log('Hello, world!'). Run the script with node hello.js and observe the output in your terminal. For projects, initialize a package.json with npm init -y to manage dependencies, scripts, and metadata. You can then define a run script, for example "start": "node hello.js", so you can start your app with npm run start. Node’s module system supports both CommonJS and ES modules; if you plan to use ES modules, name files with .mjs or set "type": "module" in package.json. As you scale, consider environment management, version pinning, and careful handling of asynchronous code using promises and async/await.
Transpiling and tooling: Babel, TypeScript, and bundlers
Not all environments support the latest JavaScript features. Transpiling lets you write modern syntax and still run it on older engines. Tools like Babel can convert ES modules, arrow functions, and class fields to compatible syntax. For front-end projects, bundlers (Webpack, Rollup, Vite) package your modules into a single file for efficient loading. TypeScript adds static types that compile to JavaScript; you’ll still run the output with Node or in the browser, but you gain safer code. When configuring transpilation, target your minimum supported browser or runtime, enable source maps for debugging, and consider tree-shaking to reduce bundle size. Keep in mind that transpiled code may differ slightly in behavior from the original; test thoroughly across environments. Once you have a build step, you’ll be able to run newer syntax in older environments while keeping your development workflow fast and scalable.
Online playgrounds and IDEs to run JavaScript
Online editors provide a quick sandbox without local setup. Platforms like CodeSandbox, CodePen, Replit, and JSFiddle let you write, run, and share JavaScript snippets with live results. They’re great for experiments, demonstrations, or learning with peers. When using online tools, be mindful of browser security policies and the limitations of the execution environment (for example, no access to your local filesystem). These tools often support multiple languages and frameworks, so you can prototype a React component or a simple vanilla JS snippet in minutes. For ongoing work, consider syncing projects with your preferred version control and moving to a local runtime when you need full control or longer-running tasks.
Debugging while you run: tips to pinpoint issues
Effective debugging starts with clear, repeatable tests. Use console.log for tracing values and consider JSON formatting for objects: console.log(JSON.stringify(obj, null, 2)). In Node.js, run with --inspect or --inspect-brk to attach a debugger, or use the built-in inspector in browsers. Breakpoints let you pause execution exactly where you need to inspect state, call stacks, and asynchronous timing. Remember to isolate changes by running small, focused snippets; this makes it easier to identify which line or API is causing problems. When dealing with asynchronous code, align promises with .then() or await, and use try/catch to surface errors early. Logging levels and environment-based configurations help keep production noise down while preserving visibility in development.
Performance and best practices when running JS
Performance comes from avoiding blocking the main thread and choosing efficient algorithms. Prefer asynchronous APIs, use requestAnimationFrame for UI updates, and minimize DOM writes to reduce layout thrashing. Profile code with browser DevTools Performance panel or Node’s built-in profiler to identify hot paths. Memory management matters; avoid creating unnecessary objects in tight loops, reuse buffers when possible, and be mindful of closure scopes that prolong lifetimes. Security and reliability matter too: never evaluate untrusted code, sanitize inputs, and keep dependencies up to date. Document the runtime assumptions for your project, including compatibility targets and package versions, so future developers can reproduce the same environment. Finally, adopt a simple, repeatable workflow for running, testing, and deploying your JavaScript code.
Common pitfalls and security considerations
Common pitfalls when running JavaScript include assuming cross-browser behavior, ignoring asynchronous timing, and relying on global state. Always test across target environments to catch API differences and shipping-edge cases. Security is a critical concern: avoid eval or similar dynamic execution, limit cross-origin access, and validate user input on both client and server side. If you’re using remote code or data, sanitize it thoroughly and apply strict Content Security Policies. Finally, document your runtime decisions and provisioning steps so future developers can reproduce results without guesswork.
Tools & Materials
- Laptop or desktop computer(Any modern computer with internet access)
- Text editor or IDE(Examples: Visual Studio Code, Sublime Text, or WebStorm)
- Node.js installer (LTS)(Includes npm; verify with node -v and npm -v)
- Web browser with DevTools(Chrome/Edge/Firefox; ensure DevTools are up to date)
- Terminal or command prompt(For running commands and scripts)
- Internet connection(Needed to download runtimes and tooling)
- Optional: package manager hints (npm or yarn)(Use if you’re managing dependencies)
- Optional: online playgrounds(Good for quick experiments when offline)
Steps
Estimated time: 30-60 minutes
- 1
Decide your runtime
Identify whether you are building for the browser (UI, client-side logic) or for Node.js (servers, tooling). This choice will drive how you structure modules, access APIs, and test your code. Start with a simple goal and map it to the appropriate runtime.
Tip: Write down your target environment and required APIs before coding. - 2
Install the runtime you need
Download and install Node.js (LTS) or verify your browser setup. Ensure npm or another package manager is available to fetch dependencies and run scripts.
Tip: Use official sources and verify installations with --version commands. - 3
Create a simple script
In your project folder, add a file like hello.js. Write a tiny snippet such as console.log('Hello, world!') to confirm the environment runs JavaScript correctly.
Tip: Keep the script small to isolate issues. - 4
Run the script with the runtime
If using Node.js, run node hello.js from the terminal. In a browser, load the file via an HTML page or use the console to execute code directly.
Tip: If you see output, you have a working runtime. - 5
Test in the browser via DevTools
Open a browser, press F12 to open DevTools, and type or paste code into the Console. Confirm results appear synchronously or as expected with asynchronous code.
Tip: Check for cross-origin errors when fetching resources. - 6
Explore environments online
If you want a quick test without setup, use an online playground like CodeSandbox or Replit. They provide an instant, shareable workspace.
Tip: Be mindful of security policies in online environments. - 7
Refine and automate
Add a simple npm script like "start": "node hello.js" to standardize how you run code. As you expand, introduce linting, testing, and a basic CI pipeline.
Tip: Automate repetitive runs to reduce errors.
Questions & Answers
What is the difference between running JavaScript in the browser and Node.js?
The browser runs JavaScript with DOM and Web APIs, while Node.js provides server-focused features like file I/O and network access without a DOM by default. Each environment has unique globals and module systems, so code often needs adjustments to run everywhere.
In short, browsers give you UI APIs and a DOM, while Node.js gives server-side capabilities without a DOM.
Do I need npm to run JavaScript?
Not always. You can run standalone JavaScript in a browser or a single Node.js script without npm. However, npm (or another package manager) is essential when you manage dependencies, scripts, or build steps for larger projects.
You can run small scripts without npm, but for real projects, npm is usually essential.
Can I run JavaScript without installing anything?
Yes. Modern browsers let you run JavaScript directly in the console, and online playgrounds offer drag-and-drop testing without local setup. For full control or longer-running tasks, local runtimes are recommended.
Yes—use the browser console or online editors for quick tests.
What is 'use strict' and should I use it?
Use strict mode to catch common coding mistakes. In modern code, modules are strict by default, but you can still include 'use strict' at the top of scripts for compatibility with older environments.
Strict mode helps catch errors; in modules, it’s often automatic.
What environments should I consider beyond browser and Node?
Deno and Bun are newer runtimes offering different security models and tooling. They share JavaScript syntax but can differ in package management, permissions, and startup times. Start with browser or Node if you’re learning basics, then explore these options as needed.
Beyond browser and Node, consider Deno or Bun for newer runtimes.
How do I run TypeScript if I only know JavaScript?
TypeScript compiles to JavaScript, so you still run the emitted JS with Node or in the browser. Set up a TypeScript compiler or a task runner to transpile, and consider enabling strict typing to catch errors early.
TypeScript compiles to JavaScript; run the output the same way as JS.
Watch Video
What to Remember
- Choose the runtime that matches your project needs
- Browser and Node.js exposes different APIs and globals
- Use DevTools and console for effective debugging
- Leverage online playgrounds for quick experiments