How to Upload a File in JavaScript: A Practical Guide
Learn how to upload a file in JavaScript using the File API, FormData, and Fetch, with client-side validation, drag-and-drop, progress indicators, accessibility, and robust UX.

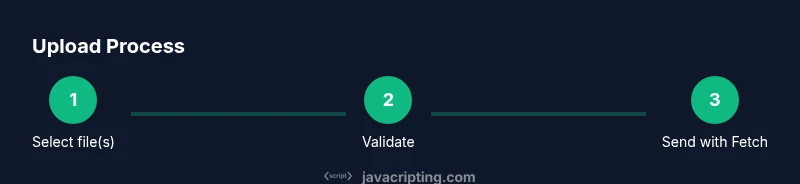
In this guide, you’ll learn how to upload a file in JavaScript using the File API, FormData, and the Fetch API, including validation, progress feedback, and accessibility considerations. You’ll implement a client-side flow that works in modern browsers and provides a smooth user experience. This quick overview signals where you’ll find detailed steps, examples, and best practices throughout the article.
Why uploading a file in JavaScript matters
Uploading a file in JavaScript is a foundational capability for modern web applications. Whether users are submitting resumes, sharing photos, or uploading documents, a seamless client-side experience reduces friction and boosts engagement. The File API, FormData, and Fetch empower you to collect files, prepare them for transmission, and send them without full page reloads. According to JavaScripting, investing in a robust file-upload UX leads to higher completion rates, fewer support tickets, and a smoother overall experience. In this section you’ll see how the pieces fit together and why careful client-side handling matters for performance and security.
Understanding the browser File API basics
The browser File API gives you access to files selected by the user through an <input type="file"> element, as well as the FileList object that aggregates those files. Each File behaves like a blob with name, size, type, and a lastModified timestamp. To prepare data for transmission, you’ll commonly use a FormData object, which can append one or more File objects and additional fields. On the receiving end, servers typically handle multipart/form-data requests. Grasping these basics sets you up for clean, scalable upload logic that scales from single to multiple files.
Setting up the HTML form for file input
Create a simple and accessible file input, optionally supporting multiple files. For example:
<label for="fileInput">Choose files</label>
<input id="fileInput" type="file" multiple accept="image/*,.pdf" />
<button id="uploadBtn" disabled>Upload</button>
<progress id="uploadProgress" value="0" max="100" style="width: 100%; display: none;"></progress>
This structure ensures users with assistive tech can identify the control, while the multiple attribute enables multi-file uploads. The button remains disabled until files are selected to prevent accidental submissions.
Client-side validation before upload
Before you send data to the server, validate client-side to catch obvious issues early. Validate each file’s type and size, enforce a maximum total size, and ensure at least one file is selected. Use a whitelist of MIME types (or extensions) to prevent unwanted content, and provide clear, friendly error messages. Client-side validation improves perceived performance and reduces unnecessary network traffic, but remember to recheck all constraints on the server as a final defense.
Choosing an upload strategy: Fetch vs XMLHttpRequest
Fetch offers a modern, promise-based API for sending FormData. It’s simpler to compose requests and handle responses with async/await. However, progress events aren’t supported natively in fetch for uploads in some environments, so you may fall back to XMLHttpRequest (XHR) for detailed progress feedback. A pragmatic approach is to use fetch for the core upload and enhance UX with an XHR-based progress fallback when precise progress is required. Securely handle the server response and errors in both cases.
Progress indicators and user feedback
Providing upload progress improves user trust and reduces abandonment. Use the HTML5 progress element or a custom progress bar to visualize byte transfer. If the browser supports the fetch-progress pattern, you can approximate progress by monitoring the uploaded bytes via an XHR fallback or by chunking the data manually. Always show accessible labels and status updates (e.g., “Uploading file 1 of 3…”) and consider canceling or retry options if the network is slow or unstable.
Drag-and-drop and multi-file uploads
Drag-and-drop provides a natural, efficient way to select files. Implement onDragOver, onDrop, and preventDefault to avoid unintended navigation, then extract files from the DataTransfer object. Combine drag-and-drop with a conventional file picker to accommodate users who prefer or need keyboard navigation. When handling multiple files, iterate over the FileList, validate each item, and append to FormData in a loop. Clear feedback after each successful or failed upload for clarity.
Security considerations and server configuration
Front-end validation is essential for UX but does not replace server-side checks. Validate file type, size, and content on the server, enforce rate limits, and use CSRF protections if applicable. Ensure your server handles multipart/form-data correctly and that your endpoints support CORS appropriately for cross-origin clients. Use HTTPS to protect file integrity and privacy during transit, and consider content scanning to detect malware in uploaded files. A secure pipeline begins at the browser and ends with a validated server response.
Error handling, retries, and resilience
Network glitches happen. Implement robust error handling and a retry strategy with exponential backoff. Expose meaningful error messages (e.g., “Network error, please try again in 30 seconds”) and provide controls to retry, pause, or cancel uploads. Logging a failure on the client aids debugging, while server-side error codes help users understand what went wrong. A resilient uploader gracefully degrades to a simple retry loop when needed.
Accessibility and keyboard support for uploads
Make file uploads accessible by ensuring all controls have visible focus, descriptive ARIA labels where appropriate, and screen-reader-friendly text. Provide keyboard shortcuts for the primary actions (e.g., enter to trigger the upload) and ensure the drag-and-drop zone is reachable via the keyboard. When errors occur, announce them with live regions to assist users who rely on assistive technologies. Accessible uploads reach all users and align with inclusive design principles.
A practical, end-to-end example: building a reusable uploader
Consider a self-contained widget that encapsulates HTML, CSS, and JavaScript logic. A reusable uploader exposes a public API to set allowed types, max sizes, and a hook for progress and completion events. It accepts a file input element or drag-and-drop area, creates a FormData payload, and submits via Fetch with appropriate headers. By packaging the logic into a module, you make it easy to reuse across pages and projects, maintaining consistency and reducing maintenance burden.
Testing, debugging, and common pitfalls
Test with a variety of file sizes, types, and network conditions. Use browser dev tools to inspect FormData payloads, monitor network timing, and verify progress events when available. Common pitfalls include relying solely on client-side validation, incorrect Content-Type handling on the server, and assuming fetch will provide precise upload progress. Document any assumptions, log client-side steps clearly, and maintain a minimal, well-structured example to speed up troubleshooting.
Quick recap and next steps
You now have a solid mental model of how to upload a file in JavaScript, including File API basics, FormData usage, and a pragmatic strategy for progress feedback. From here, adapt the patterns to your backend, add drag-and-drop, and ensure accessibility and security are baked in. Practice by building a small demo: a single-file uploader with progress, then extend to multiple files and custom validation rules. JavaScripting’s guidance helps you stay practical and focused on real-world outcomes.
Tools & Materials
- Text editor(VSCode or a similar editor with JS/HTML support)
- Modern web browser(Chrome, Firefox, Edge, or Safari)
- Local development server(Live-server, http-server, or similar)
- Sample HTML/JS files(index.html and script.js with a basic uploader)
- API endpoint to test(A test server to receive multipart/form-data uploads)
Steps
Estimated time: 60-90 minutes
- 1
Prepare HTML input
Create a file input element and a trigger button. Ensure the input allows multiple files if needed and that the button is disabled until files are selected. This sets up the UI for a usable, accessible experience.
Tip: Link the button state to the input’s change event to reflect the number of selected files. - 2
Capture file selection
Attach an event listener to the input to retrieve the FileList, validate basic constraints, and store references for later use. This step avoids duplicating work during the actual upload.
Tip: Validate at least one file is selected before enabling the upload button. - 3
Validate file types and sizes
Check each file against a whitelist of MIME types and a maximum size. Provide clear feedback if a file is rejected so users can choose alternatives.
Tip: Display a summary of rejected files to help users adjust their selection. - 4
Assemble FormData
Create a FormData instance and append each File with a meaningful field name (e.g., 'files[]'). Include any extra metadata you need on the server.
Tip: Use a loop to append multiple files efficiently and consistently. - 5
Choose upload method
Decide between Fetch for simplicity or XMLHttpRequest for fine-grained progress events. Implement a small wrapper to handle both possibilities.
Tip: If you need progress, implement a minimal XHR path even if you primarily use Fetch. - 6
Send data to server
Submit FormData to the server via the chosen method. Handle response status codes and error conditions gracefully for a robust UX.
Tip: Set reasonable timeout logic to avoid hanging requests on poor networks. - 7
Show upload progress
Provide real-time feedback using a progress bar or status messages. Update the UI as data transmits, and reset on completion.
Tip: Offer an option to cancel ongoing uploads with a clear confirmation. - 8
Handle server response
Process server responses, extract success identifiers, and present a clear result to the user. Implement error messaging for failure cases.
Tip: Cache and display the server-provided file URL for easy sharing. - 9
Support drag-and-drop
Add a drop zone and prevent default browser actions. Validate dropped files and integrate them into the same upload path as the input.
Tip: Indicate drop zone status via keyboard and screen-reader friendly cues. - 10
Accessibility and keyboard navigation
Ensure all controls have proper labels, focus visibility, and ARIA attributes as needed. Test with screen readers and keyboard-only navigation.
Tip: Provide an aria-live region for upload status updates.
Questions & Answers
Do I need a server to upload files?
Yes. A server is required to receive multipart/form-data, store the file, and return a response. Client-side code can prepare and send the data, but the server handles persistence and validation.
Yes. A server is required to receive and store the file, even if the upload is started from JavaScript in the browser.
Can I upload multiple files at once?
Yes. Use the multiple attribute on the input and append each File to FormData. Ensure the server supports handling an array of files.
Yes, you can upload many files at once by using a multiple input and iterating over the files.
How do I show upload progress?
Progress can be shown with an XHR upload event or a workaround when using Fetch. Provide a visual indicator and accessible status updates.
You can show progress with an upload event in XHR or a manual progress indicator when using Fetch.
Is it safe to upload files from the browser?
Client-side code must be paired with server-side validation and secure handling. Use HTTPS, validate content, and scan uploads on the server.
Security comes from server-side checks and HTTPS, not just browser-side validation.
How can I implement drag-and-drop?
Add a drop zone, prevent default behavior, extract files from the DataTransfer object, and feed them into your existing upload flow.
Add a drop zone and integrate dropped files into your upload logic.
What about accessibility?
Ensure focus indicators, labels, ARIA attributes, and live regions for status updates to support screen readers.
Make it accessible with proper labels, focus styles, and live update regions.
Watch Video
What to Remember
- Understand the File API and FormData basics
- Validate client-side, then verify on the server
- Combine Fetch with optional XHR for progress
- Enhance UX with drag-and-drop and accessibility
- Build a reusable, modular uploader