How to Install JavaScript on Windows 10: A Practical Guide
Set up JavaScript tooling on Windows 10: Node.js, npm, and a code editor. This step-by-step guide from JavaScripting covers installation, PATH setup, and quick verification to start coding confidently.

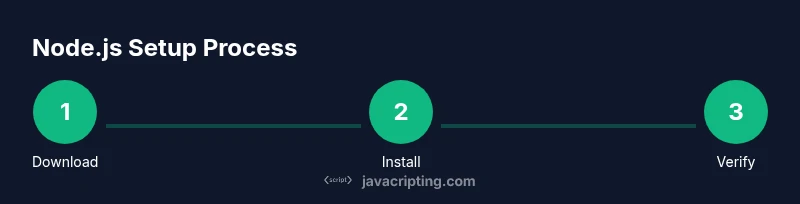
By following this guide, you will install Node.js, npm, and a code editor on Windows 10, verify the setup, and run your first JavaScript script. You’ll learn to download the installer, run it with default options, update PATH if needed, and test using node -v and a simple file. This process is suitable for beginners and seasoned developers.
Why Windows 10 needs a JavaScript development setup
According to JavaScripting, setting up a robust JavaScript development environment on Windows 10 starts with the core runtime, a package manager, and a capable editor. Most modern workflows rely on Node.js to run JavaScript outside the browser and npm to manage libraries. A properly configured PATH ensures you can run node and npm from any terminal, which speeds up testing and iteration. If you want to work on frontend tooling, scripts, or small servers, having Node.js installed is essential. As you follow this guide, you’ll learn the exact steps to install, configure, and verify your environment so you can start coding immediately. The task is approachable for beginners while still valuable to experienced developers who want a clean Windows setup.
In the context of "how to install javascript in windows 10", this section lays the groundwork for a smooth experience by emphasizing official sources and safe practices. You’ll see why the official Node.js installer is preferred and how npm integrates into your workflow from day one.
What you’ll install and why
To establish a solid JavaScript development environment on Windows 10, you’ll typically install three things: the Node.js runtime, the npm package manager (which comes with Node.js), and a modern code editor. The Node.js installer provides the runtime needed to execute JavaScript outside the browser and includes npm for managing libraries. A code editor (like VS Code) offers syntax highlighting, integrated terminals, and debugging features that accelerate learning and productivity. Optional utilities, such as a Node version manager, can simplify updates, but most newcomers benefit from starting with the standard installer. When you install, you’ll also verify with simple commands to confirm everything is wired correctly.
If you’ve never installed development tools on Windows 10 before, this section helps you decide what to download and how to install it safely. You’ll learn where to get the official installers, how to choose between 64-bit vs. 32-bit, and why you should prefer the Long Term Support (LTS) version for stability while you learn.
How Node.js and npm work together in Windows 10
Node.js provides the JavaScript runtime that executes code outside the browser, which is essential for server-side tasks, build tooling, and scripting. npm is the package manager that ships with Node.js and lets you install thousands of libraries with a single command. Together, they form the backbone of modern JavaScript development on Windows 10. You can think of Node.js as the engine and npm as the toolbox. Understanding this relationship helps you move from basic scripts to real projects quickly. As you progress, you’ll use npm to install frameworks, utilities, and linters that improve code quality and consistency across projects.
In this guide you will see how to verify that both Node.js and npm are accessible from your terminal, which confirms that the PATH configuration was successful. If PATH isn’t set correctly, commands like node -v or npm -v won’t run, which is a common hurdle for newcomers.
Verify installations and run a test script
Verification is a critical step. Start by opening a Command Prompt or PowerShell window and typing: node -v and npm -v. If both commands return version numbers, you’re in good shape. Next, create a file named test.js with a simple script like console.log('Hello, JavaScript on Windows 10!'). Run node test.js to see the output. This quick test confirms that the runtime is functioning and that your editor will work well with actual code.
If you don’t see version numbers, restart your terminal or your computer, and re-check the PATH settings. Ensure you installed the Node.js Windows x64 installer if you use a 64-bit system. This practical check is part of the standard workflow when you’re learning how to install javascript in windows 10.
Selecting a code editor and configuring it for Windows 10
A modern editor speeds up learning and debugging. VS Code is widely recommended for beginners and professionals due to its built-in IntelliSense, debugging, and extensive extension ecosystem. Install VS Code, then open test.js in the editor to leverage syntax highlighting and real-time feedback. You can customize the editor with extensions such as ESLint for code quality and Prettier for consistent formatting. When you save a file, your editor can automatically run scripts via an integrated terminal, which streamlines experimentation.
If you prefer alternatives, lightweight editors like Sublime Text or Atom are viable, but ensure they support linting and a good JavaScript integration to keep your learning productive. While experimenting, keep your project organized in a dedicated folder to avoid clutter and confusion as you scale up.
Common issues and quick fixes during setup
Sometimes Windows 10 users encounter PATH-related errors, or the installer fails to update environment variables. Common fixes include reinstalling Node.js with the “Add to PATH” option checked, manually adding C:\Program Files\nodejs to the PATH, or restarting the machine after changes take effect. If npm commands fail, verify that the npm directory is present in the PATH (e.g., C:\Users\YourName\AppData\Roaming\npm). For slower installations, ensure a stable internet connection and temporarily disable any VPNs that might block downloads. These steps address typical setup obstacles and keep you moving.
If you’re stuck, consult the official documentation from the Node.js site and MDN for troubleshooting tips. The goal is to establish a reliable baseline so you can focus on learning how to install javascript in windows 10 without getting mired in configuration hiccups.
Next steps: building a productive Windows 10 JavaScript environment
With Node.js and npm installed, you can begin exploring package-based workflows, learning resources, and project scaffolding. Consider initializing a project with npm init -y, installing essential linters like ESLint, and setting up a small script-driven workflow. As you gain confidence, you might explore TypeScript, testing frameworks, and build tools that automate tasks. The key is consistency: start small, test often, and gradually expand your toolchain. By following these practices, you’ll be prepared to tackle more ambitious JavaScript projects on Windows 10.
Tools & Materials
- Node.js installer (official site)(Choose the LTS version; download Windows x64 for modern PCs)
- Code editor (e.g., VS Code)(Recommended for built-in terminal and IntelliSense)
- Web browser(Needed to test in-browser features and debugging)
- Administrative access on Windows 10(Needed to install software and modify PATH)
- Stable internet connection(Required to download installers and updates)
- Optional: Node Version Manager (nvm-windows)(Useful for managing multiple Node versions)
Steps
Estimated time: 25-40 minutes
- 1
Download the Node.js installer
From the official Node.js website, download the Windows installer. Choose the LTS build to ensure stability during learning. Save the file to your Downloads folder and double-click to begin.
Tip: Verify you pick the Windows 64-bit executable if your PC is 64-bit. - 2
Run the installer and install Node.js
Follow the prompts and accept the license. Ensure the option Add to PATH is checked so node and npm are accessible from any terminal. Complete the installation with the default settings to start quickly.
Tip: Do not skip PATH; it prevents many common post-install issues. - 3
Verify Node.js and npm installation
Open Command Prompt (or PowerShell) and run node -v and npm -v. If both return version numbers, you’re set. If not, restart the terminal or your computer and re-check PATH.
Tip: If you see a 'not recognized' error, PATH may not have updated yet. - 4
Install a code editor
Download and install a code editor like VS Code. Open it and use its built-in terminal to run and test small scripts, which helps you stay in flow while learning.
Tip: Install the ESLint and Prettier extensions to keep code consistent. - 5
Create and run your first script
In a new folder, create test.js with a line like console.log('Hello, JavaScript on Windows 10!'). Run node test.js from the terminal to see the result.
Tip: Keep test.js short and readable; it’s your first step in scripting outside the browser. - 6
Optional: set up a basic project workspace
Initialize a project with npm init -y to create a package.json, then install a couple of dev dependencies to explore libraries and tooling.
Tip: Use npm init -y to bootstrap quickly; you can customize later.
Questions & Answers
Do I need Node.js to run JavaScript outside the browser?
Yes. Node.js provides a runtime to execute JavaScript on servers or desktops, which browsers cannot unless you use browser APIs. It also enables npm for library management.
Yes, Node.js gives you a standalone JavaScript runtime outside the browser.
Is npm included with the Node.js installer?
Yes. The official Node.js installer bundles npm, so you don’t need a separate install for most use cases.
Yes, npm comes with Node.js by default.
Can I use Windows 10 without admin rights for this setup?
Administrative rights are typically needed to install software. You can run portable editors, but the standard install path usually requires admin access.
Yes, usually you need admin rights to install software like Node.js.
What if node is not recognized after installation?
Ensure PATH includes the Node.js directory and open a new terminal. Reinstall with PATH checked if needed.
Check PATH and reopen your terminal; reinstall if necessary.
Which editor is best for JavaScript beginners?
VS Code is broadly recommended for its IntelliSense and debugging features, though other editors can work well too.
VS Code is a solid starting editor for beginners.
Watch Video
What to Remember
- Install Node.js from the official source.
- Verify with node -v and npm -v to confirm setup.
- Choose VS Code or a similar editor for productivity.
- Keep PATH updated and test with a simple script.
- Consider version management for future updates.