How to Make a JavaScript File in VS Code
Learn how to create, save, and run a JavaScript file in Visual Studio Code. This practical guide covers setup, writing code, running with Node.js, and debugging tips for a smooth JS workflow.

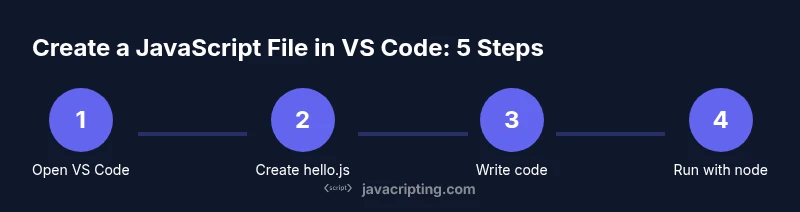
Open VS Code, add a new file named yourfile.js, save it, write JavaScript, and run it with Node.js from the built-in terminal. This quick flow gets you from a fresh editor to executing JavaScript in minutes, using VS Code's powerful features and Node.js runtime.
Why this guide helps you learn how to make javascript file in vs code
In this guide on how to make javascript file in vs code, you will learn a reliable path to create, save, and execute JavaScript directly inside Visual Studio Code. This approach pairs VS Code's lightweight editor with the power of Node.js, giving you an efficient workflow for writing, testing, and debugging code. By following the steps below, aspiring developers can move from an empty editor to a running script in minutes, while adopting best practices that scale to larger projects. According to JavaScripting, establishing a clean, repeatable setup reduces friction for beginners and accelerates learning. That insight shapes every practical tip in this article as you build confidence with real-world workflows.
Prerequisites and setup
Before you write your first line of JavaScript in VS Code, make sure your environment is ready. You will need Visual Studio Code installed on your computer, and Node.js installed so you can run JavaScript outside the browser. Node.js provides the runtime and npm to manage packages if you extend your project later. In addition, having a dedicated project folder helps keep your code organized and makes it easier to run scripts from the terminal. Finally, consider enabling a couple of optional extensions such as ESLint or Prettier to improve consistency and quality as you grow your projects.
Creating your first JavaScript file in VS Code
To create your first JavaScript file in VS Code, start by opening a folder for your project. Right-click in the Explorer pane, choose New File, and name it hello.js. VS Code will automatically recognize the .js extension and enable JavaScript syntax highlighting and intellisense. You can also create multiple files in the same folder to build a small project, such as app.js, utils.js, or main.js. Keep filenames short, descriptive, and lowercase to match common JavaScript conventions.
Writing simple JavaScript and saving the file
Enter a simple script to confirm everything works. A classic starter is:
console.log('Hello, world!');This tiny snippet prints a message to the terminal to verify that your runtime is functioning correctly. Save the file with the .js extension using Ctrl/Cmd+S, or choose File > Save. VS Code will retain your code and reflect any syntax hints or linting feedback in real-time as you type.
Running JavaScript locally with Node.js
Open the integrated terminal in VS Code (View > Terminal) and navigate to your project folder if needed. Run the script using the Node.js runtime with:
node hello.js
The terminal will display Hello, world! if everything runs correctly. If you see an error like 'node: command not found', ensure Node.js is properly installed and added to your system PATH. Using the terminal inside VS Code keeps you in one workspace, reducing friction.
Debugging and troubleshooting your script
VS Code provides a powerful debugging experience for JavaScript, especially with Node.js. Set a breakpoint by clicking in the gutter next to a line of code, then run the debugger (Run > Start Debugging) or press F5. The debugger pauses at your breakpoint, allowing you to inspect variables, call stacks, and the current state. If your script doesn’t run, check that you saved the file, that the terminal is in the correct directory, and that you are invoking node with the correct filename.
Extending VS Code with extensions for JavaScript
Enhance your workflow with extensions like ESLint for linting, Prettier for consistent formatting, and the built-in Node.js debugging tools. Install these from the Extensions view (Ctrl/Cmd+Shift+X). After installation, you can configure ESLint rules and Prettier formatting in your project settings to enforce coding standards and reduce common mistakes as you scale up projects. Using extensions helps you maintain quality while learning.
Common pitfalls and best practices
Avoid common beginner mistakes by keeping a simple project structure: one folder per project, with a small set of JS files. Always save before running, ensure you are using the correct Node.js version, and test in a terminal that matches your development environment. Use descriptive file names, include comments for clarity, and gradually introduce tooling like linters and formatters as you advance. The JavaScripting team emphasizes gradual adoption of tooling to build durable, reliable habits.
Tools & Materials
- Visual Studio Code (VS Code)(Install from the official site; ensure it’s up to date.)
- Node.js(Downloads from nodejs.org; includes npm for package management.)
- Project folder/workspace(Create a dedicated directory for your JS learning and projects.)
- Integrated Terminal in VS Code(View > Terminal to access the command line without leaving the editor.)
- Optional extensions (ESLint, Prettier, Node Debug)(Install to improve code quality and debugging experience.)
- Sample code snippet(Keep a small hello.js or demo.js for practice.)
Steps
Estimated time: 15-25 minutes
- 1
Open or create a project folder
Launch VS Code and open an existing project folder or create a new one dedicated to JavaScript learning. A clean workspace helps you manage files and run scripts without confusion.
Tip: Use File > Open Folder to avoid mixing unrelated files. - 2
Create a new JavaScript file
In the Explorer pane, right-click the folder, select New File, and name it hello.js. The .js extension enables JavaScript syntax highlighting and language features.
Tip: Choose a descriptive name (e.g., hello.js) to reflect its purpose. - 3
Write a simple script
Type a basic script such as console.log('Hello, world!'); to verify the environment. Save frequently as you iterate on code.
Tip: Include a semicolon for clarity and to match common JS conventions. - 4
Run the script in the terminal
Open the integrated terminal and run node hello.js from the project folder. If you see the message, your setup is correct.
Tip: If node is not recognized, recheck Node.js installation and PATH settings. - 5
Debug your script
Set a breakpoint by clicking the gutter next to a line, then start debugging with the Run panel. Inspect variables and call stacks as the code executes.
Tip: Use the Debug Console to evaluate expressions on the fly. - 6
Add linting and formatting
Install ESLint and Prettier to enforce code quality and consistency. Configure rules in project files like .eslintrc.json and .prettierrc.
Tip: Start with a simple rule set and expand as you grow comfortable. - 7
Organize and expand your project
Create utility modules (utils.js) and a main entry (app.js). Use exports and imports to modularize your code as it scales.
Tip: Follow a consistent module structure to ease collaboration. - 8
Practice and iterate
Repeat writing small scripts, then gradually tackle small projects to reinforce concepts. Use version control to track changes over time.
Tip: Commit frequently with meaningful messages to document your progress.
Questions & Answers
Do I need Node.js to run JavaScript files in VS Code?
For running JavaScript outside a browser, Node.js is the typical runtime. It provides the 'node' command used in the terminal to execute your scripts. If you plan to run JavaScript in a browser, you can do so there without Node.js, but Node is essential for server-side code and local testing.
Yes. Node.js is commonly needed to run JavaScript outside the browser, using the node command in the terminal.
How do I run a JavaScript file in VS Code's terminal?
Open the integrated terminal in VS Code and type node followed by your filename, e.g., node hello.js. Make sure you are in the right directory and the file has a .js extension.
Open the terminal and type node followed by the file name.
Can I debug JavaScript directly in VS Code without a browser?
Yes. VS Code includes a built-in debugger for Node.js. You can set breakpoints, inspect variables, and step through code using Run and Debug.
Yes, you can debug JavaScript in VS Code with Node.js.
Which extensions help with JavaScript development in VS Code?
Common choices are ESLint for linting, Prettier for formatting, and the Node.js Debug extension for debugging. These tools improve code quality and speed up development.
Install ESLint, Prettier, and Node.js Debug to streamline JS work.
What should I do if VS Code doesn't recognize my .js file?
Ensure the file extension is .js and that the language mode is set to JavaScript. If issues persist, reload the window or reopen the folder to refresh the editor state.
Make sure the file uses .js and the language mode is JavaScript.
Watch Video
What to Remember
- Create JS files with a .js extension in VS Code
- Run scripts via Node.js in the integrated terminal
- Use debugging to inspect runtime behavior
- Enhance quality with ESLint and Prettier
- Organize code into modular files for scalability