What to Download for JavaScript: A Practical Starter Toolkit
Discover what to download for JavaScript development in 2026, from runtimes and editors to essential tooling. A practical, step-by-step guide for beginners and pros.

You’ll land a practical JavaScript toolkit by installing Node.js (LTS), a modern code editor, a Node version manager, Git, and a browser with DevTools. You’ll also grab a package manager and optional tooling to speed your workflow. This roadmap helps beginners grow into confident, productive developers in 2026.
What you’re downloading and why
When you start a JavaScript project, the downloads you choose determine your speed, reliability, and safety. The goal is to assemble a small, stable toolkit that covers runtimes, code editing, version control, and package management. This guide helps you decide what to download for javascript with a practical, modern setup that serves beginners and seasoned developers alike. According to JavaScripting, a well-chosen toolkit reduces friction and keeps you focused on code, not configuration. The JavaScripting team found that most new projects stall when tooling is bloated or out of sync, so we emphasize a lean, coherent stack. In this section we’ll map the core components you’ll install, explain why each matters, and outline a safe, scalable approach for 2026.
By focusing on essential downloads first, you can validate your environment quickly and add advanced tools later without breaking your workflow. You’ll see how to pick versions, how to avoid common installers that bundle unnecessary features, and how to ensure your setup remains portable across operating systems. As you read, keep in mind the keyword what to download for javascript; it anchors the guidance and helps you recall the key decision points when you sit down to install.
Must-have downloads (core components)
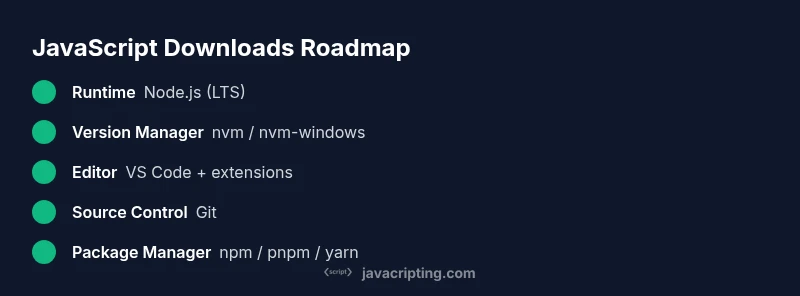
The foundation of any JavaScript project is a reliable runtime, a capable editor, and robust tooling. At minimum you should install Node.js (LTS) so you can run JavaScript outside the browser, use a version manager to switch Node versions as you work on multiple projects, and have Git for source control. A modern code editor with essential JavaScript/TypeScript support makes coding comfortable, while a browser with built-in DevTools helps you test and debug fast. Remember that the JavaScript download stack evolves; aim for stable, well-supported options rather than one-off hacks. In 2026, most developers pair Node.js with npm and optionally pnpm or yarn for different workflows. The overall aim is a lean, predictable setup you can reproduce across machines and team members.
Optional but recommended tools that improve productivity
Beyond the core components, a few tools can dramatically speed up development. Bundlers and build tools like Vite or Esbuild accelerate local development with fast hot-reload and small bundles. Testing frameworks (Jest, Mocha) help you catch bugs early, while ESLint and Prettier keep code consistent and readable. If you’re embracing TypeScript, add its compiler and editor support to catch type errors early. For larger projects, consider a task runner or monorepo tooling to organize work. Docker is optional but valuable when you want reproducible environments or CI pipelines. This section is about practical, optional expansions that still keep your footprint manageable in 2026.
Environment setup: OS, security, and version management
A smooth setup respects your operating system and security needs. On macOS and Linux, you’ll typically install Node via the official installer, then set up a Node version manager (nvm) to switch between projects. Windows users can use nvm-windows or the official installer with careful PATH adjustments. Security matters: keep your system updated, enable firewall protections, and be cautious with global npm packages. Use a dedicated user account for development to minimize risk, and avoid running commands with elevated privileges unless necessary. Documenting your PATH, npm, and Git configurations ensures you and teammates can reproduce environments easily.
How to verify your setup and keep it updated
Verification matters as much as installation. Start by checking versions: node -v, npm -v, and git --version should print stable, expected releases. Create a tiny project folder, run npm init -y to generate a package.json, and install a tiny dependency like lodash to confirm the package manager works. Set up a routine to update Node, npm, and global tools every few months, and use a version manager to test new Node releases before adopting them widely. Regularly audit dependencies for security vulnerabilities and remove unused global packages. This ensures your toolchain stays secure and aligned with best practices for 2026.
Quick-start plan you can implement today
If you’re ready to start immediately, follow this practical 5-step plan to land a solid JavaScript toolkit in under an hour. First, install the Node.js LTS and confirm npm. Next, install a version manager and switch to the LTS line. Then install Git and set your user details. Choose a code editor and install key extensions for linting and formatting. Finally, initialize a sample project with npm init and run a quick script to verify the environment.
Tools & Materials
- Computer with internet access(Broadband recommended; admin rights to install software)
- Node.js (LTS) installer(Download from nodejs.org; choose the LTS line)
- Node version manager (nvm / nvm-windows)(Allows easy Node version switching; Windows variant separate)
- Git(Install from git-scm.com; configure user.name and user.email)
- Code editor (e.g., Visual Studio Code)(Install essential extensions: ESLint, Prettier, JS/TS support)
- Browser with Developer Tools(Chrome or Edge recommended for DevTools DevTools)
- Terminal or shell(macOS Terminal, Windows Terminal/PowerShell, or Linux shell)
- Package manager(npm ships with Node; alternative options: pnpm, yarn)
- Optional: Docker(Useful for containerized environments and CI)
Steps
Estimated time: 60-90 minutes
- 1
Define your goals
Clarify whether you’re learning JavaScript, building front-end apps, or creating Node services. This determines which downloads you prioritize and how aggressively you expand your toolchain later.
Tip: Write down your primary project type and target timeline to guide tool choices. - 2
Install Node.js (LTS)
Download and install the LTS version from nodejs.org and verify npm is available. This gives you a reliable JavaScript runtime outside the browser and the package manager you’ll use for dependencies.
Tip: After installation, run node -v and npm -v to confirm successful setup. - 3
Set up a Node version manager
Install a version manager (nvm for macOS/Linux or nvm-windows for Windows) to switch Node versions per project. This prevents version conflicts as your projects evolve.
Tip: Learn a couple of commands early: nvm list, nvm use <version>. - 4
Install Git and configure identity
Install Git and set your global identity with git config --global user.name and user.email. This enables clean commit history and seamless collaboration.
Tip: Consider linking an SSH key for secure interactions with remote repositories. - 5
Choose a code editor and extensions
Pick a modern editor (e.g., VS Code) and install core extensions for JavaScript/TypeScript, linting, and formatting. These tools improve consistency and reduce debugging time.
Tip: If you work with TypeScript, enable the built-in type-checking features in the editor. - 6
Initialize a project and pick a package manager
Create a new project folder and run npm init -y to generate a package.json. Install a starter tool (e.g., lodash) to validate the package manager and environment.
Tip: Use npx to run one-off tools without full installation. - 7
Run a quick test in the browser
Create a simple index.html and script.js, open it in your browser, and check the console for errors. This confirms your runtime, editor, and browser DevTools work together.
Tip: Keep DevTools open and console visible to catch early issues.
Questions & Answers
What should I download first for JavaScript development?
Start with Node.js LTS, a modern code editor, and Git. These three form the core your toolbelt. A browser with DevTools completes the setup for testing and debugging.
Begin with Node.js, a capable editor, and Git. The browser tools complete a solid setup.
Do I really need Node.js to write JavaScript?
Node.js is not required for browser-only JavaScript, but it’s essential for tooling, local testing, and server-side code. It unlocks npm, build tools, and many libraries used in modern workflows.
Node.js isn’t required for browser JS, but it’s vital for tooling and servers.
Can I use any code editor for JavaScript?
You can use any editor with solid JavaScript support. Popular choices include Visual Studio Code, Sublime Text, and JetBrains IDEs. Pick one and customize with extensions for linting and formatting.
Yes, any editor with JavaScript support works; VS Code is a common starting point.
Should I use TypeScript or plain JavaScript?
TypeScript adds static types and tooling that can catch errors early. Start with plain JavaScript to learn fundamentals, then adopt TypeScript as your projects grow.
TypeScript helps with types, but you can begin with vanilla JavaScript and add TS later.
How often should I update my tools?
Update when security patches are released and when you upgrade Node versions. Test changes in a safe environment before applying them across projects.
Update regularly for security but test first to avoid breaking changes.
Watch Video
What to Remember
- Choose essential tools first and expand later.
- Verify Node.js, npm, and Git versions after install.
- Use a version manager to simplify multi-project work.
- Keep your development environment reproducible across machines.