JavaScript Installation: Step-by-Step Setup for Developers
Master JavaScript installation across platforms with Node.js, npm, and modern tooling. This practical, step-by-step guide covers Windows, macOS, and Linux, plus browserDevTools setup for a robust development environment.

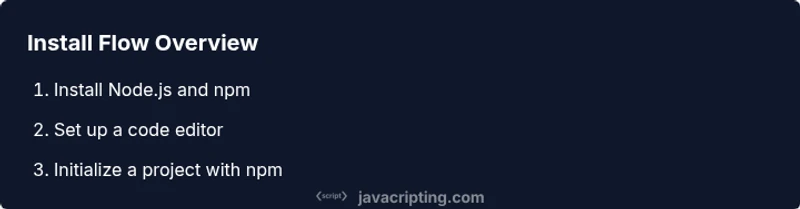
By completing this guide, you will set up a local JavaScript environment: install Node.js and npm for server-side JavaScript, verify your setup, and configure a code editor and terminal workflow. Whether you're on Windows, macOS, or Linux, this approach ensures you can run, test, and debug JavaScript code locally with confidence.
Assess Your goals and pick the installation path
Before you dive into javascript installation, clarify your goals: Are you building a Node.js backend, a browser-based script, or a tool that runs in both environments? Most developers start with Node.js for server-side tasks and npm package management, then layer browser testing with devTools. In this section, we'll compare the two main paths and outline when to pick each. According to JavaScripting, most newcomers benefit from starting with Node.js because it provides a consistent runtime and a thriving ecosystem, but you should still understand browser environments since most front-end code eventually runs there.
- Node.js runtime for server-side JavaScript, with npm for dependencies
- Browser-based JavaScript runs in the client with built-in support
- Version management is recommended to keep projects stable across teams
This decision shapes your installation flow and the tooling you’ll rely on daily, so take a few minutes to align your project’s needs with the setup you’ll implement.
Install Node.js (server-side JavaScript) and verify
Node.js is the backbone for server-side JavaScript development. Start by choosing a distribution path: the official Node.js installer for Windows/macOS/Linux, or a version manager like nvm (Node Version Manager) for macOS/Linux and nvm-windows for Windows. Install the LTS (Long-Term Support) version to maximize stability. After installation, verify the runtime with node -v and npm -v to confirm both Node.js and npm are accessible in your shell. If you’re using a version manager, install the required Node version and switch to it using the manager’s commands. JavaScripting analysis shows that a clean Node.js base reduces environment-specific issues and accelerates onboarding for new projects.
- Check Node.js version: node -v
- Check npm version: npm -v
- If using a version manager, install and switch versions accordingly
- Ensure PATH includes the Node.js binary directory
Install a modern code editor and terminal setup
A productive JavaScript installation includes a capable editor and a terminal that works well with your workflow. Popular choices include VS Code, Sublime Text, and JetBrains WebStorm. Install an editor that supports JavaScript/TypeScript syntax highlighting, linting, and npm scripts. Configure the built-in terminal to open in the project directory to streamline commands like npm run dev. Set up helpful extensions for code completion, snippets, and debugging, and tailor your editor to show lint warnings inline for faster feedback.
Set up npm and package management basics
npm is the heart of JavaScript package management. Start with npm init -y to create a package.json with sensible defaults, then install essential tooling like eslint for linting, prettier for formatting, and a test framework if needed. Learn the difference between npm install (adds dependencies) and npm ci (reproducible installs from package-lock.json). If you’re exploring alternative tools, pnpm or yarn can be considered for faster installs and different deduplication strategies. A well-configured npm setup keeps your project scalable and consistent across teams.
Verify your setup with test scripts and browser DevTools
Verification ensures your installation works across environments. Create a small test script (e.g., test.js) that logs a message, then run it with node test.js to confirm the runtime is functioning. Open your browser and load a minimal HTML page with a script tag linking to a small script to confirm browser-side JavaScript execution. Use browser DevTools to inspect console output, test network requests, and verify that your development environment handles live-reload or hot module replacement if you’ve configured them. Consistent verification reduces wall time for debugging later.
Cross-check: common pitfalls and environment management
Environment quirks are common: PATH misconfigurations, shell profile changes not loading in new sessions, or multiple Node versions conflicting. Regularly verify which node and npm are active, and clean up global installations if needed. Keep your environment organized with a project-local node_modules directory and a .nvmrc or .node-version file for version managers to surface the correct Node version automatically when entering a project. This reduces surprises when teammates switch machines or CI systems run your build.
Advanced tips: using version managers and nvm/wrapper
Version managers simplify multi-project setups. On macOS/Linux, use nvm to install and switch between Node versions; on Windows, nvm-windows or Node Version Manager for Windows options can help. Pin the Node version in a local .nvmrc file and commit it to your project so teammates get the same runtime when they run npm install. This approach minimizes “works on my machine” issues and keeps your development workflow fluid across projects.
Troubleshooting: network restrictions, permissions, PATH issues
If installers fail due to network restrictions, try alternative mirrors or offline installers from trusted sources. On Windows, run installers as an administrator if PATH updates fail to apply, and ensure antivirus or firewall rules allow node and npm binaries to execute. If you encounter permission errors on macOS/Linux, avoid using sudo for npm install in project folders; instead, adjust directory permissions or use a version manager to install Node in user space. A small set of checks goes a long way toward keeping your setup stable.
Tools & Materials
- Node.js installer(Download from nodejs.org; choose the LTS version for stability)
- nvm (Node Version Manager) / nvm-windows(Recommended for managing multiple Node versions; use Windows-specific installer if on Windows)
- Code editor (e.g., VS Code)(Install JavaScript/TypeScript extensions and enable integrated terminal)
- Terminal or shell(PowerShell/Command Prompt on Windows; Terminal on macOS/Linux)
- Internet connection(Needed to download installers and packages)
- Browser with DevTools(Chrome/Edge/Firefox with built-in DevTools)
- Sample project scaffold(Optional starter repo or template to jump-start development)
Steps
Estimated time: 45-60 minutes
- 1
Identify installation path
Decide whether you need Node.js for server-side code, browser-based JavaScript, or both. This choice drives the tools you install and how you structure your project. Take a moment to map your target runtime to the workflow you’ll use.
Tip: Document your target runtime to avoid installing unnecessary components. - 2
Choose installation method
Pick a direct Node.js installer for simplicity, or a version manager for flexibility across projects. If you expect multiple Node versions, a version manager will save time later.
Tip: Using a version manager helps you switch between projects without reinstalling Node. - 3
Download the installer
Visit the official site to download the correct installer for your OS. If using a version manager, skip to the manager’s install step. Verify the source URL to avoid tampered packages.
Tip: Whenever possible, validate installer signatures or checksums if provided. - 4
Run the installer and configure PATH
Run the installer and ensure the Node and npm binaries are added to your PATH. You may need to restart your terminal or your computer for changes to take effect.
Tip: If PATH updates don’t apply, manually add the bin directories to your shell profile. - 5
Verify Node.js and npm versions
Open a new terminal and run node -v and npm -v to confirm successful installation. If a version manager is used, ensure you’re on the expected version.
Tip: Keep a short note of the installed versions for project documentation. - 6
Install a code editor
Download and install a preferred editor like VS Code. Install recommended JavaScript/TypeScript extensions and enable the integrated terminal to streamline workflows.
Tip: Configure auto-save and formatting on save to improve consistency. - 7
Initialize your project and tooling
Create a project folder and run npm init -y to generate a package.json. Install essential tools like eslint and prettier for code quality and formatting.
Tip: Add npm scripts for common tasks (lint, test, build) to simplify commands. - 8
Create a test script and verify
Write a minimal test.js that logs a message, then run node test.js. Confirm browser execution with a simple script in an HTML page and check DevTools output.
Tip: Use console.log to quickly verify runtime behavior across environments. - 9
Document environment and consider advanced setup
Add a .nvmrc or .node-version file to pin the Node version for the project. Consider using a containerized environment or CI to ensure consistency across machines.
Tip: Version pinning reduces drift between development and CI environments.
Questions & Answers
What is the difference between Node.js installation and browser JavaScript?
Node.js provides a runtime for server-side JavaScript, enabling you to run JS outside the browser. Browser JavaScript runs within the web page, interacting with DOM and browser APIs. Both rely on the same language syntax, but the execution context and APIs differ.
Node.js runs JavaScript on the server; browser JavaScript runs in the web browser.
Do I need npm if I only work on front-end code?
Even for front-end work, npm helps manage tooling and libraries you depend on. You can install build tools, linters, and test frameworks via npm, though you might not need a server runtime installed unless your project uses Node.js.
Even front-end projects benefit from npm for tooling.
Can I install JavaScript tools without admin rights?
Yes, especially on macOS/Linux with a version manager like nvm. Windows users can use nvm-windows or portable installers. Using a version manager generally avoids requiring admin rights for everyday work.
You often don’t need admin rights if you use a version manager.
What is a version manager and why use one?
A version manager lets you switch Node.js versions per project, keeping dependencies compatible. This is crucial when projects require different runtimes or when testing across multiple Node versions.
It helps you switch Node versions quickly.
How can I verify Node.js installation on different platforms?
Run node -v and npm -v to confirm installations. For a quick runtime check, execute node -e 'console.log("Hello, world!")'. Use the browser console to verify client-side scripts.
Check versions and run a tiny test script.
Watch Video
What to Remember
- Install Node.js and npm to begin JavaScript development
- Use a version manager to handle multiple runtimes
- Verify setup with simple tests in Node and the browser
- Document environment settings for consistency