What to Install for JavaScript: A Practical Toolkit (2026)
Learn the essential tools to set up a robust JavaScript development environment in 2026. From Node.js and editors to version managers and linters, this practical guide covers pragmatic setup for beginners and pros.

By the end of this guide you will be able to establish a practical JavaScript development environment. You will know which runtimes, editors, version managers, and tooling to install, and you’ll have a clear, repeatable setup for new projects. According to JavaScripting, starting with Node.js LTS, a modern editor, and Git creates a reliable baseline that scales from small scripts to full‑stack apps. This quick answer frames the goal: a fast, maintainable, and reproducible setup that matches modern frontend and backend workflows.
Establishing a Modern JavaScript Development Foundation
If you’re unsure where to begin, the simplest starting point for JavaScript tooling is a solid runtime, a dependable package manager, and a capable editor. This block helps frame the core choices you’ll make, so you don’t get overwhelmed by every shiny tool. Node.js provides the runtime for running scripts and building projects. npm (bundled with Node.js) acts as the baseline package manager, while alternatives like pnpm and Yarn offer different performance characteristics and workspace features. According to JavaScripting, a pragmatic baseline in 2026 centers on Node.js LTS, a modern editor, and Git for version control. Understanding how these pieces fit together helps you scale from tiny experiments to robust applications across frontend and backend domains. Keep in mind: consistency across machines matters, so establishing a repeatable setup is a win for collaboration and debugging. The guiding question remains: what to install for javascript, and how do these choices align with your goals?
Core Tools for a Stable Foundation
The next layer you’ll install builds stability into your workflow. Node.js is the heartbeat of most JavaScript projects, providing the runtime and npm, which you’ll rely on to install libraries and run scripts. In 2026, most teams standardize on an LTS version to minimize breaking changes and ensure broad ecosystem support. A version manager can save you headaches when juggling multiple projects that require different Node versions. Additionally, Git brings reliable version control and collaboration through branches, commits, and pull requests. When you choose what to install for javascript, think about how tools will grow with your skill set: you’ll want services that scale from learning projects to production apps, including automated testing, linting, and optimized builds.
Editors and IDEs: Picking a Comfortable Workspace
Your editor choice shapes your day-to-day development flow. Visual Studio Code remains the most popular option due to its extensive extensions, built-in Git integration, and superb debugging support. Alternatives like WebStorm, Sublime Text, or Atom offer different strengths, such as speed, plugin ecosystems, or minimalism. Whichever you pick, install essential extensions for JavaScript, TypeScript, linting, and code formatting. This section isn’t about chasing perfection; it’s about creating a productive environment so you can focus on solving problems rather than fiddling with configurations. Remember to configure code formatting rules to maintain consistency across teams and projects. When you’re considering what to install for javascript, prioritize a setup that reduces cognitive load and speeds iteration.
Version Management: Handling Node Versions Gracefully
If you work on multiple projects or contribute to open-source, a Node version manager is a savior. Tools like nvm (or nvm-windows) let you switch Node versions quickly and safely. This reduces compatibility headaches when large projects depend on different runtimes. Use a .nvmrc or equivalent file at the project root to lock the Node version for your team, and document it in your README. The goal is reproducibility: every developer should be able to install the same Node version with a single command. As you plan what to install for javascript, think about how you’ll keep Node aligned with project requirements without manual fiddling.
Package Managers: npm, pnpm, and Yarn
Package managers centralize dependencies and scripts. npm is the default and widely supported; pnpm and Yarn offer advantages like deterministic hard-linking and workspace improvements. When evaluating what to install for javascript, select one as your primary manager and use the others only where they add measurable value. For example, pnpm can dramatically speed up monorepos thanks to content-addressable storage, while npm is often sufficient for smaller projects. Document your chosen manager’s commands in your setup guide so teammates stay aligned.
Basic Build and Test Tooling: ESLint, Prettier, and Jest/Vitest
Quality tooling protects your codebase from drift and bugs. ESLint identifies common mistakes and enforces best practices, while Prettier ensures consistent formatting. For testing, Jest or Vitest provide fast, reliable feedback during development. Start with a minimal config and expand as your project grows. If you’re asking what to install for javascript, include at least linting, formatting, and testing tools in your baseline setup; these guardrails pay dividends as your codebase scales.
Debugging, Logging, and Observability
Debugging capabilities are essential for both frontend and backend work. Use browser dev tools for client-side code and Node’s inspector for server-side logic. Add logging libraries like pino or simple console-based logging for quick feedback during development. While you may not need sophisticated observability at the start, having a plan for structured logging and error reporting helps identify issues faster and makes debugging less painful as your project grows.
Local Development Workflows: Reproducibility and Runs
A repeatable workflow is your best friend. Create a small starter project with a consistent folder structure, a package.json with scripts, and a lockfile to pin dependencies. Use dotfiles, shell aliases, and editor settings to streamline tasks like starting a dev server, running tests, or building assets. This consistency reduces onboarding time and makes it easier to troubleshoot issues when they arise. When you ask what to install for javascript, plan your workflow around reproducibility and speed.
Starter Templates and Scaffolds: Getting Momentums Faster
Starter templates drastically reduce boilerplate and speed up onboarding. Tools like Vite create fast, modern project templates that support React, Vue, or even vanilla JS, with sensible defaults. Consider using a template that aligns with your target stack to minimize setup time. You’ll often need to customize only a few configuration files, such as package.json, ESLint config, and a basic test harness. Adopting templates helps you ship features sooner and learn best practices by example.
Security, Maintenance, and Dependency Management
Security should be a first-class concern when you begin a JavaScript project. Run regular audits with your package manager, enable automated alerts for vulnerable dependencies, and consider integrating dependency updates into your CI workflow. Use Dependabot or similar services to stay current with patches. While this is often overlooked in early exploration, a secure, maintainable baseline reduces risk and keeps your project healthy over its lifetime.
Environment Hygiene: Reproducibility, Documentation, and Shipping
Finally, treat your development environment as code. Commit setup steps to a README, include an .nvmrc or engines field, and pin dependency versions with lockfiles. Maintain a simple, version-controlled record of tools and commands so future contributors can reproduce your environment reliably. The combination of documentation and reproducible tooling ensures your JavaScript projects remain accessible, debuggable, and scalable over time.
A Minimal 1-Hour Setup Plan: Put It All Together
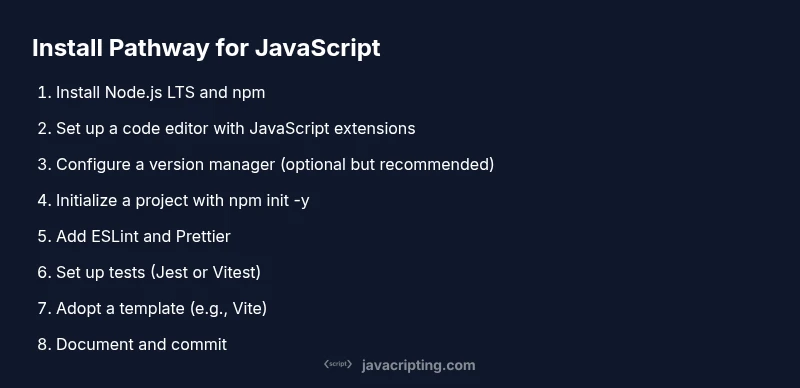
If time is tight, you can assemble a solid baseline in about an hour by following a focused plan: install Node.js LTS, install Git, set up your editor and Git integration, initialize a project with npm init -y, add ESLint and Prettier, and scaffold a minimal Vite project. This plan gives you a working environment quickly and sets you up for incremental improvements. As you gain confidence, layer in a version manager, a test runner, a linter configuration, and a robust README with setup instructions for teammates.
Tools & Materials
- Node.js (LTS version)(Includes npm; choose the official installer for your OS)
- Git(Install from git-scm.com; verify with git --version)
- Code editor (e.g., Visual Studio Code)(Install recommended extensions for JavaScript/TypeScript)
- Terminal or shell(PowerShell, Terminal, or similar; PATH should include Node binaries)
- Version manager (optional but recommended)(Examples: nvm (macOS/Linux), nvm-windows)
- Alternative package manager (optional)(pnpm or Yarn can complement npm in certain workflows)
- Linting/Formatting tools (optional but recommended)(ESLint, Prettier for code quality and consistency)
- Testing framework (optional but recommended)(Jest or Vitest for unit+component tests)
Steps
Estimated time: 90-120 minutes
- 1
Install Node.js LTS
Download and install the latest Node.js LTS from the official site. This provides the runtime for JavaScript and the npm package manager. Verify installation with node -v and npm -v to ensure you’re using the expected versions.
Tip: Use the LTS version to maximize stability across tools and projects. - 2
Install Git and configure your identity
Install Git and run git --version to confirm. Configure your user.name and user.email so your commits are properly attributed. This establishes reliable version control for all future work.
Tip: Set a global .gitignore to exclude node_modules and build artifacts. - 3
Choose and install a code editor
Install your chosen editor (e.g., VS Code) and add recommended JavaScript/TypeScript extensions. Configure formatting on save and enable linting on the fly where possible.
Tip: Keep editor settings in a shared config to maintain consistency across teammates. - 4
Set up a Node version manager
Install a version manager (e.g., nvm) and install a Node version that matches your project .nvmrc. Use the manager to switch versions per-project when needed.
Tip: Create a .nvmrc file at the project root to lock the Node version. - 5
Initialize a new project with npm
Create a project directory and run npm init -y to generate a package.json. This file will hold your scripts and dependencies, forming the backbone of your project.
Tip: Add a scripts block early, e.g., "start": "node index.js" and "build": "vite build". - 6
Add a package manager alternative (optional)
If you’re curious about faster installs or workspace features, install pnpm globally and compare its behavior with npm in a small test project.
Tip: Use one manager per project to avoid lockfile conflicts. - 7
Install ESLint and Prettier
Add ESLint for code quality and Prettier for consistent formatting. Create basic config files and run lint fixes to ensure baseline standardization.
Tip: Start with a minimal config and gradually enable rules as needed. - 8
Set up a testing framework
Add Jest or Vitest for unit tests. Create a small test and run npm test to verify the setup works as expected.
Tip: Keep tests fast and focused to maintain quick feedback during development. - 9
Create a minimal project scaffold
Create a simple project scaffold using a template (e.g., Vite or a minimal Node script). This gives you a working baseline to iterate from.
Tip: Document the scaffold choices in a README for future contributors. - 10
Add build and start scripts
Edit package.json to include start, build, and test scripts. This standardizes how you run and deploy local builds.
Tip: Keep scripts short and expressive to reduce cognitive load. - 11
Configure formatting and linting on save
Configure your editor to run ESLint and Prettier on save, and add an npm script to run lint fixes. This enforces consistency as you type.
Tip: Share editor settings via a .vscode/settings.json in the repo. - 12
Document, commit, and share your setup
Publish a concise README detailing the installation steps, version requirements, and common commands. Commit your changes to Git and push to your repository.
Tip: Include a short troubleshooting section for common hiccups.
Questions & Answers
What is the minimal setup I need to start JavaScript development?
A minimal start is Node.js LTS with npm, a code editor, and Git. This gives you a runtime, package management, version control, and a workspace to write code. You can extend with ESLint, Prettier, and a testing framework as your project grows.
Start with Node.js LTS, npm, a code editor, and Git. Then add ESLint, Prettier, and a testing framework as you scale.
Should I use pnpm or npm for a new project?
Both are valid; npm is the default and widely supported, while pnpm offers faster installs and efficient space usage for larger projects. Start with npm to keep things simple, and experiment with pnpm if you hit performance bottlenecks.
Start with npm for simplicity, and try pnpm later if you need faster installs for bigger projects.
Is a Node version manager necessary?
A Node version manager is highly recommended if you work on multiple projects requiring different Node versions. It prevents conflicts and makes switching versions quick and reliable.
Yes, use a Node version manager to handle multiple projects with different Node versions.
How do I verify Node and npm were installed correctly?
Run node -v and npm -v in your terminal. These commands output the installed versions and confirm the PATH is set up properly.
Check versions with node -v and npm -v to confirm a proper install.
What security steps should I take from the start?
Run npm audit regularly, enable automatic dependency updates where feasible, and document a policy for reviewing third-party packages before adding them to your project.
Do regular audits and set up a dependency review process from the start.
Can I bootstrap a project quickly with a template?
Yes. Starter templates like Vite can bootstrap a modern project in minutes, giving you a functional setup with sensible defaults and fast feedback loops.
Use a template like Vite to bootstrap quickly and learn best practices fast.
Do I need to learn a lot of tooling to start?
You can start lean and add tooling gradually. Focus on Node.js, a code editor, Git, and npm; expand with ESLint, Prettier, and testing as you encounter real-world needs.
Begin with the basics and add tooling as you grow.
Is Visual Studio Code mandatory?
No. VS Code is popular due to its ecosystem, but any modern editor that supports JavaScript/TypeScript and debugging will work well.
Not mandatory—choose an editor you’re comfortable with.
Watch Video
What to Remember
- Install Node.js LTS as the foundation.
- Choose a single package manager to start and document it.
- Add ESLint and Prettier early for consistent code quality.
- Use a version manager to handle multiple Node versions.
- Document your setup and keep it reproducible across teammates.