Download Free JavaScript: A Practical Guide for 2026
Learn how to download free JavaScript resources safely—runtimes, libraries, and CDN options. This practical guide covers npm, versioning, security checks, and best practices for aspiring developers.

To download free JavaScript resources, start by choosing a legitimate runtime (Node.js) and a package manager (npm, pnpm, or Yarn). Then fetch libraries via npm or a CDN, verify checksums when possible, and keep dependencies up to date with careful versioning. This guide will walk you through safe, legal steps to assemble your JavaScript toolkit.
What you actually download when you 'download free javascript'
The phrasing often leads beginners to think you download the language itself, but JavaScript is natively supported by modern browsers. What you typically download are runtimes (for running JavaScript on your machine or server), libraries, and tooling that help you write, test, and bundle code. According to JavaScripting, the practical goal is to assemble a dependable toolkit: a stable runtime, a package manager, and vetted libraries. This knowledge helps you avoid confusion and unsafe sources, ensuring your projects stay secure while you learn. You’ll also discover how to differentiate between runtimes, libraries, and frameworks, and why each matters in real-world development.
Runtimes vs Libraries vs Frameworks
Understanding the three categories is crucial for safe downloading. A runtime executes JavaScript code outside a browser (for example, Node.js). Libraries are collections of reusable code you integrate into your project (lodash, moment,axios, etc.). Frameworks provide a full structure for building applications (React, Vue, Angular). You don’t download JavaScript itself; you download runtimes and usable pieces that extend or run your code. This separation helps you manage dependencies, updates, and security more effectively. When you start a new project, decide whether you need a runtime for serverside work, browser-ready libraries for frontend tasks, or a framework that provides architecture.
Choosing a runtime: Node.js, Deno, and browsers
Node.js remains the most common runtime for server-side JavaScript and tooling. Deno is an alternative with built-in security features, but Node.js has the broader ecosystem and community support. For client-side development, your browser already runs JavaScript, so you don’t install a separate runtime for the browser. The key decision factors are your project type, deployment environment, and the ecosystem you rely on. Install the Long-Term Support (LTS) version of Node.js for stability, and remember that npm (or pnpm/yarn) comes bundled with Node.js, making it easy to manage libraries.
Package managers and registries
Package managers handle the installation, versioning, and resolution of dependencies. npm is the de facto standard, while pnpm and Yarn offer performance or workspace advantages. Registries are centralized locations where packages are published and discovered. The official npm registry at npmjs.com hosts millions of packages, while cdn-based cases use script tags from cdnjs, jsDelivr, or unpkg. When you're downloading free JavaScript resources, prefer official registries and reputable CDNs, and always review package metadata, licenses, and maintainers before adding them to your project.
Installing Node.js and verifying installation
Begin by downloading the Node.js installer from the official site. Run the installer and follow prompts to install both Node.js and npm. Open a terminal and run node -v and npm -v to confirm you have a working setup. If you see version numbers, you’re ready to move forward. Keep Node.js updated with the LTS release cycle to minimize breaking changes. Consider using version managers like nvm to switch between Node versions for different projects.
Installing libraries with npm
Navigate to your project folder and initialize it with npm init -y to create a package.json file. Then install libraries with npm install <library-name> --save. This records the dependency in package.json and creates a node_modules directory. Always review the library’s npm page for usage instructions, license, and maintenance status. Prefer semantic versioning and lockfiles (package-lock.json) to ensure reproducible builds across environments.
Using CDN scripts for browser-based JavaScript
CDNs offer quick testing by linking scripts directly in HTML via a script tag. For prod, prefer hosting essential libraries locally or using a trusted CDN with integrity attributes (Subresource Integrity, SRI). Always pin versions and test in isolation before integrating into production builds. CDN usage is convenient for demos and learning, but robust projects should rely on controlled dependencies to minimize risk.
Managing versions and security: package-lock.json, audits
Lockfiles lock exact dependency versions, enabling reproducible installs. Run npm audit to identify known vulnerabilities in your dependency tree and apply fixes with npm update or targeted upgrades. Regularly review dependency health, deprecations, and changelogs. For production, implement automated scanning in your CI pipeline to catch issues before deployment.
Common pitfalls and how to avoid them
Common issues include dependency drift, mismatched Node versions, and installing packages from untrusted sources. Avoid global installs unless necessary, and prefer local project scope to prevent version conflicts. Always verify package sources, check for updated licenses, and test changes in a staging environment before merging to production. Regular backup and version control reduce risk during experimentation.
Next steps and learning paths
After you have a basic setup, practice by building small projects: a weather dashboard, a to-do app, or a REST client. Explore npm scripts for automating builds, tests, and linting. Read official docs, follow tutorials, and contribute to open-source projects to gain real-world experience. As you grow, explore frameworks, testing strategies, and deployment workflows to broaden your toolbox.
Tools & Materials
- Computer with internet access(Stable connection; Terminal access for commands)
- Node.js installer(Download from the official Node.js site)
- Code editor(VS Code recommended for JS projects)
- Web browser(Modern browser for testing and debugging)
- npm (bundled with Node.js)(Verify with npm -v after installation)
- Optional: Git(For version control and collaboration)
- Checksum verification tool(Useful for verifying downloaded packages)
Steps
Estimated time: 30-60 minutes to set up a basic project; longer for learning paths
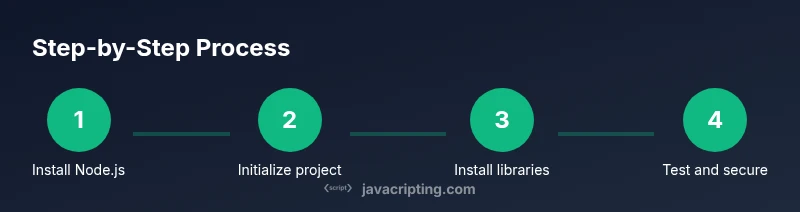
- 1
Install Node.js
Download and install Node.js from the official site. This will install npm automatically. Verify by running node -v and npm -v.
Tip: Choose the LTS version for stability. - 2
Initialize your project
Create a project folder, open it in terminal, run npm init -y to generate package.json.
Tip: This file tracks your dependencies. - 3
Install a library
Run npm install <library-name> --save to add it to dependencies.
Tip: Always check the library's npm page for usage. - 4
Add a script for quick testing
Add a test script in package.json and run with npm run test to verify basic functionality.
Tip: Automate repetitive tasks to save time. - 5
Test in a browser or node
Run your code in the intended environment to catch environment-specific issues.
Tip: Use isolated demos before integrating into apps. - 6
Audit and update
Run npm audit to check for known vulnerabilities and npm update to apply fixes.
Tip: Review breaking changes before upgrading.
Questions & Answers
Is JavaScript downloaded like a software program?
No. JavaScript runs in the browser or on a runtime. You download runtimes like Node.js or libraries via npm. The language itself is loaded by the environment.
JavaScript is run by your browser or runtime; you install runtimes or libraries, not the language itself.
What is the safest way to download libraries?
Always use official registries (npm, pnpm) and verify checksums. Avoid untrusted mirrors.
Use official registries and verify integrity before install.
Can I use CDNs for production?
CDNs are convenient for testing; for production, prefer bundling and local dependencies or trusted CDNs with integrity attributes.
CDNs are fine for testing, but production should be cautious with version control and SRI checks.
Do I need to know npm scripts?
Yes. npm scripts let you automate common tasks like build, test, and run locally.
Learn a few npm scripts to speed up development.
Should I commit node_modules to version control?
No. Commit the package.json and package-lock.json to reproduce builds; node_modules should be regenerated via npm install.
Don't commit node_modules; rely on package.json and lock files.
What about licenses when downloading libraries?
Check the library license on its npm page and repository to ensure compliance with your project.
Always verify licenses before using a library in production.
Watch Video
What to Remember
- Download runtimes from official sources
- Use npm, pnpm, or Yarn to manage libraries
- Prefer local dependencies for production
- Verify integrity and run audits
- Lock dependency versions to ensure reproducible builds