How to Install JavaScript: A Practical Guide
Learn how to install JavaScript runtimes (Node.js), set up your environment, verify your setup, and troubleshoot common issues for beginners. browser vs runtime, npm, and next steps.

JavaScript itself isn’t something you install; you run it in engines built into browsers or on runtimes like Node.js. To get started, install Node.js, verify the installation, and set up a simple editor. This quick guide outlines the essential steps to have JavaScript ready for learning and experimentation.
What installing JavaScript means
In practice, you don’t install the language itself. JavaScript is executed by engines built into browsers (like V8 in Chrome or SpiderMonkey in Firefox) or by runtimes such as Node.js. When people say “install JavaScript,” they usually mean setting up a runtime environment so you can write, run, and test code outside a browser. This distinction matters because browser JavaScript is tied to web APIs, while a runtime lets you run scripts on a computer or server. Understanding this helps you pick the right path for your learning goals—quick experiments in the browser, or full-stack development with Node.js. According to JavaScripting, starting with Node.js is a practical first step for most beginners who want server-side or tooling work.
As you progress, you’ll encounter essentials like the JavaScript runtime, the package manager (npm), and a code editor. You’ll also learn how to run scripts from the terminal, manage dependencies, and structure small projects. This article sticks to practical steps you can follow in a few hours, with real-world examples you can try locally.
Browser vs runtime JavaScript: understanding where code runs
JavaScript Code can run in two main contexts: the browser and a runtime environment (like Node.js). Browser JavaScript executes within a web page and has access to the DOM, events, and browser APIs. Node.js runs outside the browser and gives access to the file system, network, and process management. The engines behind these environments differ: Chrome uses V8, while Firefox uses SpiderMonkey. This distinction matters when you move from learning basics to building apps that run on servers or command-line tools. JavaScripting’s analysis shows most beginners start in the browser to learn syntax, then move to Node.js to gain real-world tooling experience.
Choosing a runtime: Node.js, Deno, or others
Node.js remains the industry-standard runtime for JavaScript outside the browser, with a vast ecosystem of packages and tooling. Deno is an alternative that emphasizes security and modern tooling, but it’s less ubiquitous in job markets and tutorials. For most learners, starting with Node.js offers the broadest compatibility, tutorials, and support. Later, you can experiment with Deno to explore module systems and permissions. The choice influences how you install packages, run scripts, and manage dependencies, so pick Node.js for a solid, widely-supported foundation first.
What you’ll need to get started
To install and run JavaScript locally, you don’t need much: a computer (Windows, macOS, or Linux), a modern web browser for browser-based experiments, a terminal or command prompt, a text editor or IDE, and a reliable internet connection. Optional but helpful are a version manager like nvm for Node.js, a testing framework, and a simple project structure. Having these in place reduces friction as you start building small scripts and progressively larger projects.
As you prepare, keep your goals in mind: quick experiments in the browser versus building tooling or servers using Node.js. This clarity will guide tool choices and learning paths, helping you stay motivated as you scale up.
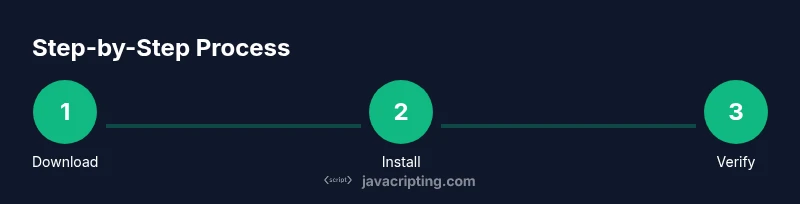
Step-by-step installation overview
The following steps assume you want to run JavaScript with Node.js. If you’re primarily learning in the browser, you can skip to browser-specific sections later in this guide. You’ll learn how to download the installer, verify the installation, create your first script, and set up a productive development workflow. This path emphasizes practical, repeatable actions rather than theoretical concepts, so you can start coding quickly.
Step 1: Install Node.js (LTS)
Visit the official Node.js website and download the Long-Term Support (LTS) version for your operating system. Run the installer and follow the prompts, making sure to add Node.js to your system PATH when prompted. The LTS version prioritizes stability, which is ideal for beginners. After installation, you’ll have access to both the node executable and npm, the package manager used for JavaScript projects.
Tip: If you’re managing multiple Node versions, consider using a version manager like nvm to switch between versions easily.
Step 2: Verify the installation
Open your terminal or command prompt and run:
node -v
npm -v
These commands confirm you installed Node.js and npm correctly. If you see version numbers, you’re ready to proceed. On Windows, you might use where node to locate the executable; on macOS/Linux, which node works similarly.
Tip: If you don’t see a version, restart your terminal or reinstall Node.js, ensuring PATH updates complete successfully.
Step 3: Create your first script
Create a new file named hello.js with the following content:
console.log('Hello, JavaScript!');
This tiny script demonstrates the runtime executing JavaScript outside the browser. Save the file in a convenient folder to keep your projects organized.
Tip: Use a dedicated project folder to keep future dependencies and scripts tidy.
Step 4: Run the script
From the folder containing hello.js, run:
node hello.js
You should see the message Hello, JavaScript! printed to the terminal. This confirms the runtime is functioning and your environment is ready for more complex experiments.
Tip: If you see an error, double-check the filename and the current directory; a small typo is a common source of issues.
Step 5: Install a code editor and set up basics
Choose a code editor (VS Code is a popular choice) and install helpful extensions like ESLint and Prettier to improve code quality. Create a small project folder and initialize npm with npm init -y if you plan to manage dependencies. A consistent editor and basic tooling keep you productive as you grow your projects.
Tip: Enable auto-save and set a clear rule for formatting to reduce friction during development.
Step 6: Explore npm and packages
NPM lets you install packages that extend JavaScript capabilities. Try a simple package like lodash by running npm install lodash and then require or import it in your project. Reading the package’s README before installation helps you understand usage and licensing.
Tip: Use package.json to lock your project’s dependencies for consistent builds across machines.
Tools & Materials
- Node.js installer (official site)(Download the LTS version for your OS. Include npm with Node.js.)
- Internet connection(Needed to download Node.js and packages from npm.)
- Modern web browser(For browser-based experiments and quick checks.)
- Code editor (e.g., Visual Studio Code)(Install extensions like ESLint/Prettier for better quality.)
- Terminal or Command Prompt(Used to run node, npm, and scripts.)
- Optional: Node Version Manager (nvm)(Useful for managing multiple Node.js versions.)
Steps
Estimated time: 30-60 minutes
- 1
Download Node.js (LTS)
Navigate to the official Node.js website and download the LTS installer for your operating system. Run the installer with default settings to ensure a clean PATH and easy access to node and npm.
Tip: Choosing the LTS version prioritizes long-term stability and broad compatibility. - 2
Install and configure
Run the installer and follow the prompts. Ensure that the option to add Node and npm to your PATH is selected so commands are available in any terminal.
Tip: If you’re on macOS or Linux, you can also install via a package manager for easier updates later. - 3
Verify installation
Open a terminal and run `node -v` and `npm -v` to confirm the installation succeeded. If you see version numbers, you’re ready to proceed.
Tip: If the commands aren’t recognized, restart the terminal or your computer to apply PATH changes. - 4
Create a first script
Create a new file hello.js containing `console.log('Hello, JavaScript!');`. Save it in a dedicated project folder.
Tip: Keep initial scripts tiny and focused to avoid confusion as you learn. - 5
Run your script
In the terminal, navigate to the folder and run `node hello.js`. You should see the greeting in the console.
Tip: If you get an error, verify the file name and path exactly. - 6
Set up a code editor
Install a code editor and enable helpful extensions (linting and formatting). Create a workspace for your JavaScript projects.
Tip: Use consistent formatting to keep your code readable and maintainable. - 7
Initialize a project (optional)
If you plan to manage dependencies, run `npm init -y` to create a package.json file and begin tracking libraries you add.
Tip: A proper package.json helps you share and reproduce projects. - 8
Learn by building small projects
Start with tiny scripts (calculation, file I/O in Node.js, or simple CLI tools) to reinforce concepts before tackling larger apps.
Tip: Incremental projects reinforce learning and build confidence.
Questions & Answers
Can you install JavaScript itself?
JavaScript is a language that runs inside engines; you don’t install the language itself. You install a runtime like Node.js to execute JavaScript on your machine.
JavaScript isn’t installed as a separate program; you install a runtime like Node.js to run it locally.
Do I need Node.js to learn JavaScript?
No. You can learn JavaScript in the browser with built-in engines. Node.js is for running JavaScript outside the browser and for building tools and servers.
You can learn in the browser first; Node.js is optional but very helpful for real-world projects.
Which version should I install?
Install the Long-Term Support (LTS) version. It prioritizes stability and broad compatibility for learning and small projects.
Choose the LTS version for best stability and support.
What about Deno as an alternative?
Deno is a newer alternative runtime. It can be educational, but Node.js has a larger ecosystem and more tutorials, which helps beginners.
Deno exists as an alternative, but Node.js is the more common starting point.
Is npm required?
npm is included with Node.js and is used to manage packages. It’s a core tool for most JavaScript projects.
Yes, npm comes with Node.js and is commonly used to handle dependencies.
Can I install JavaScript on Linux?
Yes. Node.js provides Linux packages and installers. Use your distribution’s package manager or the official Node.js installer.
Yes, you can install JavaScript on Linux using Node.js like on other OSes.
What if the installer won’t run?
Ensure you downloaded from the official source, check your system policies, and temporarily disable blockers if safe. Re-run the installer after security prompts.
If the installer is blocked, verify the source and try again with proper permissions.
Watch Video
What to Remember
- Install Node.js from the official site.
- Verify installation with node -v and npm -v.
- Create and run a simple test script to confirm the setup.
- Set up a code editor and optional npm workflow for projects.