How to Install js node: Step-by-Step Guide
Learn how to install js node across Windows, macOS, and Linux. This step-by-step guide covers prerequisites, platform-specific methods, verification, and troubleshooting for aspiring developers.

Learn how to install js node on Windows, macOS, and Linux using installers or package managers. This guide covers prerequisites, platform-specific steps, and verification commands, so you can start building in JavaScript with Node.js quickly. By the end you’ll know how to check versions and resolve common issues today with practical tips.
What is Node.js and why install js node
Node.js is a JavaScript runtime built on the V8 engine that lets you run JavaScript outside a browser. According to JavaScripting, it powers servers, scripts, and tooling for modern frontend workflows. This guide focuses on how to install js node so you can run JavaScript on your machine, experiment with servers, and build CLI tools. Understanding the install process early saves time later and aligns with JavaScripting's practical guidance in 2026.
System prerequisites for installing js node
Before you begin, make sure your system meets a few basic prerequisites. You should have a computer with internet access and an account with administrator privileges to install software. A supported operating system (Windows, macOS, or a modern Linux distribution) is required, along with a minimum amount of free disk space and a working shell or terminal. JavaScripting analysis shows that most developers start from a clean environment, so consider disabling conflicting software temporarily and ensuring your PATH is clean and ready for new additions.
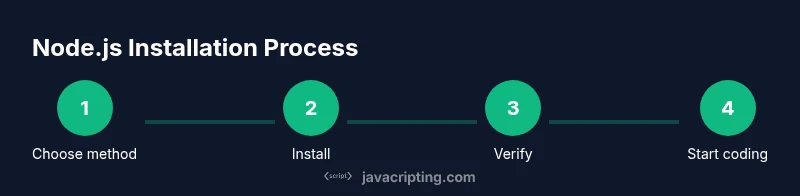
How to install js node
There isn’t a single one-size-fits-all approach. You can install via an official installer from the Node.js website or use your system’s package manager. The key is choosing the Long-Term Support (LTS) version for stability, especially when you’re just learning. In this section we’ll outline both methods, highlight safe defaults, and explain how to verify the installation after the first run.
Windows installation steps
To install on Windows, download the official Windows installer from the Node.js site and run it. Follow the setup wizard, accepting the license and selecting the default components unless you have a specific need. The installer will typically add Node.js and npm to your PATH, allowing you to open a Command Prompt and run node -v and npm -v to confirm success. If you see a security prompt, approve it to continue. After installation, restart your terminal to refresh PATH settings.
macOS installation steps
Mac users have two reliable paths: install via Homebrew or use the official macOS installer. Homebrew users can run brew install node to pull the LTS version, while the official installer provides a graphical setup. Both methods add node and npm to your system. After installation, open Terminal and test node -v and npm -v to confirm the tools are accessible.
Linux installation steps
Linux users typically rely on their distribution’s package manager. For Debian-based systems, you can update your package list and install Node.js with apt-get install nodejs npm. Red Hat-based distributions can use dnf or yum, depending on the release. If you prefer a version management approach, consider installing a tool like nvm to switch between Node.js versions without affecting system packages. Either path should provide a working Node.js environment once installation completes.
Verifying the installation and first run
Verification is essential to confirm the toolchain is ready. Run node -v to check the Node.js version and npm -v for the package manager. Create a tiny test file, say hello.js, with console.log('Hello Node'), and run it with node hello.js to ensure your runtime executes code. If the output is as expected, you’re set to begin building projects and experimenting with modules and packages.
Common issues and troubleshooting
If you encounter a command not found or Node is not recognized, double-check your PATH and restart the terminal. On Windows, ensure the PATH includes the directory where Node.js was installed; on macOS and Linux, verify that the binary locations are in your PATH. Permission errors can arise during installation; running the installer as administrator or using sudo on Linux can resolve them. When in doubt, consult the official documentation and refer to JavaScripting resources for guidance.
Next steps and best practices
Once Node.js is installed, set up a simple project, initialize with npm init, and start adding dependencies with npm install. Keep your Node.js version aligned with LTS releases for stability and security. Regularly update npm independently if needed, and consider using a version manager like nvm for smoother upgrades. The JavaScripting team recommends adopting a disciplined upgrade plan to minimize breaking changes while you learn.
Tools & Materials
- Computer with internet access(Needed to download installers or access package managers.)
- Terminal or Command Prompt(For running commands like node -v and npm -v.)
- Administrative privileges(Required to install system-wide packages on Windows or Linux.)
- Text editor (optional)(Helpful for creating hello.js or small test scripts.)
- Homebrew (macOS only)(If you choose the Homebrew route.)
- nvm or other version manager (optional)(Useful for managing multiple Node.js versions.)
Steps
Estimated time: 15-25 minutes
- 1
Decide installation method
Choose between an official installer and a package manager based on your OS and preference. This sets the baseline for download sources and future maintenance.
Tip: If you’re new, start with the official installer for clarity and a guided setup. - 2
Download the installer or prepare the package manager
For Windows or macOS, download the official installer or set up Homebrew. For Linux, ensure your package index is updated so you pull the latest available package.
Tip: On macOS, Homebrew can simplify future updates; on Windows, the official MSI handles PATH for you. - 3
Run the installer or execute package commands
Run the installer on Windows/macOS or execute the package manager commands to install Node.js and npm. Follow prompts and accept defaults unless you have a specific reason to customize.
Tip: Avoid changing the install location unless you have a solid reason; keep the default paths for simplicity. - 4
Verify installation
Open a new terminal and run node -v and npm -v. You should see version numbers indicating successful installation.
Tip: If commands aren’t found, re-open the terminal or reboot the system to refresh PATH. - 5
Run a quick test
Create a small test file like hello.js with a console.log statement and run it with node hello.js to confirm runtime execution.
Tip: Use a simple script first before building more complex projects. - 6
Configure optional tools
If you plan to use multiple Node versions, install a version manager such as nvm. This makes upgrades and testing across versions easier.
Tip: If you skip this now, you can add it later without reinstalling Node.js. - 7
Document your setup
Note the installed versions, the paths added to PATH, and any custom configuration. This helps troubleshooting later.
Tip: Keep a small cheatsheet with commands you use often.
Questions & Answers
Is Node.js required to install npm?
Yes. npm ships with Node.js, so installing Node.js provides npm by default. You can verify both tools are available using node -v and npm -v.
Node.js comes with npm, so installing Node.js gives you npm as well.
How do I verify Node.js version after installation?
Open a terminal and run node -v to see the installed Node.js version. You can also run npm -v to confirm the package manager is ready.
Run node dash v to confirm Node.js is installed and npm dash v for npm.
What if Node.js isn’t recognized after installation?
Check that the installation path is in your system PATH. On Windows, re-run the installer and ensure the PATH option is selected; on macOS/Linux, log out and back in or restart the terminal.
Make sure the Node.js path is in your PATH, restart the terminal if needed.
Can I install multiple Node.js versions?
Yes. A version manager like nvm lets you install and switch between Node.js versions without affecting system libraries. This is handy for testing across versions.
You can manage versions with a tool like nvm to switch between Node.js versions easily.
Which installation method is easiest for beginners?
For beginners, the official installer is straightforward and guides you through necessary steps. Developers who want flexibility may prefer a package manager or nvm.
Beginners usually start with the official installer for a guided setup.
Watch Video
What to Remember
- Install the LTS version for stability.
- Verify Node.js and npm with version checks.
- Use a version manager for multi-version workflows.
- Document your setup for easier troubleshooting.
- Follow platform-specific steps to avoid PATH issues.