How to Install JavaScript on Windows 11: Node.js Setup Guide
Learn how to install a JavaScript runtime on Windows 11, verify Node.js, set up a code editor, and run your first script with confidence.

On Windows 11, you don’t run JavaScript from the browser alone—you install a runtime like Node.js to run scripts locally. This quick setup gets you a working environment, npm for package management, and a code editor. According to JavaScripting, choose the LTS release for stability as you learn the basics.
Why use a JavaScript runtime on Windows 11
On Windows 11, JavaScript runs in browsers by default, but building full-stack apps, running automation scripts, or using development tools requires a standalone runtime. A runtime like Node.js provides the engine for executing JavaScript on your machine and includes npm, the package manager that lets you install libraries and tooling. This combination enables you to run scripts, manage dependencies, and experiment with modern JavaScript tooling locally. The JavaScripting team emphasizes the importance of a local runtime for learning by doing, so you can experiment without relying on online sandboxes. By installing a stable runtime, you unlock opportunities to explore frameworks, automate tasks, and speed up development workflows.
Node.js vs browser JavaScript: what changes
JavaScript running in a browser is designed for interactivity with the DOM and web APIs. Node.js, by contrast, runs server-side or in CLI environments, with access to the file system, streams, and network sockets. This difference matters for tooling, build processes, and automation. When you write scripts to automate tasks, manage packages, or run dev servers, Node.js provides the necessary runtime, API surface, and ecosystem. Expect module systems (CommonJS or ES modules), asynchronous I/O, and npm-based workflows that are not available in the browser context.
Choosing the right Node.js installer: LTS vs Current
Node.js ships two main channels: LTS (Long-Term Support) and Current. The LTS line is recommended for most learners and projects because it prioritizes stability and long-term compatibility. Current contains the latest features and updates, which can be exciting but may require more frequent changes to code or tooling. For beginners and most professional workflows, start with the LTS release and upgrade deliberately after you’ve established a working setup.
How Windows 11 environment affects installation
Windows 11 supports Node.js installers that come with an integrated npm and an option to add Node.js to your PATH automatically. Make sure you download the 64-bit Windows installer unless your system is explicitly 32-bit. Administrative rights are helpful for a smooth install, but many users successfully install Node.js without elevated privileges by choosing a per-user installation. A modern Windows 11 setup paired with a stable Node.js release minimizes surprises when you install libraries or run development tools.
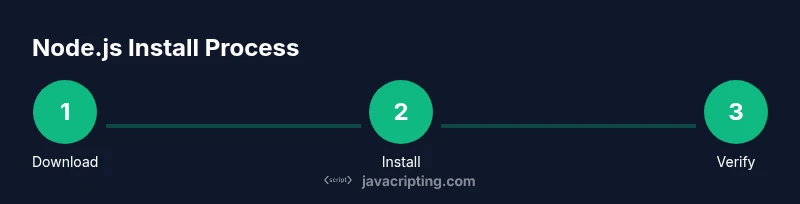
Step-by-step at a glance (high level)
- Download the Node.js Windows installer from the official site and pick the LTS version.
- Run the installer, verify that npm is included, and ensure the PATH option is selected.
- Open a fresh terminal and test the installation with node -v and npm -v.
- Install a code editor (e.g., VS Code) and set up a simple project folder.
- Initialize your project with npm init -y, create a hello.js script, and run it with node hello.js.
This overview helps you understand the flow before you dive into the detailed steps.
Verifying the installation and basic usage
After installation, confirm Node.js and npm are accessible from the command line. Open a new terminal and run: node -v to check the Node.js version and npm -v to verify npm. If you see version numbers, your runtime is ready. From here, you can install packages, run scripts, and begin experimenting with JavaScript outside the browser.
Setting up your editor and first project
Choose a code editor that fits your workflow; VS Code is popular for JavaScript development due to its integrated terminal and helpful extensions. Create a project directory, e.g., C:\Projects\HelloJS, and navigate there in your terminal. Initialize a package.json with npm init -y to establish a project baseline, then create a file named hello.js with a simple script. Running node hello.js should print a greeting and confirm the runtime works as intended.
Common pitfalls and how to fix them
If Node.js seems missing after installation, restart your computer to refresh PATH changes, or reopen your terminal. Some antivirus or corporate networks may block installers or npm registry access; ensure you download from the official site and temporarily disable overly aggressive security tools if safe to do so. When npm modules fail to install, check your network, npm configuration, and permissions. These steps cover the most frequent causes of a failed setup.
Next steps: expanding your JavaScript toolkit
With Node.js installed, you can explore building small CLI tools, learn asynchronous patterns with Promises and async/await, and experiment with popular tooling like npm scripts, linters, and test runners. Consider exploring simple frameworks or libraries to solidify your understanding, and gradually adopt version control, documentation, and testing practices to grow your projects. The JavaScripting team recommends continuing with stable tooling and keeping a watchful eye on security practices as you expand your JavaScript capabilities.
Tools & Materials
- Node.js Windows installer (64-bit)(Download from the official Node.js site; choose the LTS version.)
- Windows 11 PC(64-bit architecture recommended.)
- Code editor(Popular choice: Visual Studio Code (VS Code).)
- Administrative rights(Helpful for system-wide installation; per-user install works too.)
- Internet connection(Needed to download the installer and npm packages.)
- A small project folder(Example path: C:\Projects\HelloJS)
Steps
Estimated time: 30-60 minutes
- 1
Download Node.js installer
Visit the official Node.js website and download the Windows 64-bit installer. Choose the Long-Term Support (LTS) version for stability. This ensures a reliable baseline for beginners.
Tip: Tip: verify the source URL matches nodejs.org and select the LTS option. - 2
Run the installer
Execute the downloaded .msi file and follow the prompts. Leave the default options selected, which include npm and the PATH integration. Completing the setup installs the runtime and package manager.
Tip: Tip: ensure the option to add Node.js to PATH is checked for easy access from any terminal. - 3
Refresh your terminal
After installation, close any open terminals and open a new one to load the updated PATH. This step ensures the new node and npm commands are found by the system.
Tip: Tip: Use PowerShell or Command Prompt to confirm PATH changes take effect. - 4
Verify Node.js and npm
In the terminal, run `node -v` and `npm -v` to confirm the versions installed. Seeing a version number means the runtime is ready for use.
Tip: Tip: If you don’t see versions, reboot or re-run the installer to fix PATH issues. - 5
Install a code editor
Download and install a code editor like VS Code. It provides syntax highlighting, IntelliSense, and an integrated terminal that streamline JS development.
Tip: Tip: Install extensions like ESLint and Prettier for better code quality. - 6
Create your project folder
Create a dedicated folder for your JavaScript project, e.g., C:\Projects\HelloJS, and open it in your editor or terminal.
Tip: Tip: Keep a clean structure (src for sources, dist for builds) to stay organized. - 7
Initialize npm
Run `npm init -y` to generate a package.json with default values. This file defines metadata and dependencies for your project.
Tip: Tip: Review package.json and adjust fields like name and description as you grow. - 8
Create your first script
In your project, create a file named hello.js with a simple console log, for example: console.log('Hello, Windows 11 JavaScript!');
Tip: Tip: Start with small tests to confirm each step works before expanding. - 9
Run the script
Execute `node hello.js` in your terminal to see the output. This verifies the runtime executes your JavaScript code outside the browser.
Tip: Tip: If you see an error, re-check file name, path, and syntax.
Questions & Answers
Do I need Node.js to run JavaScript on Windows 11?
Browser-based JavaScript runs without a runtime, but Node.js is required for CLI tools, servers, and local tooling. It enables you to execute JavaScript outside the browser and work with npm packages.
Node.js lets you run JavaScript outside the browser, which is essential for tools and servers on Windows 11.
Is Node.js required for frontend development?
Frontend development often uses build tools and package managers that run under Node.js. The browser still executes your code, but Node.js powers the tooling, bundlers, and dev servers used in modern workflows.
Frontend tooling relies on Node.js to run tasks like bundling and live reloading.
What is npm and why do I use it?
npm is the Node.js package manager. It helps you install, share, and manage dependencies for your JavaScript projects, enabling efficient tooling and libraries.
npm helps you install and manage libraries for your JavaScript projects.
How do I update Node.js on Windows 11?
To update, download the latest LTS installer from the official site and re-run it. The installer will replace the old version while preserving your project files.
Update Node.js by installing the new version from the official site; it replaces the old one.
Can I use Node.js with Windows Subsystem for Linux (WSL)?
Yes. You can install Node.js in WSL for Linux-like tooling or use the native Windows installer. Both approaches work; choose based on your workflow preferences.
You can install Node.js in WSL or on Windows directly—either works.
What if the installer is blocked by antivirus?
If blocked, verify the source, temporarily adjust security settings for trusted downloads, and re-run the installer. Always revert changes after installation.
If blocked, confirm the source and try again, adjusting security settings if safe to do so.
Watch Video
What to Remember
- Install Node.js with the LTS release on Windows 11.
- Verify installation using node -v and npm -v.
- Set up a code editor and create your first script.
- Use npm to manage dependencies for future projects.
- Troubleshoot PATH or antivirus issues if installation fails.