How to Install JavaScript in Ubuntu: Node.js Setup
Learn how to install JavaScript on Ubuntu, covering Node.js installation with apt, using nvm for flexible versions, and verification steps for a stable runtime.

This guide shows how to install JavaScript on Ubuntu by setting up Node.js. Choose apt for a quick, system-wide runtime, or use NVM to manage multiple Node.js versions across projects. After installation, verify with node -v and npm -v. This approach works on Ubuntu 20.04 LTS or newer with an active internet connection.
Why you need a JavaScript runtime on Ubuntu
If you're building web apps, scripts, or automation on Ubuntu, you need a JavaScript runtime. The most common choice is Node.js, which includes npm for package management. Having Node.js installed unlocks developer workflows, from building frontend tooling to running servers locally. In this section, we cover how to install javascript in ubuntu and set up a dependable runtime you can rely on for projects of any size.
Choosing your installation method on Ubuntu
There are multiple ways to install Node.js on Ubuntu, each with trade-offs. Apt-based installations are fast and stable, ideal for quick setups. NVM (Node Version Manager) lets you switch between Node versions effortlessly, which is essential for testing across environments. You can also use NodeSource binaries for more recent releases. This section guides you through the options and helps you decide the best fit for your project.
Prerequisites and initial setup
Before you begin, ensure your system is up to date and you have a working internet connection. You should be able to run commands with sudo privileges. A supported Ubuntu version (20.04 LTS or newer) is recommended so you can access the latest package features and security fixes. If you’re new to the terminal, practice a few basic commands to navigate directories and manage files.
Install Node.js via apt for a quick, stable setup
To install Node.js using the Ubuntu package manager, start by updating the package index: sudo apt update. Then install the nodejs and npm packages: sudo apt install -y nodejs npm. After installation, verify the versions with node -v and npm -v to confirm the runtime is ready. Using apt provides a reliable baseline suitable for most development tasks.
Install Node.js using NVM for version flexibility
If you plan to test apps across Node.js releases or need multiple versions, install NVM (Node Version Manager). Download the install script and run it in your shell, then restart your terminal. Use nvm install --lts to install the current LTS release, or nvm install <version> for a specific release. Set a default version with nvm alias default <version>.
Verify installation and perform a quick test
After installation, run node -v and npm -v to confirm the runtimes. Try a tiny script to print a message: echo 'console.log("Hello, Ubuntu JavaScript!")' > test.js && node test.js. This validates the setup and gives you a quick feel for the environment.
Post-install considerations and best practices
Consider configuring npm to use a global directory in your home folder to avoid permission issues. Keep your Node.js versions up to date and review security advisories for dependencies. When working across teams, document the method you used (apt or NVM) so others can reproduce the environment.
Tools & Materials
- Internet connection(Stable connectivity to reach Ubuntu repositories and GitHub for scripts)
- Ubuntu machine (20.04 LTS or newer)(A fresh install is ideal, but existing setups will also work)
- Terminal with sudo access(Needed for package management and script execution)
- Curl (or wget)(Required for NVM installation script; can be replaced with wget if curl is unavailable)
- Text editor(Optional for creating and editing test files like test.js)
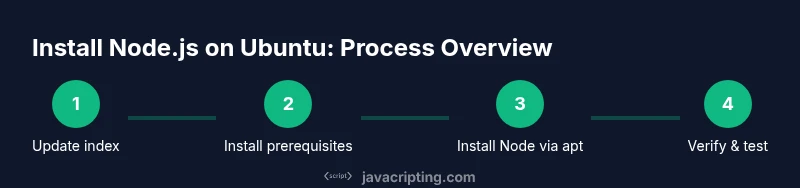
Steps
Estimated time: 30-60 minutes
- 1
Update package index
Open a terminal and run sudo apt update to refresh the list of available packages. This ensures you install the latest Node.js from Ubuntu's repositories and reduces the risk of missing dependencies.
Tip: If you see 404 errors, switch to a different Ubuntu mirror or check your network proxy. - 2
Install prerequisites
Install curl and build-essential if they are not already installed: sudo apt install -y curl build-essential. These tools are needed for compiling native addons and for downloading scripts.
Tip: Curl is commonly used to fetch the NVM installation script; having build-essential helps compile native modules later. - 3
Install Node.js via apt
Install Node.js and npm from the Ubuntu repositories with: sudo apt install -y nodejs npm. This provides a quick, stable runtime suitable for many projects.
Tip: If you need a newer release, consider the NVM path after this step. - 4
Verify apt installation
Check the installed versions: node -v and npm -v. Confirm there are no permission or PATH issues preventing execution.
Tip: If node or npm commands are not found, ensure /usr/bin is in your PATH and you may need to reopen your terminal. - 5
Install NVM (for version management)
Download and run the NVM installer from the official repository, then source your shell configuration or restart the terminal to apply changes.
Tip: NVM allows you to install multiple Node versions and switch between them with ease; this is ideal for testing across environments. - 6
Install Node.js via NVM and set default
After NVM is installed, run nvm install --lts to get the current LTS release, then nvm alias default <version> to set a global default for new shells.
Tip: To see available versions, use nvm ls-remote. Avoid using sudo with NVM since it is user-local. - 7
Test Node.js with a quick script
Create a tiny test script and run it with Node to confirm everything works as expected: echo "console.log('Hello Ubuntu JS')" > test.js && node test.js.
Tip: Keep test scripts simple to quickly validate runtime and environment setup. - 8
Optional: adjust npm global directory
If you encounter permission errors when installing global npm packages, configure npm to use a per-user directory and avoid sudo for global installs.
Tip: This reduces permission issues across projects and improves security.
Questions & Answers
What is the difference between apt and NVM for Node.js installation?
Apt installs Node.js system-wide from Ubuntu's repositories, usually providing stable, older releases. NVM manages multiple Node.js versions in your home directory and lets you switch between them easily, which is ideal for testing across environments.
Apt is a system-wide, stable option; NVM lets you manage many versions without admin rights.
Can I install Node.js without sudo?
You can install Node.js via NVM without sudo after you’ve installed NVM itself. Apt-based installs require sudo because they affect system-wide locations.
Yes, with NVM you can install Node.js without sudo once NVM is set up.
Which Node.js version should I start with?
Start with the current LTS (long-term support) release for stability and ongoing support. This is suitable for most projects and teams.
LTS is best for beginners and teams prioritizing stability.
Do I need npm separately after installing Node.js?
Usually not. npm comes bundled with Node.js in most distributions, including apt and NVM setups.
npm typically comes with Node.js installation.
How do I upgrade Node.js later?
If you used apt, upgrade via sudo apt update && sudo apt upgrade. If you used NVM, install a newer version with nvm install <version> and set it as default with nvm alias default <version>.
Use apt upgrades for system installs or NVM to switch versions easily.
What should I do if npm permissions block installation of global packages?
Configure npm to use a per-user directory to avoid needing sudo for global installations, or prefer NVM so global installs stay user-scoped.
Create a user-local npm directory to avoid permission errors.
Watch Video
What to Remember
- Choose an installation method that fits your needs (apt for quick setup; NVM for version control).
- Verify Node.js and npm after installation to ensure the runtime is ready.
- NVM simplifies upgrading and switching Node versions across projects.
- Configure npm to avoid global permission issues for smoother development.