How to Use JavaScript on Mac: A Practical Guide
Learn to run, develop, and debug JavaScript on macOS with Node.js, browsers, and essential tooling. Step-by-step setup, project workflows, debugging tips, and best practices for macOS developers.

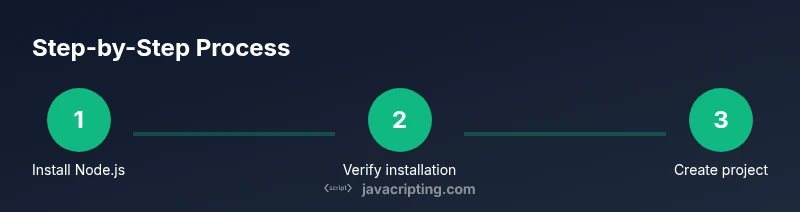
On macOS, you can run JavaScript both in the browser and on the server with Node.js. This quick answer outlines the essential steps: install Node.js, verify the setup, create a local project, and execute scripts from Terminal. It also covers browser testing, simple debugging, and basic tooling to start developing right away today on your Mac environment.
Getting Started with JavaScript on macOS
If you’re just getting started, learning how to use javascript on mac on a Mac means choosing the right runtime, setting up a robust editor, and understanding where code runs best. According to JavaScripting, the easiest entry point is Node.js for server-side tasks and browser environments for client-side scripts. The JavaScripting team found that starting with a simple hello world file keeps the learning curve low while building confidence. This section explains why macOS is a friendly platform for JavaScript development and how to orient your setup for fast wins. You’ll learn about runtimes, shells, and where to write code, so you can move from idea to runnable script quickly.
In this guide you’ll discover practical steps and strategies to learn how to use javascript on mac, including how to install Node.js, set up a local project, and run scripts from Terminal. The emphasis is on clarity, reproducibility, and workflows that fit macOS defaults like zsh and the Finder. Expect concrete commands, sensible defaults, and links to authoritative resources that deepen your understanding.
Tools & Materials
- Node.js installer (official)(Download from nodejs.org. Choose the LTS release for stability.)
- Homebrew (optional)(If you prefer, install Node.js via Homebrew: brew install node.)
- Text editor(VS Code recommended for macOS; ensure it supports JavaScript debugging.)
- Terminal app(Preinstalled on macOS; you’ll run all commands here.)
- Node Version Manager (optional)(Use nvm to manage multiple Node versions.)
- Sample project folder(Create a dedicated directory to keep scripts organized.)
Steps
Estimated time: 60-90 minutes
- 1
Install Node.js
Download and install the LTS version from nodejs.org. This provides the JavaScript runtime and npm, which you’ll use to manage dependencies. Verify the installation by running node -v and npm -v in Terminal to confirm versions are available.
Tip: If you already use Homebrew, you can install with brew install node for convenience. - 2
Verify your installation
Open Terminal and run node -v to confirm Node.js is installed, then run npm -v to confirm npm. This ensures your PATH is correctly set and your shell recognizes the commands before you proceed with projects.
Tip: If the commands show a permission error, restart Terminal or log out/in to refresh your PATH. - 3
Create a project folder
Make a dedicated directory for your project and navigate into it. A clean workspace helps you keep code, dependencies, and scripts organized from day one.
Tip: Use a descriptive folder name like my-js-project and avoid spaces in names. - 4
Initialize package.json
Run npm init -y to create a package.json file that will track scripts, dependencies, and metadata for your project. This file is the control center for your JavaScript workflows.
Tip: You can edit package.json later to add scripts like "start" or "build". - 5
Add your first script
Create index.js with a simple console.log('Hello from mac!') and save it in your project folder. This establishes a working script you can run with node index.js.
Tip: Keep initial scripts minimal to validate the runtime quickly. - 6
Run the script
Execute the script with node index.js or set up an npm script like npm run start to automate the command. This confirms your environment is executing JavaScript as expected.
Tip: For longer runs, consider using a tool like nodemon to auto-restart on changes. - 7
Experiment with browser testing
Open a quick HTML page referencing your script, or run JavaScript directly in the browser console. This helps you compare server-side versus client-side execution and understand scope and DOM interactions.
Tip: Use Safari’s Web Inspector for a seamless macOS debugging experience.
Questions & Answers
Do I need a browser to run JavaScript on Mac?
No. JavaScript can run on macOS via Node.js for server-side tasks, and in browsers for client-side scripts. You can test both environments to understand how they differ.
No—Node.js lets you run JavaScript outside a browser, while browsers run client-side scripts.
Which Node.js version should I install on macOS?
Choose the Long-Term Support (LTS) version for stability and long-term security updates. You can switch to newer releases later using a version manager like nvm.
Pick the LTS version for reliability, and switch versions with a tool like nvm if needed.
Can I run JavaScript without installing anything?
Only in a web browser. For node-based scripts and server-side tasks, you need Node.js installed on your Mac.
Only in the browser you can run JavaScript without installing anything; for Node.js you need to install it.
What tools help with debugging JavaScript on macOS?
Use browser dev tools (Safari Web Inspector or Chrome DevTools) and a code editor with a built-in debugger. Add ESLint for linting to catch issues early.
Browser dev tools plus a code editor debugger will cover most debugging needs.
Is npm required to run JavaScript projects on Mac?
npm comes bundled with Node.js and handles dependencies and scripts. It’s a core part of most JavaScript workflows on macOS.
Yes, npm is included with Node.js and is essential for managing packages and scripts.
Watch Video
What to Remember
- Install Node.js (LTS) to get a reliable JavaScript runtime
- Verify installation to ensure a healthy development environment
- Create a dedicated project folder for organized work
- Use npm scripts to automate common tasks
- Differentiate server-side Node.js from browser-based JS for clarity