How to Download JavaScript: A Practical Guide for 2026
Learn how to download JavaScript by installing a runtime (Node.js), setting up a local development environment, and verifying your setup. From official sources to version management, follow this practical guide to run JavaScript confidently.

This guide will show you how to download JavaScript by installing a JavaScript runtime (Node.js), setting up a local development environment, and verifying your setup. You'll learn how to choose an installer, manage versions, and run a simple script to confirm everything works. We also cover safety practices and how to keep your tooling up to date.
Why download JavaScript matters
JavaScript runs everywhere—from web browsers to servers and desktop apps. When someone says they want to "download JavaScript," they usually mean obtaining a runtime that can execute JavaScript code outside a browser. The most common starting point for beginners is Node.js, which lets you run scripts locally and manage dependencies with npm. According to JavaScripting, using a stable, well-supported runtime reduces setup friction and keeps you focused on learning core concepts. This section clarifies what you’re downloading, why it matters, and how a solid setup accelerates progress. By the end, you’ll understand the practical difference between browser JavaScript and a full runtime, and you’ll be ready to install the official tooling with confidence.
Choose the right runtime for your needs
The term “download JavaScript” often involves picking a runtime that can execute JS outside the browser. The most popular choice is Node.js because of its broad ecosystem, strong community, and long-term support. Other runtimes like Deno exist, but Node.js remains the standard for beginners and professionals alike. From a learning perspective, start with Node.js LTS (long-term support) to ensure compatibility with tutorials, libraries, and project templates. For browser-focused experiments, you can still write JavaScript directly in the console or in your HTML files, but a runtime unlocks server-side scripting, tooling, and package management. Based on JavaScripting analysis, most developers begin with the official Node.js installer to establish a reliable foundation.
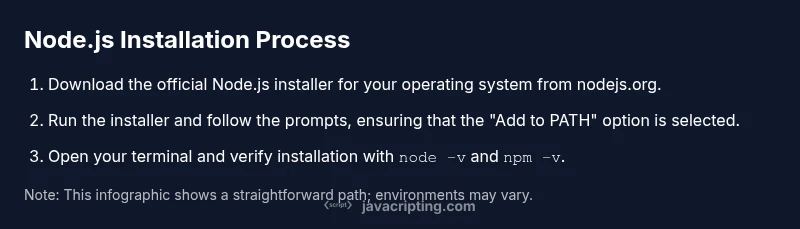
Install Node.js on Windows (with official installer)
Begin by visiting the official Node.js site and downloading the Windows installer (the .msi file). Run the installer and follow the prompts, keeping the default options unless you have a specific reason to customize. Ensure you enable the “Add to PATH” option so you can run node and npm from any command prompt. After installation, restart any open terminals and verify with node -v and npm -v. If you encounter permission prompts, run the installer as an administrator. This path minimizes the risk of corrupted PATH settings and conflicting components.
Install Node.js on macOS (via installer or Homebrew)
macOS users can install Node.js via the official macOS installer or with Homebrew. If you choose the installer, download from the official site and run the package, which wires Node and npm into /usr/local. If you prefer Homebrew, a quick brew install node will install the latest LTS-compatible version and set up npm automatically. After installation, open Terminal and run node -v and npm -v to confirm. For Homebrew users, you can also upgrade later with brew upgrade node. Either method provides a robust macOS setup for learning JavaScript.
Install Node.js on Linux (apt/dnf or official binaries)
Linux users have multiple paths. Debian/Ubuntu: sudo apt-get update && sudo apt-get install -y nodejs npm. Fedora/RHEL: sudo dnf install -y nodejs. If you want more control, download the official binaries or use a version manager. After installation, verify with node -v and npm -v. If your system uses alternatives, ensure the correct executable is prioritized in your PATH. Linux setups often benefit from a version manager for easy upgrades and switches.
Verification: ensure Node.js and npm are ready
Verification is crucial to confirm a clean install. Run node -v to check the Node.js version and npm -v to confirm npm is present. If either command is not found, re-check PATH configuration or reinstall using the official installer. For scripting and project work, npm (the package manager) is your gateway to installing libraries, frameworks, and tooling. Once verified, you’re ready to initialize projects and experiment with code.
Optional: using a version manager for multiple Node versions
If you anticipate working with multiple projects that require different Node.js versions, consider a version manager. On macOS/Linux, nvm (Node Version Manager) is popular; Windows users often use nvm-windows or a similar tool. Install the manager, then install a stable LTS release (nvm install --lts), and set a default (nvm alias default). This approach makes it easy to test code across Node versions and switch quickly when needed.
Setting up a project and testing locally
Create a project directory, then initialize npm to manage dependencies. Commands: mkdir my-js-project && cd my-js-project && npm init -y. After that, create a test script (e.g., test.js) with a simple console.log('Hello, JavaScript!'); and run it with node test.js. This verifies your runtime, the environment, and your ability to run scripts from within a project. Starting small builds confidence and creates a reproducible workflow.
Security, maintenance, and best practices
Always download Node.js and related tools from official sources to avoid tampered software. Keep Node.js and npm updated to receive security patches and performance improvements. Use a version manager if you manage multiple projects, and regularly audit dependencies with npm audit. For security hygiene, never execute scripts from untrusted sources, and review package.json scripts before running them. These practices reduce risk while you learn.
Next steps: what to learn after you’ve installed
With your environment ready, explore core JavaScript topics, npm packages, and common tooling like Babel, webpack, and testing frameworks. Build small projects to reinforce concepts and gradually tackle more complex Node.js topics, such as asynchronous programming, file I/O, and REST APIs. Documentation and guided tutorials—especially those from official sources—will accelerate your progress and deepen your practical understanding of how to download JavaScript and apply it effectively.
Tools & Materials
- Node.js installer (official site)(Download the LTS version for stability; choose Windows/macOS/Linux accordingly.)
- Code editor(Recommended: Visual Studio Code with JavaScript/Node.js extensions.)
- Command line/Terminal access(Windows: Command Prompt or PowerShell; macOS/Linux: Terminal.)
- Internet connection(Needed to download installers and packages.)
- Optional: Node Version Manager (NVM)(Useful for managing multiple Node versions on Unix-like systems.)
Steps
Estimated time: 45-90 minutes
- 1
Prepare your environment
Ensure you have a stable internet connection and administrative rights on your computer. Confirm you know your OS (Windows, macOS, or Linux) because the installation path varies. This step reduces surprises later and ensures you can complete the install without interruptions.
Tip: Download only from the official Node.js site to avoid tampering or bundled software. - 2
Download the official Node.js installer
Go to the official Node.js website and choose the LTS version for your operating system. The LTS build prioritizes stability and long-term support. Save the installer to your downloads folder for easy access.
Tip: Prefer the installer package over other options for a straightforward setup. - 3
Run the installer on Windows
Open the .msi file and follow the prompts. Keep the default options, and ensure the “Add to PATH” checkbox is selected so you can run node from any terminal. Complete the installation and restart any open command prompts.
Tip: If you see a permission prompt, run the installer as an administrator. - 4
Run the installer on macOS
On macOS, you can use the official package or Homebrew. If using the package, run it and follow the prompts; if using Homebrew, execute brew install node. Both methods install Node.js and npm together.
Tip: Homebrew is convenient for ongoing updates via brew upgrade. - 5
Install on Linux
Use your distribution’s package manager: for Ubuntu/Debian, sudo apt-get update && sudo apt-get install -y nodejs npm; for Fedora/RHEL, sudo dnf install -y nodejs. Check versions with node -v and npm -v after installation.
Tip: If your distro doesn’t have the latest version, consider a node version manager. - 6
Verify installation
Open a new terminal and run node -v and npm -v to confirm the installation. If the commands return versions, your environment is ready for development.
Tip: If commands aren’t found, revisit PATH settings or reinstall. - 7
Install a version manager (optional)
If you plan to work on multiple projects with different Node versions, install a version manager like NVM (Unix) or nvm-windows (Windows). This lets you switch versions with simple commands.
Tip: Version managers make testing across environments painless. - 8
Create a project and initialize npm
In a new folder, run npm init -y to create a package.json. This file tracks dependencies and scripts for your project, building a foundation for future work.
Tip: Initializing early avoids missing configuration later. - 9
Write and run your first script
Create a test.js file with console.log('Hello, JavaScript!'); and run node test.js to confirm everything works. This gives you a tangible, quick win.
Tip: Keep test scripts small and focused for clarity. - 10
Plan security and maintenance
Regularly update Node.js and npm, review dependencies for security, and follow best practices for safe scripting. This helps you avoid known vulnerabilities while you learn.
Tip: Enable automatic updates where appropriate, and audit packages routinely.
Questions & Answers
What is the difference between Node.js and the JavaScript engine in browsers?
Node.js is a runtime that lets JavaScript run outside a browser, primarily on servers or desktops. Browsers have their own built-in JavaScript engines and sandboxed environments. Node.js provides access to system resources through modules, while browser JS runs in a restricted context for security and compatibility.
Node.js runs JavaScript outside the browser, with access to system resources, while browser JavaScript runs inside web pages with limited access.
Is it necessary to download anything to start writing JavaScript?
You can start writing JavaScript in-browser immediately. To run JavaScript locally, you typically download a runtime like Node.js. This gives you the ability to execute scripts on your computer and manage packages.
You can start coding in the browser, but for local execution you’ll want Node.js installed.
Which Node.js version should I install?
Install the LTS (long-term support) version for stability and broad compatibility with tutorials and libraries. You can upgrade to newer releases later when needed using a version manager or official installers.
Go with the LTS version for reliability, then upgrade when you’re ready.
How do I manage multiple Node.js versions?
Use a version manager such as NVM (for Unix-like systems) or nvm-windows. These tools let you install, switch between, and set a default Node version per project.
A version manager lets you switch Node versions quickly for different projects.
What are common installation errors and how do I fix them?
PATH issues, permissions, and mismatched installers are the usual culprits. Revisit your PATH settings, run the installer with appropriate privileges, and confirm you downloaded from the official site.
PATH problems and permission prompts are common—double-check your setup and try again.
Do I need npm separately after installing Node.js?
No. npm is bundled with Node.js by default. You can update npm later with npm install -g npm if you want the latest features.
NPM comes with Node.js; you can update it later if needed.
Watch Video
What to Remember
- Download Node.js from official sources and choose the LTS version.
- Use a version manager if you work with multiple projects.
- Verify installation with node -v and npm -v before coding.
- Initialize projects with npm init -y to create a baseline.
- Keep Node.js, npm, and dependencies up to date for security.