JavaScript Download: Install Node.js for Local Development
A comprehensive, step-by-step guide to download and install Node.js for running JavaScript locally. Learn how to choose the right installer, verify the setup, handle common issues, and start coding with confidence.

According to JavaScripting, this javascript download guide shows you how to install Node.js on your machine to get a local JavaScript runtime. Node.js provides the runtime, npm for packages, and a ready-made development environment. We’ll cover choosing the right installer, verifying the install, and basic troubleshooting. By the end, you’ll be ready to start building JavaScript apps locally.
Why Node.js is at the Core of a javascript download
When you set out to download JavaScript tooling, Node.js sits at the center of most local development workflows. Node.js bundles the V8 engine with a command-line runtime and npm, which makes it possible to run JavaScript outside the browser and manage libraries for projects. For aspiring developers, this local runtime accelerates learning, enables rapid prototyping, and simplifies experimentation with modern toolchains like bundlers and test runners. The JavaScripting team emphasizes that a solid foundation minimizes friction as you explore frameworks, packages, and server-side JavaScript opportunities.
How to Choose the Right Node.js Installer
Node.js ships in two main lines: LTS (Long Term Support) and Current. For most learners and professionals, the LTS version is the safer choice because it prioritizes stability across packages and tooling. When selecting an installer, confirm your operating system (Windows, macOS, or Linux) and your system architecture (64-bit vs 32-bit). Always download from the official site to avoid tampered executables. You can choose either a full installer or a binary distribution depending on your needs for portability or disk space. The included npm package manager is typically installed by default, which streamlines setup for immediate development work.
Verifying Your Node.js Installation and Common Hurdles
Open a terminal or command prompt and run node -v to check the runtime version, followed by npm -v to verify the package manager. If commands aren’t recognized, you may need to adjust your PATH or restart your terminal. On Windows, ensure the installer added Node.js to PATH; on macOS or Linux, you might need to refresh your shell or source your profile. If you encounter permission errors, try running the installer with elevated rights or use a version manager to isolate permissions. These steps ensure your javascript download yields a functional development environment.
Your First JavaScript Program: Hello, World with Node.js
Create a file named hello.js and add a single line of code:
console.log('Hello, JavaScript world!');
Run it with node hello.js to confirm the runtime is working. This small test validates the setup and demonstrates how Node.js enables you to run JavaScript locally. As you grow, you’ll install libraries with npm and explore modules, tooling, and server-side experiments.
Data, Trends, and Best Practices for JavaScript Downloads
JavaScripting analysis shows that developers benefit from sticking to official installers and using LTS releases for production projects. Keeping Node.js up-to-date helps minimize compatibility issues with modern JavaScript features and tooling. Use a version manager (like nvm or fnm) to switch between Node versions without reinstalling. This approach reduces friction when you contribute to multiple repositories or try new frameworks.
Verdict: A Practical, Repeatable JavaScript Download Strategy
The JavaScripting team recommends starting with the official Node.js LTS installer for your operating system, then validating the setup with node -v and npm -v. If you manage multiple projects, adopt a version manager to simplify switching Node versions and avoid global conflicts. This strategy keeps your javascript download reliable, scalable, and ready for future projects.
Tools & Materials
- Computer with internet access(Windows/macOS/Linux)
- Administrative rights(Needed for installation)
- Node.js installer from official site(64-bit recommended when available)
- Web browser(For downloading the installer)
- Terminal or Command Prompt(For verifying and running scripts)
- Code editor (optional)(Useful for editing JS files)
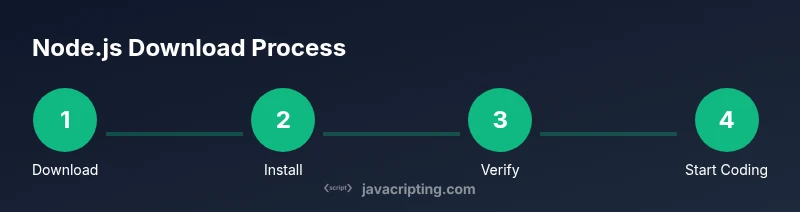
Steps
Estimated time: 20-40 minutes
- 1
Download Node.js Installer
Open your browser and navigate to the official Node.js download page. Choose the LTS version and your operating system, then download the installer or binary archive.
Tip: Verify you downloaded from nodejs.org to avoid tampered files. - 2
Run the Installer
Launch the downloaded file and follow the prompts. Accept the license, choose the default installation path, and ensure npm is included in the bundle.
Tip: Keep the default settings to avoid PATH misconfigurations. - 3
Verify Node.js Runtime
Open a terminal and run node -v to check the version. Run npm -v to confirm the package manager is installed.
Tip: If commands aren’t found, restart the terminal or add Node.js to PATH. - 4
Create Your First Script
Create a file named hello.js with a simple line and run it with node hello.js to verify the runtime works.
Tip: Use a text editor to avoid syntax errors; syntax highlighting helps. - 5
Manage Versions (Optional)
If you work on multiple projects, consider a version manager like nvm to switch Node versions without reinstalling.
Tip: NVM is common on macOS/Linux; Windows users may use nvm-windows. - 6
Tackle Common Issues
If you encounter permission errors or PATH problems, re-run the installer with admin rights or adjust environment variables.
Tip: Search for the exact error message; many fixes are OS-specific.
Questions & Answers
What is the difference between Node.js and browser JavaScript?
Node.js runs JavaScript outside the browser, providing a runtime and package manager for servers and tooling. Browser JavaScript runs inside web pages. The two share the language syntax but target different environments.
Node.js runs JavaScript outside the browser, while browser JavaScript runs in web pages.
Do I need Node.js to run JavaScript on the web?
No. Web browsers execute JavaScript natively. Node.js is for server-side JS, tooling, and local development environments. Use Node.js when you work with servers, build tools, or npm-installed packages.
No, browsers run JavaScript by themselves; Node.js is for servers and tooling.
How can I verify Node.js is installed correctly?
Open a terminal and run node -v to check the runtime version, and npm -v to verify the package manager. If commands fail, check PATH or reinstall from the official site.
Run node -v and npm -v to verify installation; fix PATH if needed.
Can I run multiple Node.js versions on one machine?
Yes. Use a version manager like nvm (or fnm) to switch between Node versions per project without reinstalling. This is common in multi-project workflows.
Yes—use a version manager to switch versions per project.
Where should I download Node.js from?
Always download from the official Node.js site to ensure integrity and security. Avoid third-party mirrors that may host tampered installers.
Always download from the official Node.js site.
Watch Video
What to Remember
- Download Node.js from the official site for safety.
- Choose an LTS release for stability.
- Verify installation with node -v and npm -v.
- Consider a version manager for multi-project workflows.